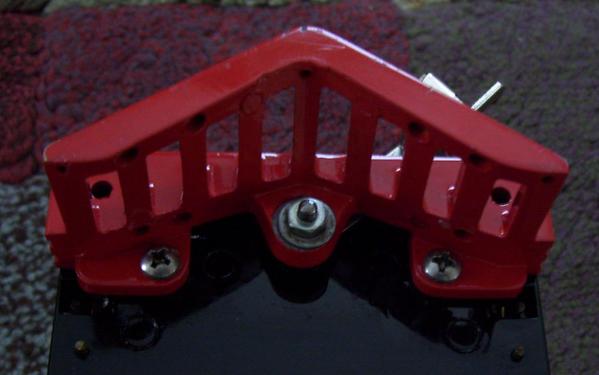
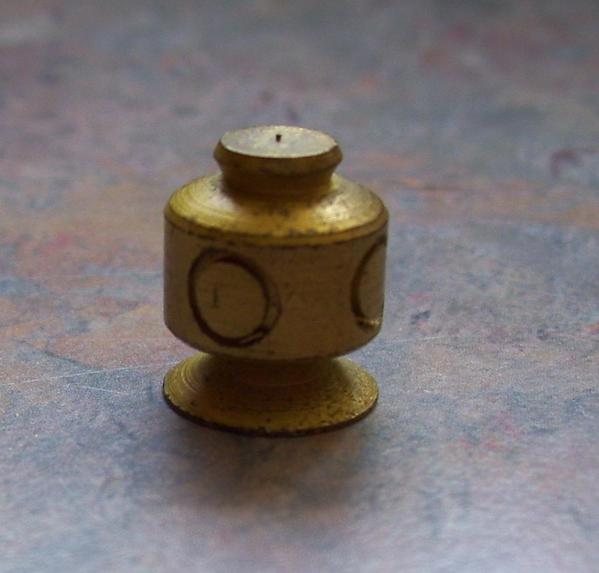
I have a Lionel Classics 390e and I never really liked the protruding headlight bulb.  I replaced the bulb with an LED (not the screw in bulb replacements) and added a flat lens.  It looks much better to me, but somehow, I think a convex lens would make it just right.  Does anyone know where I could get a convex lens in the right size?  I would also like to put tiny LEDs in the solid brass classification lights, but haven't figured out a good way to accomplish that.  The classification "lights" also serve as a nut to hold the pilot to the frame.  The brass "light" could be drilled out for tiny LEDs, but I can't figure out a good way to wire them.  Any brilliant ideas out there?


Stan

Original Post

Replies sorted oldest to newest

Pictures may take a couple of days.  I have the engine apart to swap motors etc. with an MTH PS2 384E. I want all my standard gauge engines to be PS2.  I will probably sell the 384E (which will have the bild-a-loco motor and air whistle) when I am finished. The 390 has a slot and hole to mount a front coupler, so I am looking forward to using it in DCS lashups. I added the front coupler a while back. I think the 400e can also have a front coupler mounted, but it probably wouldn't work too well as the second engine on 0-42 curves.

Not a trick question.  What I meant to ask was what color do YOU want the lights to be?


Have you checked out MV Products?  Google "MV Lens model railroad"; they have colored lenses, different sizes, maybe even one suitable for your headlight application.


But if you're a DIY enthusiast, given your hole dimension of about 4mm, I'd get 5mm LEDs of desired color (red, green, or clear) and slice off the convex "lens" part of the plastic using a hobby-saw. Then I'd drill a 3.5mm hole (slightly less than 4mm) thru and thru.  Now you have lips to glue the lenses on.  Of course this would be after you insert the light source.


The light source is the tricky part.  Maybe you can find a grain-of-rice style bulb that fits in the intersection of the two perpendicular pipes but good luck.  But I do know you can fit really tiny LEDs in that space minding the conducting capability of brass.  I'd run a pair of fine gauge magnet wire down a hole drilled parallel to the retaining screw.  Assembling the LEDs inside the cavity would take some steady-hands close-quarters soldering, but if you're determined, I'll continue the conversation.


Of course someone else will first point out that there are aftermarket class light fixtures with 2 wires coming out so all you have to do is provide a 5 cent nut to provide the mechanical support and put the fixture on top!

Can I be first Stan?


One way to use small LED chips is to make a square of them and solder the magnet wire (or I use #30 wirewrap wire) to them.  You can insulate the corners with liquid tape.  Since they don't have to be that bright, you can also sand the sides of a 3mm LED and just stuff it up in the hole, you'd be surprised how much light it'll emit to the sides.


It looks like maybe a #4 machine screw holding the fixture?  So another hair-brained scheme if you have a tap-die is to get clear acrylic rod and make a #4 threaded rod.  I'm not sure if #4 would be strong enough to take the threading but it looks like you could up it to #6.  Anyway, the idea is you could then shoot LED light from below thru the clear screw.  Then you'd form the tip of the clear screw to spread the light in the intersection of the two drilled pipes to direct the light to the 4 lenses.


If impractical to create a threaded clear acrylic rod, a variant of this light-pipe scheme is to run an unthreaded clear rod up the fixture.  Then to hold the fixture down, you could drill one or two, say, #2 machine screws on either side of the existing hole.

I had thought about magnet wire (I have plenty) but wasn't sure.  Sound like the easiest way and would not be very noticeable.  The clear threaded (or non threaded) rod idea is really interesting!  I hadn't thought about that at all.  I think mounting an LED from the back and getting light out three sides would be the one of the easiest methods that retains the original part.  I don't need light out the back side.  I am not familiar with side glow LEDs, I will have to look into that.  Anyone have a suggestion for specific aftermarket class light fixtures (and where to get them)?  Thanks for all the great ideas!


Stan

Here's a recycled photo from another thread.


ogr 3mm LEDs and MTH bulbs

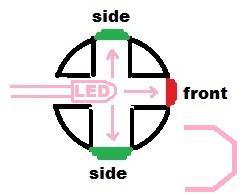
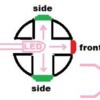
The side glow LEDs are called many things - wide-angle, flat-top, inverted-cone, straw-hat, etc.  You can see a sort of inverted cone lens rather than a convex lens as on the standard 3mm LED at the left.  This scatters some of the light sideways; the biggest application of these I'd guess are LED Christmas light strings.  Or you can just take a standard convex lens LED and sand/file the lens into 3 "faces" like a trapezoid to scatter the light in 3 direction as crudely shown below:


ogr class light

As the photo shows you could probably fit a standard PS2 6V MTH incandescent bulb into the pipe but what a hassle if it burns out and you have to replace it!

Attachments

Images (2)
  • ogr 3mm LEDs and MTH bulbs
  • ogr class light

I use the flat-top ones in places, but they don't have much side scatter.  I think the inverted cone ones that Stan mentions would work out well.


One thing you can do, since this should probably be a single color, is just use a colored LED in there and let it shine out the three sides.  I've used clear epoxy to make lenses, which is a whole lot easier than finding and/or making a colored lens fit.  Making flats on a colored LED like Stan suggests would probably work out well.


I'd use a short LED or grind down the tip so it doesn't protrude out the back.  You want to wire it with something like #30 black wire-wrap wire, small and well insulated.

I finally got around to finishing the classification lights on the 390e and converting it to PS2.  I am running the LEDs on track power using a bridge rectifier.  I had to use 100K resistors for each of the green LEDs to keep them from looking like green headlights!  If you look carefully in the pictures, you can also see the benchwork changes I made - no legs on the floor except at the section that opens.  Now we can get a nice floor put in the room. 

390 mklt1 [7)

390 mklt1 [10)

Attachments

Images (2)
  • 390 mklt1 (7)
  • 390 mklt1 (10)

Thanks for the positive comments!  From one Stan to another (two Stans in one topic!) -  for the most part, I used your advice, but I did not do anything special to make the light scatter three ways.  I mounted a green 3mm LED in the rear of the brass "lantern" such that the base was just about flush with the outer edge at the back.  This put the tip of the LED very near the middle of the assembly, which gave enough light at the sides.  I used clear epoxy for the lenses.  I kept increasing the value of the resistors feeding the LEDs until the brightness was about right.  I used two very small wires to feed each LED.  The wires enter the boiler through slots on each side of the lower boiler front mounting screw.  I bought an assortment of clear  3mm and 5mm LEDs on Ebay, so I don't know the exact specifications.  Thanks everyone for all the helpful ideas!  I have learned a lot from this forum.

Curious if you came up with any tricks to build up the lenses to make them convex and if you tinted them green (clear epoxy)?


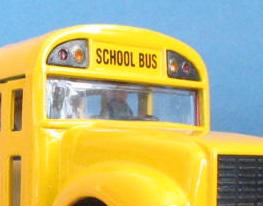
Here's a school bus I modified with LEDs to flash the amber and red lights.  I used clear glue but mixed in food coloring to tint the lenses - seemed to dry/cure OK with the pigment. I never succeeded in getting the convex shape. 


red amber tinted lenses

Attachments

Images (1)
  • red amber tinted lenses

I did not tint the clear epoxy, the color is from the LED. I was able to make the lenses slightly convex by applying a drop on the outside after having filled the holes previously with clear epoxy (one at a time).  I am also surprised that the LEDs work with 100K resistors.  I tested the LEDs with a 3v battery and a 5600 ohm resistor to begin with - still a lot of light.  I started out with 22K resistors when connected to the track powered bridge rectifier.  I kept increasing the resistance until I got the desired result.  Seems like a lot of resistance, but it works.

Add Reply

Post

OGR Publishing, Inc., 1310 Eastside Centre Ct, Suite 6, Mountain Home, AR 72653
800-980-OGRR (6477)
www.ogaugerr.com

×
×
×
×
Link copied to your clipboard.
×
×