As mentioned in the last thread about Lionel's MLB sets (here), I purchased a Cubs set when they hit the bargain-basement price of $149.  I've always wanted some passenger cars for my Lionel collection, but was never willing to fork out the entry fee for a factory set.  That combined with an upcoming layout build (first in 15 years!) made the acquisition of a complete set for that price too hard to pass up.  I figured I would document the process from Cubs to final product in the event anyone else decided to go down this path.


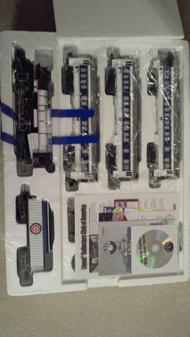
First, what came in the box.  This set is very similar to the Polar Express sets I've seen, with Baby Madison passenger cars and a small Berkshire locomotive with whistling tender, CW-80 transformer, and a small oval of FastTrack comprised of 8 curve sections (360 degrees) and four 10" straight sections (one of them has terminal wires already installed).  There was also an extra set of terminals, some additional smoke fluid, a pack of documentation (including a flyer for O Gauge Railroading Magazine!), and a CD which I have yet to put in a computer (guessing it's manuals, which are available online anyway).


 Assortment of documentation...

20141119_185806


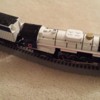
The train after function testing, before transport to the basement for dis-assembly (and painting/decals).  I did note that the couples on the passenger cars had a tendency to separate - looks like the way they are mounted to the trucks via long extension arms allows for some vertical play.

20141119_185554


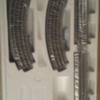
Full compliment of FastTrack.

20141119_184132


The locomotive and cars were all well packaged and very secure.

20141119_183743


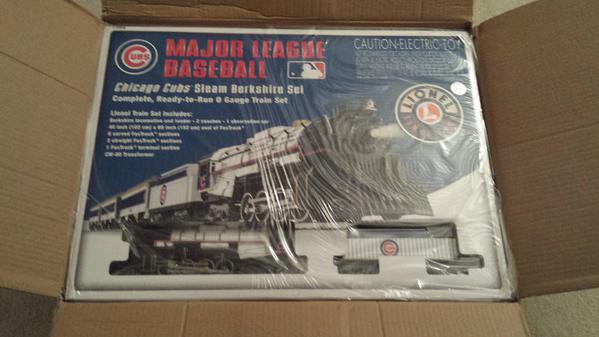
Here's what the display box looked like.

20141119_183538


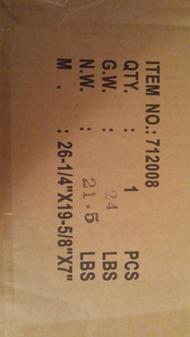
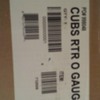
Here's the item number and weights as displayed on the shipping box.

20141119_183414


UPS codes, in case anyone is interested.

20141119_183400

Attachments

Images (8)
  • 20141119_185806
  • 20141119_185600
  • 20141119_185554
  • 20141119_184132
  • 20141119_183743
  • 20141119_183538
  • 20141119_183414
  • 20141119_183400
Original Post

Replies sorted oldest to newest

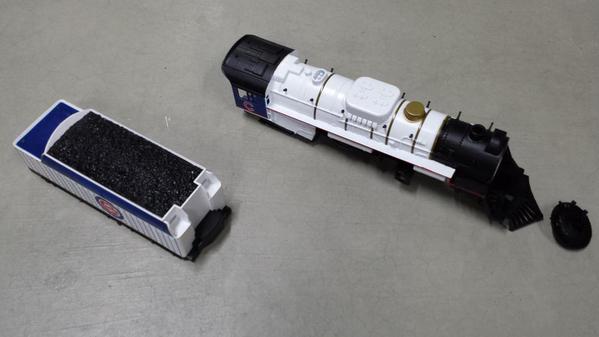
So first step once I got to the basement was to disassemble the locomotive and tender.  The locomotive shell is held to the frame via 4 screws on the bottom side - two back by the cab, and two near the cylinders.  The shell then slips off the frame.  I set the frame aside for now, but the cylinders have gold stripes and will need some manual painting to match the shell.  The smokebox front is also held on with a couple of screws and was easily removed.  I removed the lenses (headlight and two green marker lights) using an appropriately sized allen key and light tapping.  All of the hand rails are ran through small plastic stanchions that are press-fitted into the shell.  After removing the metal handrail and made sure to put all of the stanchions back in the frame before painting.  All handrails on the tender are similarly mounted.  I also removed the gold-painted bell from the smokebox front.  I taped all of the screws and little bits together with masking tape before securing to the locomotive frame on a storage shelf.


20141122_180721


The cars have proven to be more difficult, and I've only managed to complete one this week.  Follow online tips to remove the top (search for "baby madison bulb replacement, here is a Youtube video and here is a OGR forum post on the topic).  I ended up soliciting the help of some toothpicks for the first time, but am going to focus harder on the video's method (fingers only) next time.  Once the top was off, I taped the window portion of the insert - inside AND outside - to allow for painting of the roof.  I then used a thin and wide finger nail file to pry the end caps off to allow for easier painting of the inside surfaces of the vestibule area.  I removed the couplers from the trucks by removing the associated screw, and then wheels and electrical pickup assemblies from the trucks by gently prying the side-frames apart with a screwdriver, before cutting the soldered wires inside the car and removing the pickup assemblies and lights altogether.  Finally, I taped the trucks inside and out.

20141122_180151


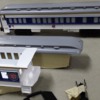
Here's a comparison of the prepped coach next to the remaining untouched coach.

20141122_180121


Another view of all of the parts.  The tape on the coupler is just holding the associated screw - I have no plans to paint these parts.

20141122_180112


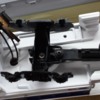
Here we see the electrical pickup assembly before I clipped the wires and completely removed it from the car.  You can clearly see the coupler attachment screw here, and the rivet holding the truck to the car body.  I tried to drill one out, but they were too loose and I couldn't keep them from spinning - so I resorted to just taping off the trucks.

20141122_155558


Long term plans are to paint the cars for the Pennsylvania Railroad, since I have a couple of older PRR steam locomotives in my collection, and the berkshire as NKP 765 (which is the reason I found this forum in the first place - thanks Rich!).  Considering a matching MTH NKP caboose.  Decals are on order directly from Microscale (PRR O Scale Passenger sets) and a hobby shop in NJ (NKP Steam).


More to come!  I'm trying to show how to do this with minimal cost and no special equipment - so any suggestions on a plastic-friendly approximation of PRR's heavyweight maroon, in spray paint form?

Attachments

Images (6)
  • 20141122_180721
  • 20141122_180151
  • 20141122_180121
  • 20141122_180112
  • 20141122_180109
  • 20141122_155558

6 years, a move, a kid, and a degree later, I finally got around to working on these thanks to our increased home hobby time this year.  It's been fun painting and decaling again after many many years.  My only wish is that I would have sanded the original artwork before painting, as it does show through when you look closely.  I haven't dull-coated or weathered anything yet as I was too excited to get them under the tree this  year, and the decals on the tender in particular need some extra attention.  Any tips or tricks out there welcome, I've been scouring Youtube videos for hints on getting them to "sit" over the pronounced rivet detail.  The passenger cars are made up with "PULLMAN" up top to match my Lionel passenger expansion set cars, but I added some numbers, car names, and a PRR keystone.  No way it's prototypical - but it has expanded my 3-car passenger train to 5 cars and a respectable length.  First one, shown below, is the "Clarion" which I picked for the river my dad used to take me camping on growing up.  Hope some of you who purchased these sets will share what you made of them - cheers!

IMG_0593

IMG_0594

IMG_0596

IMG_0598

Attachments

Images (4)
  • IMG_0593
  • IMG_0594
  • IMG_0596
  • IMG_0598

Add Reply

Post

OGR Publishing, Inc., 1310 Eastside Centre Ct, Suite 6, Mountain Home, AR 72653
800-980-OGRR (6477)
www.ogaugerr.com

×
×
×
×
Link copied to your clipboard.
×
×