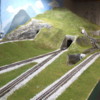
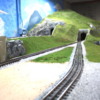
Darn, and they're some terrific pictures. Here's one... lets see if it shows up.
I saw that last picture but not the earlier ones.
I agree with Pat! Also I agree the last post shows they are great photos!!
Trainman,
I'm always following your progress and thoroughly enjoy every post.
Just love that you permit us to share in your thought process as you encounter challenges.
Your progress should be an inspiration to those that want to get their fingers dirty by stopping dreaming and starting to build.
Half the fun is figuring it out.
Ron H
Same as Pat & Mark with the pictures here. This happened to me a time (or maybe two) with pictures (I could see them but no one else could) and I think I just reloaded them, but I can't remember exactly what happened?
First I'll repost all those pics from last night. Then I give today's update. We'll see what happens today.
Attachments
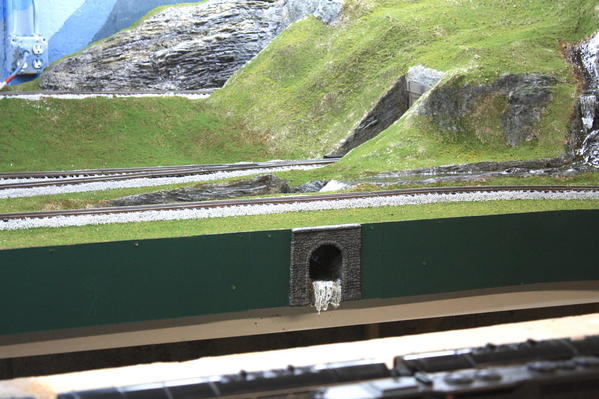
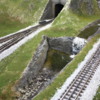
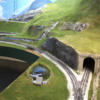
Now onto today's tasks. I permanently fastened the new tunnel portal into the layout. And I mean PERMANENTLY! Before doing this I needed to prepare the outlet more. I draped Hydrocal-soaked strips of Bounty to fill the gap between the portal's legs. I used four layers of towels since this was stabilizing the lower piece of fascia as well as place for the "waterfall". Then I slathered STM liberally on the portal's backside after wetting it, and pushed it tight into the opening. I smoothed the inner junctions with a wetted finger (I always wear nitrile gloves when working with plaster). I then added additional STM to the bottom of the two legs and some in the middle region. For the leg extensions, I hand carved some stones to make it look like the portal's longer than it (after painting of course), and carving some strata rock in the middle where a faux waterfall with appear to be dumping water on the floor.
We're almost ready for the resin. Tomorrow this new plaster will be dried enough for painting. That will need dry time also. I also have to add the silicone water falls. I'll use the same material to adhere them to the rocks and that too will require a good amount of dry time. So... based on that, resin pouring will probably happen on Tuesday. And oh... I almost forgot, I do have to add the long grass before resin so that too will happen tomorrow. I'm pleased with how this whole deal came together. I really wasn't sure how building that window screen tube off the layout and then getting it into place and sealed tight would work. But it did.
And one more thing. Just got a note from the Editor of Railroad Model Craftsman. The Distillery article goes in next month and will be in two parts due to its length. I hadn't heard anything and was thinking it wouldn't happen, but it is.
Attachments
So... didya see the pictures?
Yes they show, it's this composer. Likely updates are coming.
I see lots of great photos! I wasn't sure how you were going going to run the culvert under the track! As it turned out I wasn't imagining that you would go so low on the facia. It looks great! Once painted and 'water' solidified, it will be very convincing
Yes, much better on the pictures, looks like they are all showing here now, yesterday's and today's.
Thanks, Miles, for reposting the pictures. They look good. Congratulations on the RMC Article. I followed along while you built the Distillery. It makes a great article.
Congratulations on the RMC article! I will have to get a copy of both issues!!
Great news on the article. I bet they will want to do one on your mountain and ponds with the waterfall.
Also a congratulations on the RMC article. I will be watching my LHS for a copy of both issues.
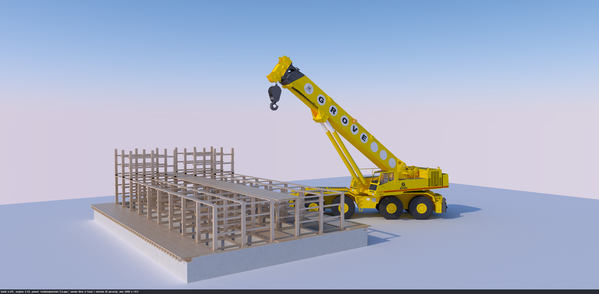
Thank you all! I'm not sure that doing the mountain is newsworthy since there are many fellows out there who do terrain work and there's lots of videos on it. That being said, most of them aren't this huge, nor are they almost entirely built of cardboard. I sent the Editor some other project pics that could become future articles. One of them I'm working on now on SketchUp. It's my rendition of a Rick House under construction. I would limit it to just the first story and a bit of the 2nd since it would consume a ton of Kepler scale lumber. It scales out to 40 X 64 feet (10" X 16"). That compares to the huge real ones that Heaven Hill is building. Those are 125 X 300 ft. They're 7 stories high so it's 263,000 sq. ft per house and they're building 8 of them. That's over 2 million sq. ft of warehouse just to age Bourbon and they have 40 others around the state.
Even though you can't see in this image, all the lumber is the same size that's used in the real one. I'm also modeling angle plates were they can be easily seen.
Today, I finished up portal and glued in the waterfall pieces using clear silicone caulk. I also started to "plant" some saw grass around the pond.
Here's the completed portal, painted, tinted and ready to go.
You cut the Saran to remove the water falls. You don't attempt to peel them off the Saran. To cut the top part I taped it to the cutting board so I could pull it taut which made using the scissors easier.
Here's the waterfalls attached to their respective places. They will look better when infused with tinted resin... supposedly.
Main Falls
Mid Falls
Outlet Falls
Upper Falls
Last thing I did today was start putting in some vegetation. This is W-S tall grass. I'm using W-S Scenic Cement (the thick stuff). I was having trouble keeping them sticking up straight so I'm adding a drop of medium CA to give it more oomph. I didn't finish this today so I'll have to do it on Monday. I may put the resin on the falls first since that will be ready. The pond will wait until the grasses all dry.
Monday and Tuesday will be big days with the completion of the mountain range and water features.
Have a nice weekend and keep warm. It will be the first week that football players heads will be steaming.
Attachments
I think all the water falls will look great when completed. The culvert, painted and shiny with water looks very good! Very nice method.
I really need to ask this as nobody has spoke of it in the many years I've been reading here, and I think a few different folks are using the term for both types of glues.
Does CA mean cyanoacrylic or an old fashioned contact adhesive?
Thanks!
When I use "CA" I mean cyanoacrylate. When I use "STM" I m referring to Sculptamold. When I use "PSA" I mean Pressure Sensitive Adhesive which is a specific product of MicroMark. I rarely use Walther's Goo since it seems more trouble than it's worth and doesn't hold forever. The other acronym I use is "RSU" which is my American Beauty Resistance Soldering Unit. Otherwise, I will spell stuff out.
Adriatic posted:I really need to ask this as nobody has spoke of it in the many years I've been reading here, and I think a few different folks are using the term for both types of glues.
Does CA mean cyanoacrylic or an old fashioned contact adhesive?
Are we all showing our age here knowing what an old fashioned contact adhesive is? ![]()
Thank you Myles for the descriptions. I was thinking cyanoacrylic, but Adriatic, your was a good question.
Remember the old Ambroid "airplane glue' that turned yellow on the places you didn't want it as a kid building models.
Ambroid and Duco Cement made balsa model building a horror. It wasn't until CA came along that working with wooden modeling was actually was fun. You can build and RC wing as fast as you can go. You don't even need to clamp. You hold the rib, put on the CA, squirt it with accelerator and then move on to the next one (as long as you haven't glued your fingers to the model). I've been a regular user of CA since the 1980s when they first came out in retail.
A bit of history. We can thank Eastman Kodak for CA. (Eastman 570 I think) They developed it for gluing lenses together. Industry picked it up for various odd uses. For example, you could glue thin metal sections to a plate so you could surface grind it (if it wasn't magnetic). Acetone would then break the bond.
Another interesting fact. Henkel is one of the world leaders in making CA. The plant is in Ireland. How do you produce a liquid that binds up metal parts? You run the machinery at a temperature below freezing. When that cold, CA does not cure. If you want to keep it fresh, put it in the freezer.
Cyanoacrylate is also used in theatres of war for quickly suturing lacerations together.
I've used it in my modelling room when I've been too enthusiastic with a blade. ![]()
And it doesn't sting. ![]()
Good tip on the freezer. Every time I try to use my CA is usually dried up. Although, I have had some Gorilla CA for 2-3 years now and it was still working as of a few weeks ago. I have never had any last that long before.
I had heard of CA being used for cuts, but never tried it. Another good tip. I am usually better at gluing my fingers together than much of anything else, so I definitely know it works well on skin. ![]()
They're using tissue glue in a lot more applications than just battlefield. I believe it's got a different chemical basis so it's not quite so aggressive. Stevie Ray Vaughn used to play until his fingers bled. He then coated them with super-glue and went back and played some more. Now that's dedication. When my fingers start to bleed, I stop playing. Actually, I stop playing a long time before that.
Did some rare Saturday work so I almost finished getting the saw grass planted. I'm leaving a blank spot so I can install a little fishing pier. It's just a pond so a boat is not in order, but a fishing pier could be okay. I'll build that on Monday. The super glue I was using yesterday dried frosty so I didn't use it today, just got more patient with the W-S Scenic Glue. I had to be careful and stop breathing since sometimes I would blow over those delicate little placements.
Attachments
rtr12 posted:Good tip on the freezer. Every time I try to use my CA is usually dried up. Although, I have had some Gorilla CA for 2-3 years now and it was still working as of a few weeks ago. I have never had any last that long before.
I had heard of CA being used for cuts, but never tried it. Another good tip. I am usually better at gluing my fingers together than much of anything else, so I definitely know it works well on skin.
I agree on the tip on the freezer, and also on gluing my fingers together. ![]()
Reminds me of a guy I worked with over 20 years ago now. He liked building model airplanes. He was an excellent story teller, and never minded telling a story where he was the brunt of the laugh either. One day he told us that he had been using fast dry CA when he got a little too ambitious and some squirted into his eye. Of course he blinked. All of a sudden his eye was glued shut!! He got his wife to drive him to the emergency room, and she laughed at him the whole way there and while at the hospital as well.
I was going to add about, "Don't let it get in your eyes." A long time ago, I was using a pinpoint to apply it and the point sprang and small amount went into my my eye. It didn't hit the cornea and burned a bit, but I got it under water right away and it was okay. My son, the ophthalmologist does see this from time to time. I don't have too much trouble gluing fingers together and I have the acetone handy nearby.
I haven't done that yet, and hadn't really thought about that one either. I will watch out for my eyes! I got my cataracts fixed last year and I only need glasses for close up so I don't always wear them unless I really need to see something close up or read the fine print. I will be wearing them more often when working on things, especially when using CA or other glues.
Back to the topic. I got all the grass done and started building a little fishing pier that will jut out into the pond. I'm also thinking about ways of crafting some miniature cattails. I know that Scenic Express has them, but I wanted to have them before doing the resin work.
Putting on that W-S long grass is finicky work, but the results are pretty nice. It's a finer fiber than using sisal rope fibers, but those might work well for the cattails. Like everything else on this layout, I finally got good at it when I was near the end.
I drew the platform up SketchUp yesterday to see how I wanted to build it.
I kind of slapped it together out of various styrene strips. The frame is s strips plus 6, 3/16" sq. legs. It's just sitting there. To install I'll probably inset it into holes in the scenery.
To hold the planks in position for gluing, I spaced them onto some reversed masking tap and then turned the frame upside down with some weight on it, and applied solvent cement with the Touch-n-Flow applicator. I didn't spend too much time getting it perfect since this is supposed to be a very crude little platform.
Here's the assembled platform again sitting by the "water".
I used my scratch brush to rough up the styrene's surface to make it more "wood" like. I would have liked to have used real strip wood for this, but didn't have any and didn't have a good local source for it. Again, I didn't want to wait for on-line delivery. I attempt to do a faux wood paint job on it. This is now right in the critical path of getting the resin poured since all the other water features are fully cured and ready to go. I suspect that I'll sink the platform another 1/8" to 3/16" to bring it closer to the water.
Attachments
I finished and installed the fishing dock today and then got the first layer of polyester bar-top coating.
To color it so it looks like aged wood, I first covered it with Tamiya Surface Primer. I'm really learning to like this stuff since it covers great and dries fast. It's also not alcohol based so successive coats of Tamiya color coats don't dissolve it. I then used a thinned Tamiya Dark Iron brown. This was after I had scratched the surface to give it some "wood grain". I left two planks unpainted which I then painted with some wood tan to show a couple of recently fixed planks. I painted on some simulated knots, but I realize now that I didn't make a nail holes. I can go back and do that if I want. I'm not sure I want to.
I trimmed the back two legs so it fit over the land area, shorted the other four legs a bit since it was sitting pretty high and then glued it down to the base with some W-S Scenic Glue. To hold it down till it dried, I added some handy weight.
When this set up I mixed the polyester. It's a "equal Part A/equal Part B" affair, plus I added three drops of Tamiya Olive Drab to give the water a bit of green tint. I poured the first amount in the center, but it didn't appear to be enough to cover the area. So I mixed up another small batch and poured it around the edges. It all blends together and flows like lava, eventually getting into all the spaces. I used a hot air gun to try and drive out the bubbles, but wasn't completely successful in this.
Here's the full pour in place and setting up.
The water is not dead flat! The plaster bottom is a bit high in the center. Tomorrow, when this sets up, I will make another pour and get it all leveled out. I didn't do a good enough job of cleaning the surface before pouring since some of the "Bubble" may actually be particles of ground cover, etc.
Attachments
Today was a milestone... of sorts since I was able to get "water" into the stream bed. There's still more to do.
I first took some fine emery stick and wet-sanded the pond surface to get rid of the bubbles and dust that was there since I hadn't cleaned the surface well enough. I then mixed another batch of the Park's product and added a new layer. It almost eliminated the high spot, and caused resin to extend well beyond the saw grass in a couple of spots. I'm going to re-landscape those spots after all is cured hard. There's still a bit of distortion where that high spot is. I may or may not go with one more coat to finally level it off. My grandson noted that high spot and I felt that the resin would have buried it long before now. I did get out all the bubbles and there's no more dirt in the pour.
I then mixed up a batch using some very old Envirotex from about the late 1980s. It will find out if it still cures. The two liquids looked the same as the Park's material so I'm optimistic. I just checked and it is curing.
To do the stream run I first brushed resin into the waterfalls and wetted the stream bed. The resin has a very high surface tension so it helps to pre-wet flow areas. I added the Tamiya O.D. paint to tint the water a bit of algae green. I may have overdid this effect a bit since as a mountain stream it probably would have been completely clear... oh well.
I didn't wait for this to set up, but immediately went ahead and mixed more and poured it from the top and let gravity do its work. It move like molasses or maybe like thick lava. It doesn't stop, but just creeps along.
I didn't like how the flow was not going over that rock in the upper mid-stream and decided that having a waterfall off that rock was completely unrealistic. The water wasn't going up and over that rock so there wouldn't be a falls there. I removed it. I added some more downstream to get it moving along.
As more material filled the void, I found some low spots that I thought were no longer there. I plugged these with some modeling clay to stanch the flow and will landscape the area after the resin cures.
Then the material started getting to the lower reservoirs, but I also added more there too.
And after adding even more resin, it finally found its way out of the outlet. I put a cup on the floor below to catch the drips as they worked their way out of the system.
After all this cures, I have more work to do. I have to highlight the falls with white paint mixed with W-S water effects and make some white water foam using the above and some CA filler beads. I will also add stream lines and more turbulence with more water effects. By this time next week, the stream should be done and I'll clean up the landscaping and the floor (again!).
Attachments
Yes I recall using a similar product years ago, it gave pretty good results. I did have one little seep hole as I recall. Yours is on its way to looking great! The green tint probably won't be too noticeable. I was going to say the last falls looks like it could go to the floor, and so it did. Looking good at this stage.
I have not had a chance to watch the progress for a little while
It is great and serves as a wonderful motivational thread
Thank you
Bought some more Enviro-tex resin today. The 25 year-old stuff was Ultra-glo and it still worked great. It was cured solid this afternoon. I added the water effects which included three different concoctions: plain W-S Water Effects, Water Effects plus some Vallejo white acrylic paint, and then these two plus some micro-balloons filling agent to bulk it up. The plain Water Effects was used to give flow lines around the various obstacles. The white/Water Effects mix was used to add white to the turbulent areas and to the falls themselves, and the bulked up stuff used to create 3D foam at strategic locations. In the first instance, I wish I would have made that falls extend from the top to the bottom. I think it's too late to make that change.
This should be so white when it all cures. We'll see. I also built a little dam with Water Effects in case I want to make another pour of the resin to fill the reservoir more completely.
I'm also not too happy about the flow lines from the final rock in the flow. You really shouldn't brush the stuff on since it doesn't give the wavy feel that water would do. It gives the tops, but can't resolve the troughs. You can see in the following pic the areas that I added more plaster to fill the divots left behind by the modeling clay dams.
This plaster was a combination of Gypsolite and Hydrocal. I did this to hopefully accelerate the setting time. We'll see. I used this mixture to also revise the banks of the pond so I can re-pour the resin to finally flatten out that high spot without extending the "wet grass" even further.
For this next pour I'll probably leave it clear since there's already enough green in the water. Any more algae there and I'd have to put in an aerator.
Tomorrow, I'll take another look at all of it and see if there's anything else I can do. If not, I'll paint the bare areas of the foreground and add ground cover, thus finishing up this part of the project. I'm going to add more color to the area where the mine's going since I don't know when I'm going to build that and don't want to look at bare plaster.
Attachments
I really love how its turning out! Just a thought about the top water fall, couldn't you just make another section like the one you have there just longer. Then attach it behind the first one.
I think when everything is said and done its going to be just GREAT!
That's a possibility. One problem is that making long strands of falls requires a different technique than the ones I made. Kathy Millatt uses silicone adhesive strands for the long falls instead of a glob stretched out from the caulking gun with the silicone caulk. You can also use W-S Water Effects to create falls. I would use a small nozzle to emit some smaller strands. I can also remove the current falls to replace it, but it won't be easy. It's well fastened in place. I think this whole deal's going to grow on me. Also, unless you're inside the middle of the layout, You won't see much of those effects.
And I'm really glad you feel that way.
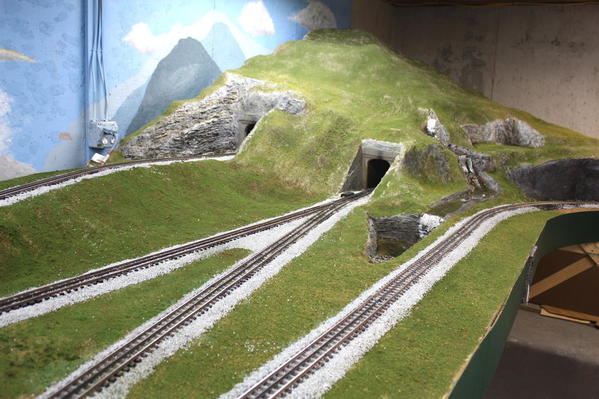
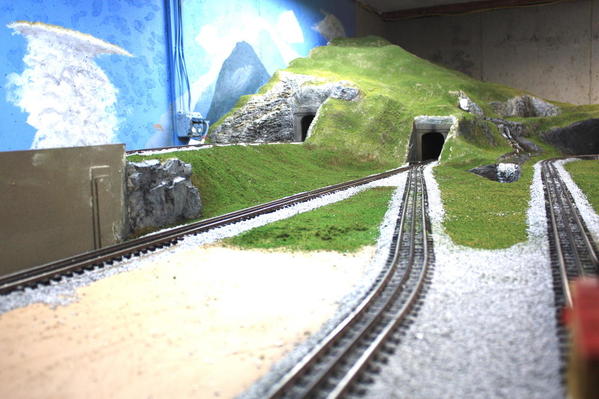
Well... the mountain's as done as it's going to get. I still have to put in trees, bushes, etc., but it can hold its own now.
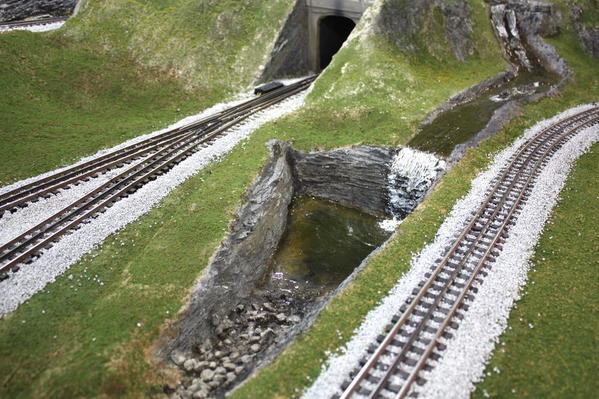
Yesterday, I added the last bit of Envirotex on the deep pond and figured a way to get a little more motion in the stream itself by adding setting resin that held a shape (sort of) so it made a more animated and more interesting to look at. This cured hard and today, I went back and put ground cover all all the bare areas, redid the ballasting where it was damaged, ground-covered that little back section on the elevated track—which required me to come up in the open space I left in that rear section—and painted those last bits of rock along the stream bed and where the mine's going to be. Here's a set of pics I took tonight after putting everything away and sweeping the floor.
Here's a few other views. I do think I'm going to try to write an article on this build.
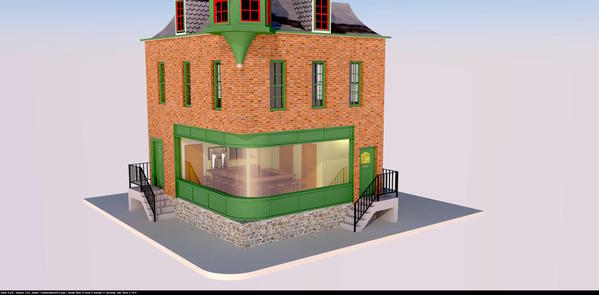
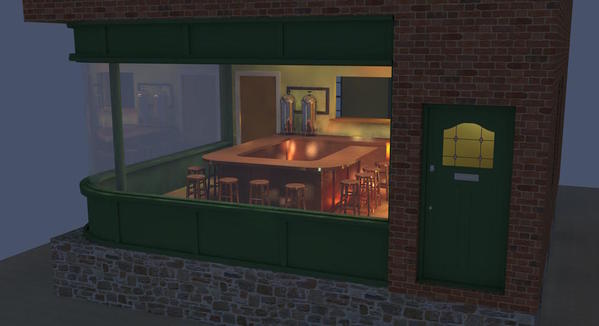
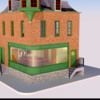
On the weekend I worked re-drawing the Night Hawks cafe that I'm going to build for the town. I've spoken about this a couple of years ago, and I bringing it up again since I lost most of the building in SketchUp since I really didn't know what I was doing. I've since learned an important point about SketchUp (SU). Unlike Illustrator, Corel Draw or other typical 2D drawing program where you actually draw on different layers to separate parts of the drawings and determine what part of the image lies over what, in SU you do all of the drawing on Layer 0. Layer 0 contains all the math and calculations necessary to create a 3D image. Then.... after you've drawn whatever you're going to draw and you want to be able to show it or hide it as you're working, you then put it onto it's own layer. But, you never ever do any work on that object on any other layer than Layer 0. So I re-drew the entire project with this new-found learning and got a very stable project.
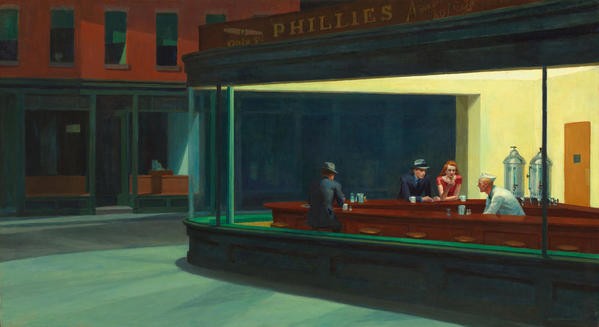
To refresh your memories, this building was a set of plans for a corner Victoria bar that was in a mid-50s Model Railroader magazine. I always wanted to build it even as a kid when my uncle gave he all his MRR mags. It has a mansard roof, gables and a neat turret. But I wanted to change it to try and duplicate Edward Hopper's American Masterpiece, "Night Hawks" which resides in the Art Institute of Chicago. It's one of my favorite paintings and he's one of my favorite artists.
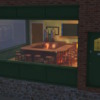
While the drawing was created in SU, the renderings you see here are created in Podium, a SU add-in that not only does photo-realistic rendering of SU drawings, but has an extensive library of its own of 3D ready objects and textures. The chrome on the coffee urns was generated in SU and if you could get close enough, you'd see the whole room reflected in those appliances. Also see the reflections generated on the window glass, also a Podium texture.
Hopper's painting warped perspective. While the street corner appears normal, the inside of the building is sort of triangular so he could visualize the couple sitting over their coffee. Those folks are supposedly Hopper and his wife, and I'll have to sculpt the people myself. The room appeared to lit by then-new florescent lights so blue white LEDs will work well. I have created the missing art work for the signage and will make my own decals for it. The building in the painting looks like one floor which is strange since the street appears to have typical city brick store fronts.
This building will queue up behind the 2nd distillery for Heaven Hill, the Plastruct chemical plant, the engine house, and the under-construction Rick house. In other words, G_d willing I'll be building it in 2017 sometime. The nice thing about SU is I can do all the design and engineering work on a building before buying or cutting anything. If it can't fit together in SU, it ain't gonna get together in the shop either.
While waiting for River Leaf to cut the 2nd Bernheim distillery, I'm going to start planting some bushes and layout the parts for the chemical plant to decide on where it will go on the layout.
Attachments
Fantastic job Myles. ![]() The mountain and it's scenic details looks great. I like the way the stream and pond came out. I can't wait to follow your effort on the Night Hawks Cafe.
The mountain and it's scenic details looks great. I like the way the stream and pond came out. I can't wait to follow your effort on the Night Hawks Cafe.
Myles:
I've enjoyed following your thread and look forward to all your future projects. This is both entertaining as well as instructional. Thanks for the taking the time to write this.
Robert


