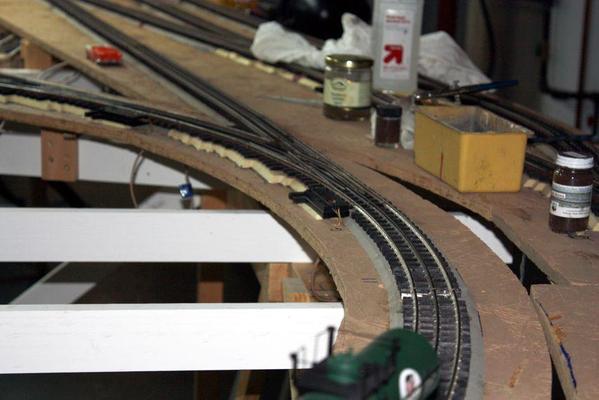
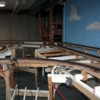
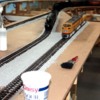
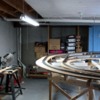
In 2013 I posted a detailed description of the rebuilding my Pennsylvania & Pacific RR. This over 10 year saga covers all the details of building this railroad since that time. You can go back to the beginning with constructing the L-girder platform, laying over 300 feet of Ross track, building and wiring the control panel at this location on the Track Planning and Layout Design Forum.

https://ogrforum.ogaugerr.com/...-vs-old-build-thread

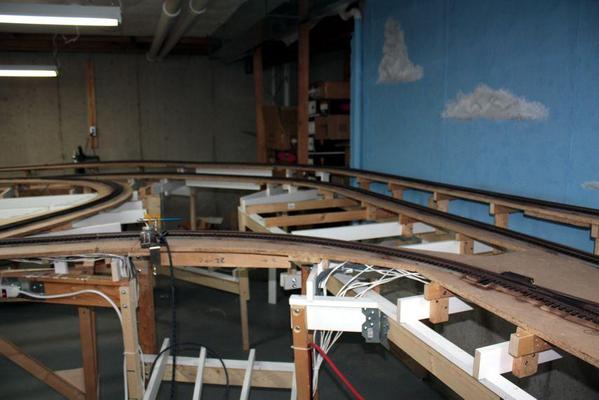
This railroad is on its third life. It was first constructed in Germany and was 21 X 13. It was built with the goal of disassembling and shipping back to the USA to our house in Bucks County, PA. I put it back together with an added 6 ft in length so it became 27 X 13 ft. After my early retirement from the housing industry in 2009, and our subsequent move to Louisville, KY, I modified it, and rebuilt it as a much larger, 39 X 15 ft railroad. I worked to eliminate all of the operational problems I had in the first two versions. The railroad is star-wired with 38 separately controlled blocks. It does not have digital control yet, but I wired it using home-run wiring throughout with high-capacity twisted pair wiring so it can get DCS whenever I'm ready to buy it. Meanwhile, it is a "Cab-control" layout run from both sides of a single-Z-4000 transformer. It has a separate DC power supply running the LED indicators for the block toggles and an interlock circuit that protects a swing-out door that permits access to the entire inside of the layout. In fact there are many DC power supplies running all the lighting. I'm using 100% LEDs now and find all of the old AC adapters laying around are a good source of DC power. I just bought my first purpose-built LED power supply to run all the lights in the new engine house. The age of the railroad, from its inception in Germany in 1999, speaks to the longevity of modern O'gauge equipment including 16 locomotives (MTH, Sunset 3rd Rail and one Atlas), Ross Custom Switches with Z-stuff for Trains machines, and the hefty MTH Z-4000 transformer, the newest of which is from 2002.

I noted when starting this thread that the layout was going to be fully scenicked, and it will be a big job that would stretch over years. Boy was I right! I've now been steadily working on it for over 10 years and have had some wonderful sub-projects that are defined in detail in this massive on-going thread. I had hoped that my eyes, hands and back would make it that far, and so far, with a couple of physical challenges creeping in, I'm hanging in there. Whatever you use most wears out first, and since I've been building models since I was 8, the hands are experiencing the most wear and tear. I am grateful for having most of the under-the-platform work finished since the back hasn't been happy either. When I built the layout the first time I was 24 years younger. My wife actually asked me if I was physically capable of the rebuild. I'm happy to report that I am and most of the injuries are temporary... I hope. At the time of this edit, I'm 78, and happily, I'm still building and still learning.

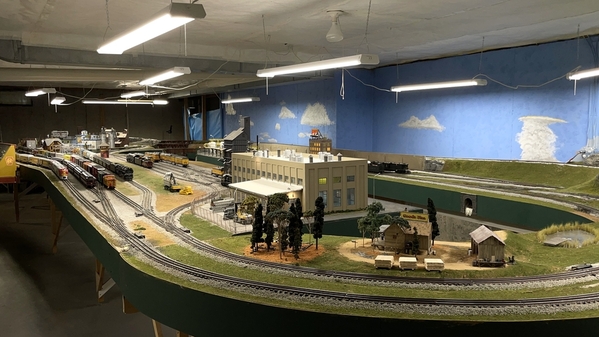
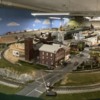
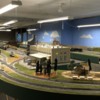
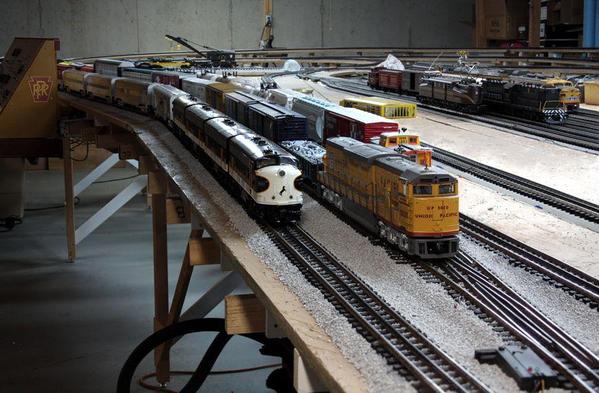
The layout has a large mountain with tunnels on one end and a the small town of Woodbourne on the other. In between are industries, yards and an engine service facility. I really don't have the room so there's no roundhouse or turntable, but there is a large engine house. The middle is open giving me complete access to almost all trackage without resorting to pop-ups (and more work under the table).

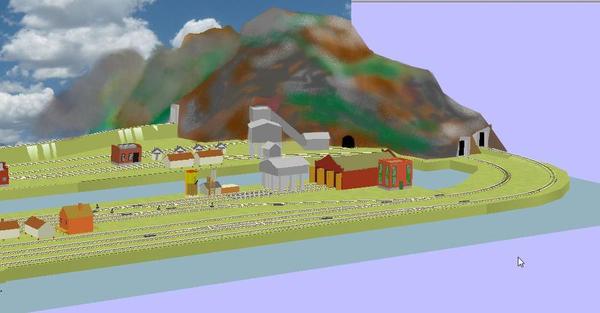
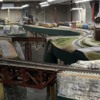
Here was my early rendition of the mountain region.

New Mountain Detail

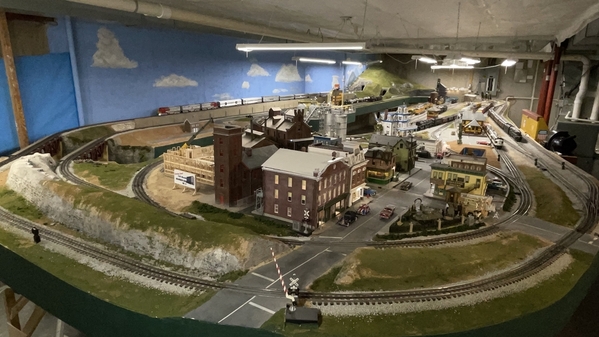
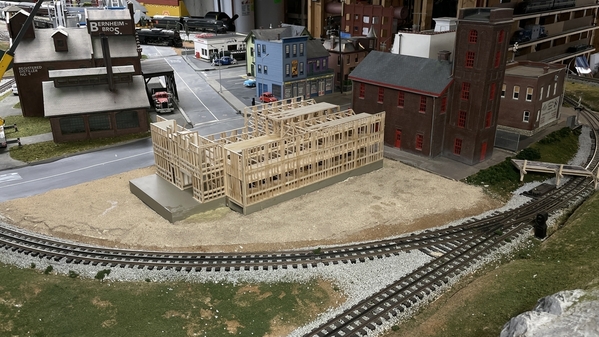
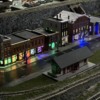
Here's a picture of the layout as it in Dec 2023. Included are the new engine house in the far background all illuminated with LED fixtures, the Hopper House, Heritage Park, the Bourbon rick house under construction and the Woodbourne Hardware House.

P&PRR Status 2023 5P&PRR 2023-5P&PRR 2023-6

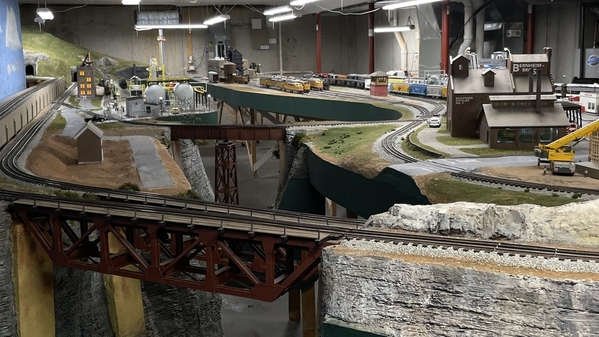
The bridges in the foreground-left are customized Plastruct Deck Truss Bridges and the third is a Deck Plate Bridge and they too, and all the beautiful ravine scenery is described here.

Lastly, throughout this massive undertaking there have been some signature projects that have found their way to the model railroad press with a substation described in the November 2015 Railroad Model Craftsman magazine, and a three-part article in the 2018 October, November and December issues of Railroad Model Craftsman on the design and building of a Victorian Bourbon Distillery that existed in Louisville, KY until Prohibition when it was razed. More buildings and articles are coming out of this very comprehensive thread. The Engine House is slated for publication and several articles have been submitted to OGRR.

So, if you're so inclined and have a couple of years to read about the trials and tribulations of big railroad building, please come along for the ride. I don't have all the answers. In fact, I have very few answers, so I expect my readers to be willing to give. And give you do. I get as much from my readers as I give, and many ideas, thoughts and plans came from them. I can point to many critical things that wouldn't have happened if it weren't for all the patient and attentive folks that read and commented on this forum. The articles wouldn't have happened. In fact, the buildings themselves may not have turned out as they did were it not for the support I constantly receive. Some folks that have been following this thread for years give me more credit than I deserve. You become a master of things by doing them a lot and practice. You have to start somewhere. The thought of starting is always worse than the actual journey.

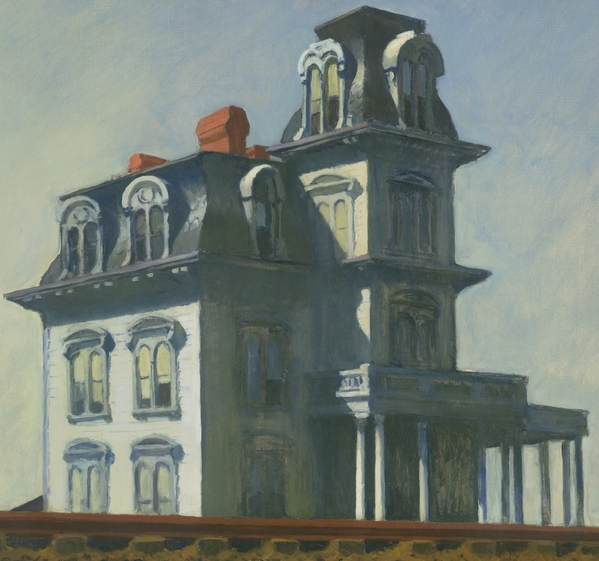
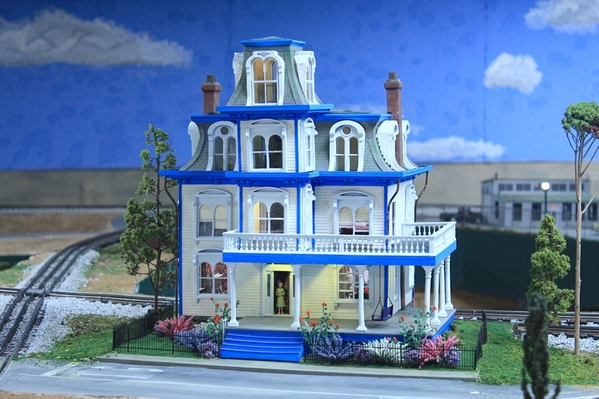
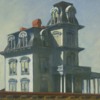
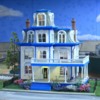
I am now fully engulfed in the world of 3D resin printing with the advent of the newest LCD Mask machines that have dropped the price on these amazing machines so normal modelers can have them in their shop. I've had some 3D printed parts done commercially, but now my capabilities have been greatly enhanced. I'm describing all the trials and tribulations going up this learning curve of a very new technology. A recent project is my rendition of Edward Hopper's "House by the RR" that has many, many 3D printed parts from my design.

The Hopper Original

House by the Railroad

The Hopper rendition "House by the Railroad" as complete, installed on the layout and the lights are on.

House Final Frt Rt

Hopper necessitated relocating the Idaho Hotel which required a new base and parking lot. Since then, I sold the Idaho Hotel to Mark Boyce where he's given it a nice home on his growing layout. I needed urban space for more of my custom projects. Then comes Heritage Park to fill the last oddly-shaped open lot on the layout. Heritage Park features 3D printed columns, lanterns, signs and entry arch. This starts on page 92.

Heritage Park Comp 3Heritage Park Comp 7

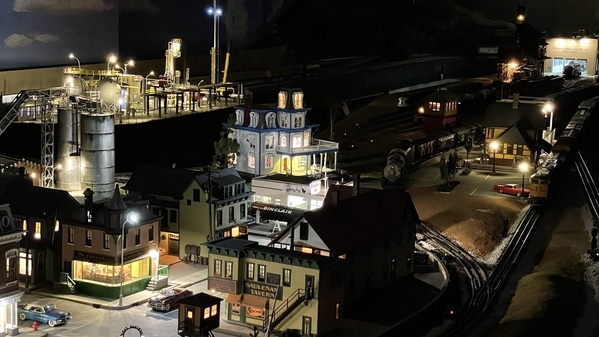
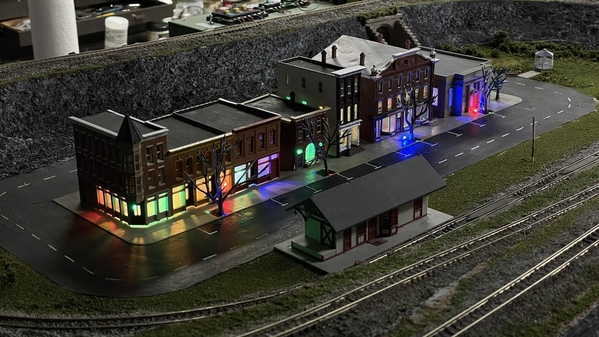
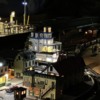
And the railroad is undergoing a municipal improvement project with new street lighting and signage as seen in this night photo.

IP12Pro Night Test 4

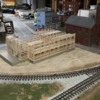
One last bit of downtown real estate is being filled with a bourbon warehouse (rick house) as it appears under construction. I chose to show it this way since, when finished, they're just a box with a bunch of windows in it. Under-construction is a whole different animal. You can view this build thread starting on page 95.

Screen Shot 2021-04-12 at 10.22.55 AM

The Rick House is done and on the layout.

RH Ground Cover Fin 1

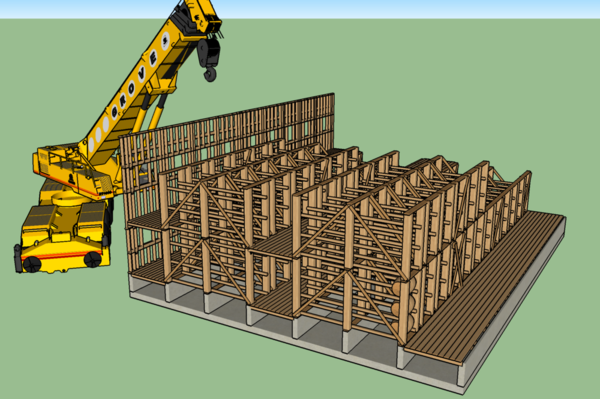
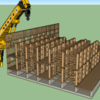
The next up is a model of the extant hardware store in Newtown, Bucks County, PA. Built in 1869, it's been a continuously operating hardware store since. In 1899 it burned down, but was rebuilt in almost original shape. Sometime in that period the owners bought the right side store and combined them into a larger hardware store. I'm doing it with some interior. The upstairs are apartments so I will not model them. All I did was compress the length a bit to fit in my layout space. This it the SketchUp drawing used to both create 3D models for the architectural details which I 3D printed, and the flat design drawings used to laser cut the flat parts. Construction has started and can be found on page 103.

mceclip0

The O'scale Hardware Store is in place, but there's still interior work to be done. None of my buildings are permanently attached to the layout. They're all on bases that are removable to facilitate repair, updates, or if required, sold.

Took a small side trip. With the success of the Hardware Store, the owner of the real store in Newtown, PA commissioned me to make an n-gauge layout to be used as a holiday store window display. I built such a RR with my grandkids when they were MUCH younger and commandeered it to be used to fulfill this job. I was able 3D print an n-scale version of the Hardware House and three other actual replicas of Newtown, PA buildings. It took some work to get the track into shape so it would run unattended, and I'm in process of finishing it up. Story starts on Page 107. The n-scale version looks just like it big brother...

NHH160 Lights On 4

So So sit back, grab a cuppa Jo, and start reading. The Saga begins with ballasting 350 feet of track...

Attachments

Images (14)
  • New Mountain Detail
  • mceclip0
  • mceclip0
  • House by the Railroad
  • House Final Frt Rt
  • Heritage Park Comp 3
  • Heritage Park Comp 7
  • IP12Pro Night Test 4
  • Screen Shot 2021-04-12 at 10.22.55 AM
  • RH Ground Cover Fin 1
  • NHH160 Lights On 4
  • P&PRR Status 2023 5
  • P&PRR 2023-5
  • P&PRR 2023-6
Last edited by Trainman2001
Original Post

Replies sorted oldest to newest

I appreciate comments like that. I'd probably write this day-by-day history even if no one was reading it, but when people tell me it's making a difference for them, that really works for me!


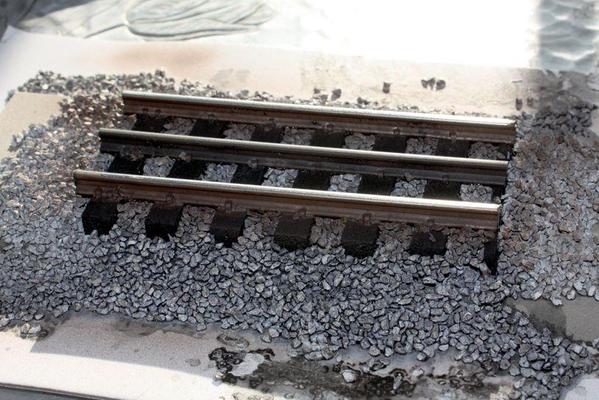
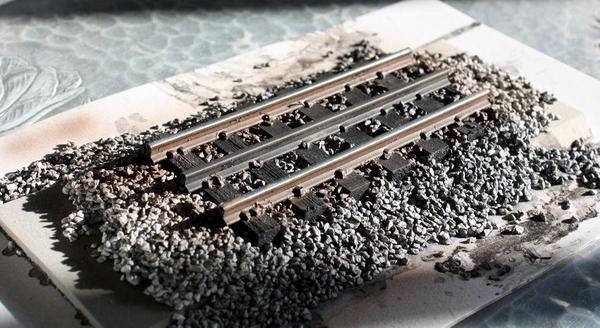
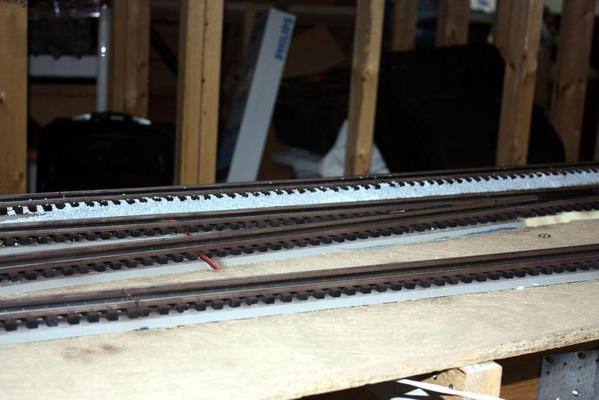
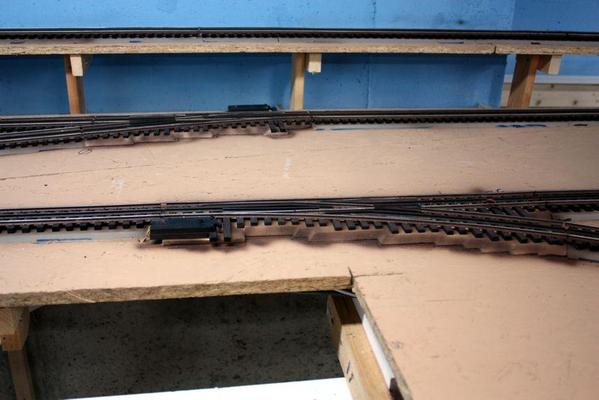
Today I started rail painting. I have buildings to build, but nothing can happen until ballasting is done, and that can't happen until the rails are painted. I have a chunk of track where I experimented with the ballast, so I used it to test the painting. I'm using rail brown from Joe's Model Trains. I bought the paint and one of his rollers at  York a number of years ago. The roller was too skinny to handle O'gauge rails. Now I see on his website that he has a much wider roller to paint O'gauge. I first tried brush painting, but it was not successful. I then tried the air brush and the results were passable. I wiped the rails off when the paint was wet. Here's what it looked like. Pretty realistic looking rail...
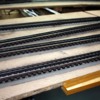
 

Rail Paint Test 2

Rail Paint Test 1


One of the things I like about Ross rail is that it ends at the ties. Gargraves on the other hand, extends below the tie level and you can often see shiny tin plate showing. With Ross, that doesn't happen.


So with this good result, I went at the railroad, realizing that once I started, I would have to paint the WHOLE THING. Some of the track work will be in tunnels so I will mark off those areas and not waste the paint. As it is, I emptied a 2 oz. bottle after painting about 1/8 of the railroad (or less). With the exclusion of the tunnel tracks. I just ordered another 5 bottles of paint on line so rail painting will be stopped until the new paint arrives.


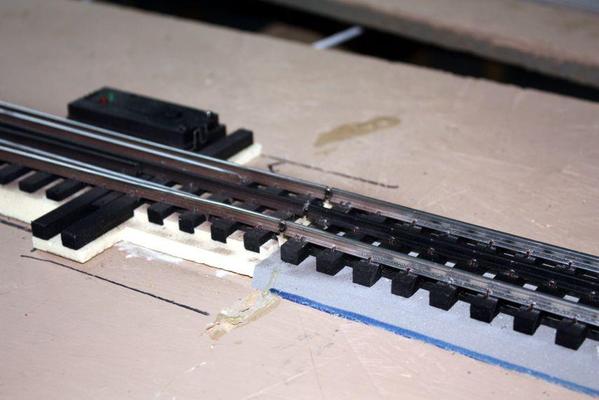
This is one of switches I painted and shows the place I stopped. I think the switches look terrific with the brown rails. 

Rail Paint 4


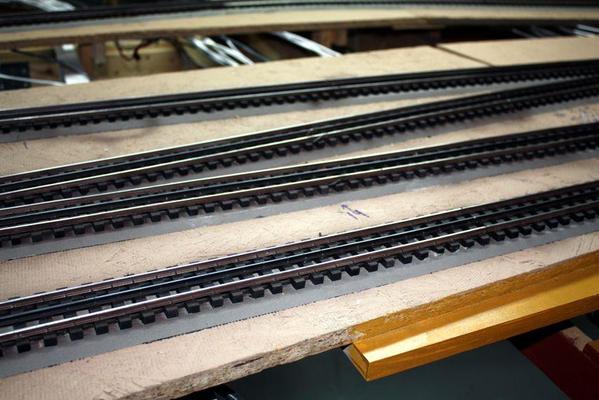
 Here's a bunch of track painted. To me, it immediately looks like RR track with the polished running surface and the dark rails.

Rail Paint 1


Here's the other end of the painted/unpainted line. That unpainted track will be in tunnel under the city so I'm glad I didn't start painting in that direction.

Rail Paint 2


The airbrush worked well unless it didn't. It was plugging a lot and I spent a lot of time cleaning and recleaning it. I cut the paint with isopropyl alcohol at 2:1, paint to thinner. I don't know if that's the best thinner to use. I also have some Vallejo acrylic diluting agent that I could use. When it worked, it went very fast. When it didn't... well... it didn't. In most cases, it took two or more passes to properly cover the steel. When I first started, I was wiping the rails down with alcohol. After a while I realized this didn't make much of difference and just painted the rails.
 

Just wait until the ballast goes down...


For the yard tracks, I'm gong to fill in the areas between the tracks with inverted roadbed beveled on both sides. Yard tracks don't have nicely shaped ballast fields. Their tracks are buried in the dirt to the ties or higher. It also reduces the amount of ballast I'll need for that track and there's a lot of it.


It goes without saying I'm not building a Proto:48 railroad, but I am trying to make it as realistic as possible given that I'm using 3-rail track with a fairly high profile with ties that are not really scale-sized and are spiked with staples not spikes and without spike plates. It's a shame that Ross can't paint the track before they ship it. Even if it were an extra cost, it would be worth it since this is a pretty big job. As I'm constantly being reminded, over 300 feet of track makes every task a BIG JOB.

Attachments

Images (6)
  • Rail Paint Test 2
  • Rail Paint Test 1
  • Rail Paint 4
  • Rail Paint 2
  • Rail Paint 1
  • Rail Paint 2

Trainman 2001....

glad to hear you can run trains at last so how about a video of a train going across that roll out area?

I have really enjoyed reading how the new layout came from a thought onto a computer and into the real world.

I retired almost a year ago and am now starting to work on our layout.

the rail brown tweaked my interest so today am going to get some and have a go at it myself so thanks for the insight to a possible color to use as railroad trackage is really a hard one to capture correctly.


hope to read more and please don't be a stranger as I enjoy reading what you have accomplished keep up the good work and I'll bet the grandsons will be staying over more now that summer is around the bend plus grampa has trains running enjoy both.


$oo

The other videos I did were on an iPhone. I don't like them so I'm going to use a more formal method for the next series. I'm going to use my daughter's camera. I now have four complete trains on the rails. Two can run at a time with the others parked in passing sidings.


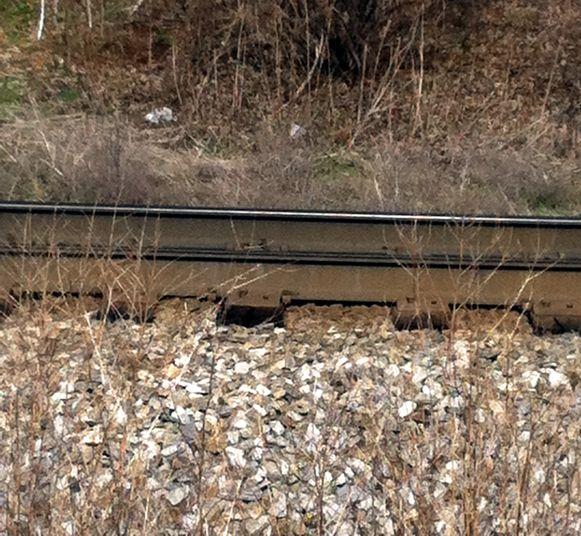
Here's a picture I took of Norfolk-Southern's track running through Louisville. It is a highly used main line, and the rail is clearly brown. It's not an orange rusty color. The darker the rail the better I like it. This picture was shot in bright sunlight directly on it.


Real Raill Color


Also note that this color extends to the ballast below the rail/ The ballast is a mixture of white and bunch of grays. I'm going with straight gray, but will selectively stain some of it darker for more variety.

Attachments

Images (1)
  • Real Raill Color

Trainman 2001....

I don't remember who posted a thread here but it dealt with creating a two toned ballast effect and if I remember correctly he used black spray paint on grey ballast so it was a gray and a mixture of light and darker black.


you could do same using a brown spray paint and accomplish two items at same time.

all he did I believe is hold spray can 12" above ballast and misted it slightly until he acieived his desired effect might be worth trying.


$oo

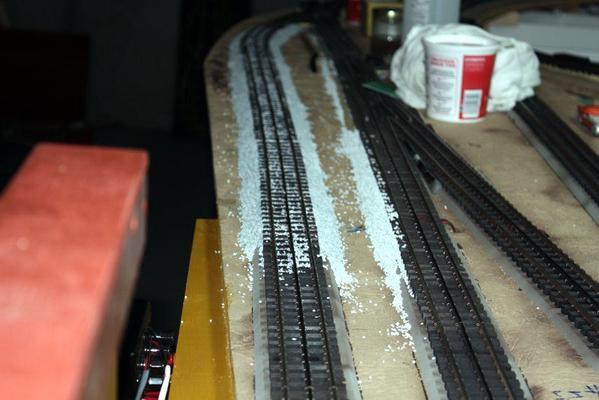
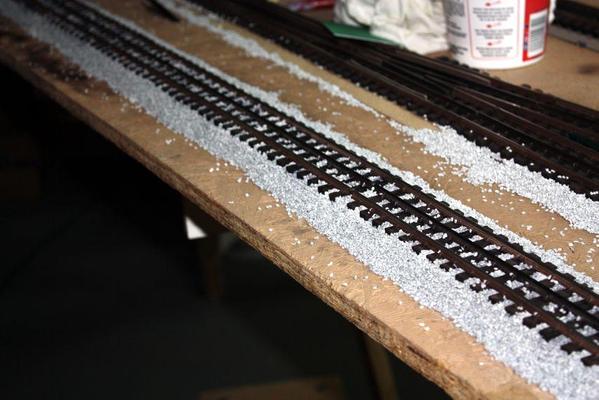
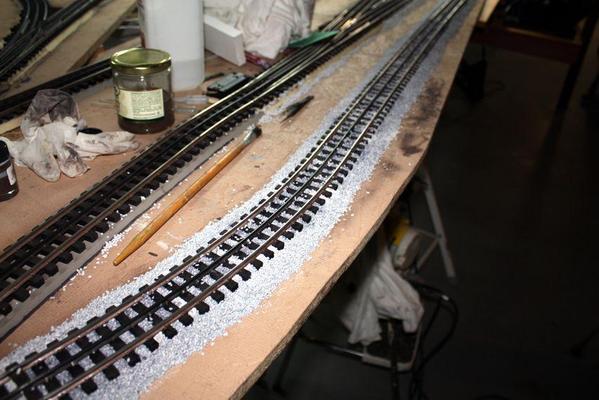
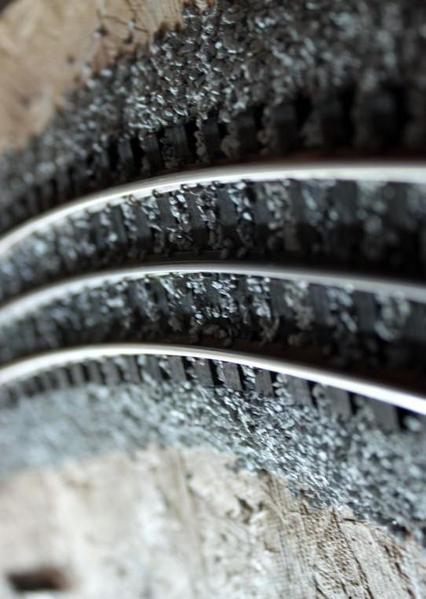
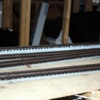
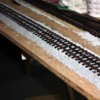
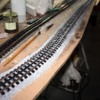
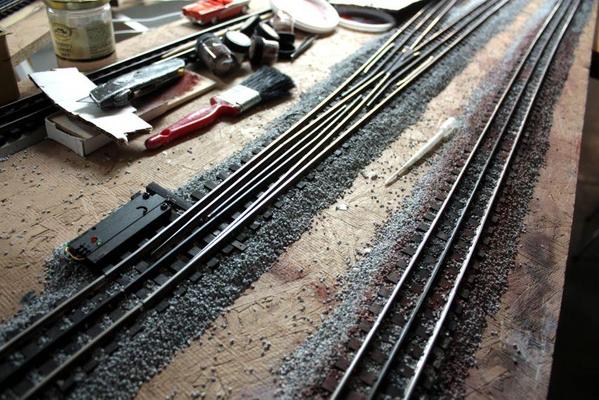
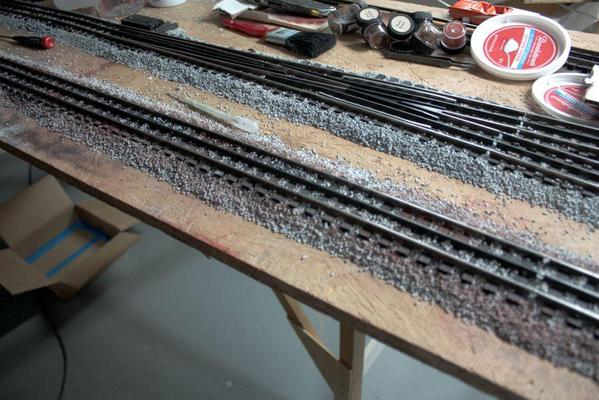
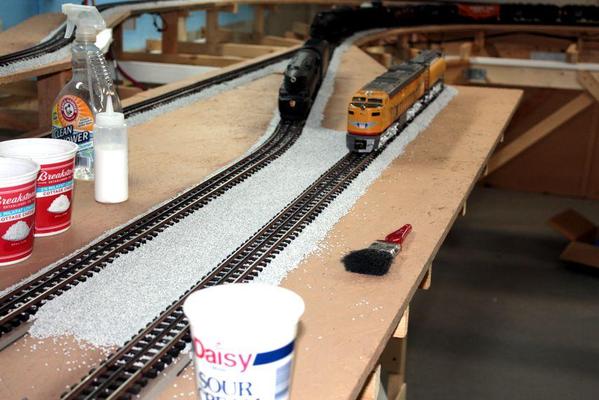
While waiting for the rest of the rail paint to arrive from Joe's Model Trains, the grandsons and I decided to try our hand at ballasting some track that was already painted. It worked pretty well although its going to take a looooonnnnng time. We did about 8 feet and it took an hour. There will be a learning curve, so I expect it will go a bit faster. But still, there's a lot of track to do even with discounting the area under the mountains and city.


Several things immediately became evident that I hadn't considered. First was the amount of stone that would be going overboard onto the floor. So we took a largish cardboard box and sealed the inside with masking tape so the tiny stones wouldn't get stuck in the flaps. Then, with my able assistants, we were able to follow the pouring operation with the box to catch the overflow. The second challenge was removing the excess that piles up between tracks. For that I made a little scoop out of cardboard, but we also realized that this excess could be pushed towards the other track and used to ballast that track.


As many of you know, the process is pour, shape, spray with alcohol and then, using a pipette, drip thinned Artist's Matte Medium as an adhesive. Many folks use thinned white glue. I made a shaping template based on a post from another forum member. I described this tool in the layout build thread on the Design forum, so I won't bore anyone with that detail.


One of the concerns I have after seeing the finished product is the ballast is a little to high up on the ties. We brushed it off level with the tie tops, but I'd like it a bit lower. 


I didn't attempt at this time to mix in any different colors, but I'm thinking about ways to do it. Grandson #1 suggested going back with the airbrush and adding some more rail brown/rust to the ballast near the rails which is very prototypical. The rust runs down into the rock as soon as it rains.


Here's our result so far. It's not yet cured as of these pictures.


Ballasting 04jpg


Ballasting 03\


Ballasting 02


Ballasting 01


This last picture can't seem to realize that I wanted to rotate it 90º. I rotate it, but it keeps loading in it's original orientation. 


 Ballasting 05

When the paint arrives next week, I'll stop ballasting and get back to painting. I may use some tinted alcohol/India Ink washes and/or weathering powers to kill that pristine "white" look. Also there should be some darkening in between as well since lots of dirt, lube, etc., bathes that area.

Attachments

Images (5)
  • Ballasting 04jpg
  • Ballasting 03
  • Ballasting 02
  • Ballasting 01
  • Ballasting 05

Trainman2001, I know these are not original ideas, but what I did was to spray both the track and ties with Floquil rail brown before putting down  ballast.  As you show in your photo, both rails and ties on the prototype get that "brown" look.  I then use roofing granules for the ballast.  As you can see they can come in mixed colors (I use two different ones - a brown for the main lines and a grey for the yards, secondary lines).


IMG_5193

Attachments

Images (1)
  • IMG_5193

It's great fun tracking your progress, Myles!  Keep in mind that many of the "learning experiences" you're going through as you build your layout would make fine how-to articles for the magazine, particularly if you come across something new and different that seems to work well.  The $ for published articles can help defray P&P construction costs. 

That's some nice looking trackwork. Whose truss bridge is that? It looks like the Plastruct bridges that I bought which I'm going to turn upside down. I chose not to use solvent based paint since the basement is not well-ventilated and the smell gets into the house and is not appreciated by my supportive spouse.


Allan, I'd love to publish in the magazine. I've written enough text in this blog alone to produce several articles. I do feel that most of what I'm doing are well-known techniques. Once in a while I do something out of the ordinary, but often I'm implementing things of which I've read or have been told by folks who are reading the build thread. A perfect example is the swing gate which was inspired by Clem K. While I chose to incorporate L-girder construction using lighter members, it closely follows his gate in that it is hinged on one side with a piano hinge and supported by two, in-line, fixed casters set on the radius of the hinge line. The interlocking switch is my own design, but the timing circuit it controls was offered by another reader. And so it goes.


Perhaps you can give me some guidelines about what I should be watching out for.


I was hoping to write an article about scratch-building the Victorian NYO&W station, but I won't get back to that project until some of the landscaping is done.


Meanwhile, the grandkids and I did some more serious ballasting today. The older one tried his hand at using some weathering powders to add some character to the ballast. At first he was a little heavy-handed, but got the hang of it and produced some interesting results. Meanwhile, the 8 year-old did some serious production. He fully understands what we're trying to do here and was able to be on the platform working on the track obscured by the control panel. I spent time ballasting two switches. 2 down and 24 to go. I was very careful to get no ballast in the area of the moving points. I'd rather have no ballast there then to have a stone foul the mechanism and cause a problem. I think the switches look terrific with ballast. It takes a good day for the Matte Medium to set up. We ran out of it and will be making a run tomorrow to replenish my supply. The paint should arrive early next week and we'll be back in the painting business.


Here are images of today's progress. The right-hand track is the weathering experiment.


Ballasting 09


Any suggestions on what type of landscaping should go in the between-track areas?


Ballasting 08


Ballasting 07


Both boys commented that the ballasting makes it no longer look like a toy train setup, rather it looks like you took real railroad track and hit it with a 1:48 shrink ray. That's just the reaction I'm looking for. Both these kids "Get it".

Attachments

Images (3)
  • Ballasting 09
  • Ballasting 08
  • Ballasting 07

That's some nice looking trackwork. Whose truss bridge is that? It looks like the Plastruct bridges that I bought which I'm going to turn upside down. I chose not to use solvent based paint since the basement is not well-ventilated and the smell gets into the house and is not appreciated by my supportive spouse.


Yes, that is a Plastruct bridge. I had to replace two of the Lionel truss bridges there when I discovered they would not clear a double stack car (the hard way!)

Peter, did you add rivet detail to the gusset plates? Since I don't have a sensi-press (something I'll probably get in the future), I bought those rivet decal sheets from Micro-Mark to see if they'll work. I used them a bit on a school project with my grandson, but haven't tried on any serious model making yet. If they work, they should be easier than impressing rivets with a ponce wheel. 


Since we ran out of adhesive yesterday, we went to the hobby shop this afternoon for some Woodlands Scenic scenery glue, but the hobby shop was closed. They now have Summer Season hours with closed on Sundays. Bummer!


Went to The Home Depot and they didn't have any white glue! Everything they had was a more specialized wood glue and they all didn't dry clear. 


Tomorrow I'll go back to the LHS and get want I need.


Here's the modified plans for the Plastruct Truss to turn it into a Deck Truss. After reviewing the literature, it was clear that the deck bridge didn't have to be as wide as a through truss since nothing had to pass inside it. Most of the structure sits directly under the rail loading area. When the bridge got narrower, it also didn't have to be as high for the same reason, so I reduced both the width and height of the re-design. Now all I have to do is build two of them. There's no rush since the temporary planks are serving as perfectly adequate bridges. I need to add another florescent light at that end of the layout. It's too dark there and it will be a feature that should be well lit.


Attachments

Last edited by Trainman2001

No,  I tried using a variety of punches and found that without a rivet press, the thickness of the plastic prevented anything I was using to make an impression. I miss the look of the rivets but have to admit that unless I am thinking of that when I am looking at the bridge, I don't notice they are not there.

Thank you very much!


Peter, just imagine that it's a more modern all-welded construction. I don't think that this kind of construction uses as many rivets today. I may end up going the same route as you if the rivet decals don't work out. When I used them on the school project. I used water-based paint over top and the decals started breaking down. Now, I'll over coat them with Dull Coat to provide a water barrier before I apply the acrylic top colors and weathering.


I bought Woodland Scenics liquid scenery glue. It's pre-thinned for use with an eyedropper or spraying. It's not cheap either, but it's easy to use. I also found out that the area between the two tracks is also gravel so I filled in some of it to see how it looks. It looks fine. I also bought the Woodland Scenics Scenery paint starter set. I mixed some slate gray into the glue and then eyedroppered some down the middle of the inter track area. Since this would be a drainage area it would be a bit more weathered than the surrounding gravel. One of the pictures I saw even showed some vegetation growing in this area. It will be fun to add these details and bring the RR alive.

Boy! It's been a while since I posted. My last post was on the second page...


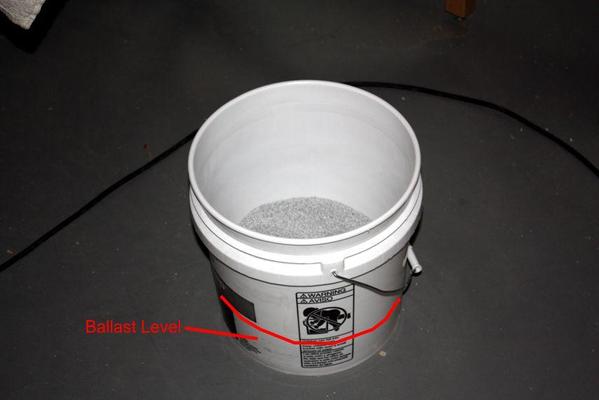
Track painting and ballasting continues. I lost a week due to a persistent sinus infection and cold, but got back to the RR this week. I'm going through ballast at an alarming rate I have less than 1/4 left of that pail, but only have 1/3 (or less) of the layout ballasted.


Ballast Test 14


When full that pail weighs almost 50 pounds and I don't look forward to dragging another one out of the car and down to the basement since I pulled my back out getting this one there.


Here's a shot looking down the front main line showing all those stones. It's hard to tell by this picture, but the ballast covering between the tracks is just one stone thick, versus the piles that are covering the track and roadbed. I noticed that areas between double tracks are ballasted, but in the wider areas there will be ground cover, cinders, and some grasses.


Ballast Progress


Please note: once again, I was able to get all 30 feet in focus using CombineZP photo stitching software. It combined 7 exposures each focused further into the distance.


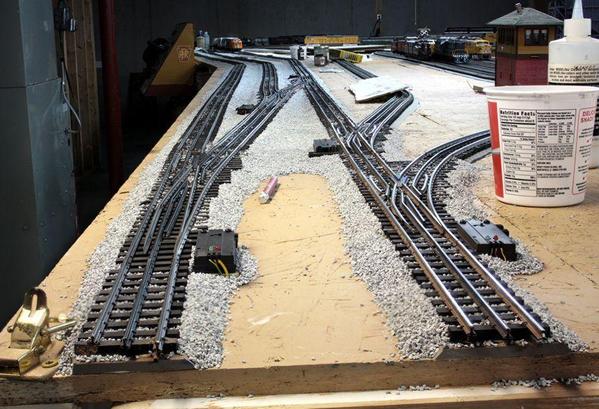
I got the swing gate ballasted today. I put masking tape on the ends to trap the ballast until it cures. I've also been very careful about ballasting around the Ross switches. No stones under the moving parts.


Ballast Test 13


Ballasting 12


I've learned some things moving along. I solved the terrible air brush problem. The gun was just working awfully, stopping and starting and blocking up constantly. Apparently it was pulling thick paint off the bottom of the 1 oz. paint bottle which was gumming up the works. So I tried using the larger 2 oz. bottle, but still with the shorter pickup tube. In this way the paint was being pulled a 1/4" from the bottom. Besides being a bigger reservoir, the air brush worked perfectly letting me blast away at foot after foot of track. 


I also found that Artist's Matte Medium mixed 50/50 with water works better than the pre-mixed Woodlands Scenics Scenery Cement. It's not cheap, running at $20+ per bottle, but it's holds like crazy once dry.


I've tried it both ways; pre-cleaning the rails before painting, or just blasting away. The jury's still out so I'm just blasting away. 


I stopped using the template to shape the stones and just carefully spread and position it with a brush. The template was springy and just splattered stones all over the place. I can control it much better and it reduces the cleanup chores.


Ross track ties are pretty tall and it takes a lot of ballast to do each foot of track, but the results are worth it. The painted and ballasted track looks much better than bare.


I painted the track around the right-hand back curve and then woke up this morning remembering that there's supposed to be a mountain and tunnels in that area, ergo, no ballast or paint. So I made sure I marked the OSB where the tunnel will be so I knew where to stop ballasting. No use in wasting precious time or resources putting detail that will never be seen.


With all the trains on the tracks, I'm having to jockey them around so they don't get sprayed or stoned. Notice that I've been ballasting the "easy" to reach tracks first. There are some areas, that are going to more challenging.


I'm also getting teased by my wife about the size of the railroad and the quantity of materials it's going to consume to finish it. She's right!

Attachments

Images (4)
  • Ballast Test 14
  • Ballast Progress
  • Ballast Test 13
  • Ballasting 12

As before, this ballasting project is a slow mover thereby creating dead spots in my daily reporting schedule. Have no fear... progress is being made albeit slowly.


Before I give today's report, I want to give a shout out to the Cincinnati History Museum housed in the fabulously restored Art Deco masterpiece... the Cincinnati Union Terminal. This museum/Working Amtrak Station houses three museums; Science, History and Duke Energy Children's Museum. Plus there is an IMAX and the station structure itself. I've driven by this edifice many times in my trips to Cincy while working for Henkel and always wanted to see the insides. It exceeded my wife's and my expectations... by a lot. There's even a perfectly executed model of an NYC Niagara in 3/4" to foot scale; an oil-fired, live steam model. It was hidden in the lower-level elevator lobby. If we had chosen to take the stairs we would have missed it. The interactive model of the entire Cincy downtown is wonderful...sorry it's in HO. If it was O... well, they'd need a bigger station. Next, I want to get my grandkids there. 


As of yesterday I've almost finished air brushing all of the exposed trackage. All that's left now is the main yard tracks. I'm continuing to ballast the rear portion of the layout working from right to left. I find everything works better if I give the acrylic track paint a full day to dry. When I rush it, the alcohol/water wetting agent tends to negatively affect the paint. I purchased another tub of roofing granules and may have to buy another. I also bought another two bottles of Woodland Scenics Scenery Cement and will definitely have to buy more of those too, I'm afraid. Lastly I added another shop light at the dark end of the layout and bought lumber to make some train shelves so I can get the remaining trains out of their boxes.


In order to do the entire back portion, I had to get all the trains and rolling stock to the front. This was facilitated by having cab control where I could move one train while keeping another quiet regardless of where they were on the layout. Here's a pile of rolling stock. I'm glad I put that intermediate passing siding in the front. This will help shunt trains past the passenger station that's going into this area.


Ballast Switch Moves


Here's the extent of the track painting. As I noted in the last post, once I changed my bottle on the air brush from the one ounce to the two ounce with the siphon tube off the bottom I had no problems. I air brushed for a half hour without a single hiccup. It was actually fun!


Ballasting 15


I'm also spraying the light tan urethane Ross Bed switch bases so they're more hidden when the ballast goes on. Man! I really like those rusty rails! It also tones down the stark "fresh creosote" look of the Ross ties.


Ballasting 14


The ballast itself is about a quarter way across the back now. If I only could get those section gangs moving a little faster I could be building mountains now...


Ballasting 16


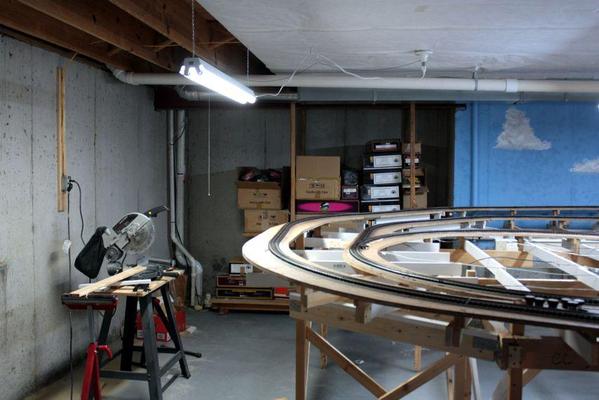
And finally, here's the new light fixture. There's still some darkness in that corner, but it's much better. It also provides much needed lighting to the chop saw. By mounting it a little beyond the layout edge, it helps illuminate the sides of the trains on the outer loop.


Ballasting 17


I spray-painted the rails on the tracks at the "future-bridges", but I'm not going to ballast them. Once tracks are ballasted, they really don't like being removed and these tracks are temporary. I also did not paint the tracks on the curves in the foreground in this picture since they are going to run under the city. You may see their edges or not. I'm not sure how I'm going to approach this.

Attachments

Images (5)
  • Ballast Switch Moves
  • Ballasting 15
  • Ballasting 14
  • Ballasting 16
  • Ballasting 17

Thanks!


I just wish I could do it a bit faster, but if I do, all I get are lots of little stones all over the place.


A note about Roofing granules: they appear to be a manufactured product rather than crushed rock. I'm going to figure a way to darken them for the yard tracks. I'm going to try using a heavy alcohol/India Ink wash as the wetting agent. On my trial piece it did darken it a bit. They make black granules, but the roofing supply place where I purchased this didn't stock it.

Originally Posted by Trainman2001:

I'm going to figure a way to darken them for the yard tracks. I'm going to try using a heavy alcohol/India Ink wash as the wetting agent. On my trial piece it did darken it a bit. They make black granules, but the roofing supply place where I purchased this didn't stock it.

Put them in a jar with the I/A, shake, and strain. That will darken them up nicely.

Add Reply

Post

OGR Publishing, Inc., 1310 Eastside Centre Ct, Suite 6, Mountain Home, AR 72653
800-980-OGRR (6477)
www.ogaugerr.com

×
×
×
×
Link copied to your clipboard.
×
×