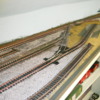
So I'm converting my engines to Battery-Power, Remote-Control, eliminating the middle "training wheels".


Now I've really done it:


3rd rail removed c

3rd rail removed a

3rd rail removed b


Not sure what you'd call that pair of round-faced cutters, but all I had to do was squeeze the rail and give the cutters a slight roll to pop the rail up out of the grooves in the ties.  Has to be done at each tie, but there's hardly any mess.  The rail with the grooves in the ties is Gargraves.  The Ross track and switches have spikes at each tie, I had to pry one end up and once I could slide a tongue depressor under it I could move the tongue depressor along the track and lift the center rail up.  Had to follow that with a pair of small needle-nosed pliers to get all the spikes.  It took about 1 hour to pull the middle rail in the engine/TT area.


BUT...I'm kepping the Hi-Rail flanges on all my engines and rolling stock.


I don't fit in anywhere now .  What to do, what to do

Attachments

Images (3)
  • 3rd rail removed c
  • 3rd rail removed a
  • 3rd rail removed b
Last edited by Bob Delbridge
Original Post

Replies sorted oldest to newest

Originally Posted by Bob Delbridge:

So I'm converting my engines to Battery-Power, Remote-Control, eliminating the middle "training wheels".


Now I've really done it:


3rd rail removed c

3rd rail removed a

3rd rail removed b


Not sure what you'd call that pair of round-faced cutters, but all I had to do was squeeze the rail and give the cutters a slight roll to pop the rail up out of the grooves in the ties.  Has to be done at each tie, but there's hardly any mess.  The rail with the grooves in the ties is Gargraves.  The Ross track and switches have spikes at each tie, I had to pry one end up and once I could slide a tongue depressor under it I could move the tongue depressor along the track and lift the center rail up.  Had to follow that with a pair of small needle-nosed pliers to get all the spikes.  It took about 1 hour to pull the middle rail in the engine/TT area.


BUT...I'm kepping the Hi-Rail flanges on all my engines and rolling stock.


I don't fit in anywhere now .  What to do, what to do

I think 3rl will accept you 'cause you maintain the deep flange wheels & 2rl should welcome you because you run on 2rls. Just my 2 cents.


Al Hummel

The trick is to go slow using those "nippers", too fast and I break a tie (or a dozen).


It didn't take as long to tear it up as it did to put it down


I'm about to find out if 2-rail REALLY is quieter than 3-rails (from a previous topic).


This may prompt me to get going and finish ballasting, etc.  If nothing else than to cover the bare spots left from removing the middle rail.

Originally Posted by Bob Delbridge:

So I'm converting my engines to Battery-Power, Remote-Control, eliminating the middle "training wheels".


Now I've really done it:


3rd rail removed c

3rd rail removed a

3rd rail removed b


Not sure what you'd call that pair of round-faced cutters, but all I had to do was squeeze the rail and give the cutters a slight roll to pop the rail up out of the grooves in the ties.  Has to be done at each tie, but there's hardly any mess.  The rail with the grooves in the ties is Gargraves.  The Ross track and switches have spikes at each tie, I had to pry one end up and once I could slide a tongue depressor under it I could move the tongue depressor along the track and lift the center rail up.  Had to follow that with a pair of small needle-nosed pliers to get all the spikes.  It took about 1 hour to pull the middle rail in the engine/TT area.


BUT...I'm kepping the Hi-Rail flanges on all my engines and rolling stock.


I don't fit in anywhere now .  What to do, what to do


Welcome to my world!  Well, not quite. 


That looks very nice... and it is much closer to 2-rail scale than the two rail tinplate track I have on my clockwork layout:


LayoutJan2015


In all seriousness, I look forward to seeing your progress on this venture.  I'm surprised more people don't go 2-rail using tinplate wheels, rails and switches.  The battery power/remote control aspect should be interesting as well.  You have my attention...


Attachments

Images (1)
  • LayoutJan2015

Bob,


I've been tempted to go "dead rail"  for some time now.  Lotsa pro's and con's.  The con's have won out to this point.  If I only had a few engines I think I would have done it.  But, with more than a few engines it seems to get expensive -- if -- one already has a wired command (DCC 2 rail in my case) layout.


What is your plan for your engines?  For example, R/C components in each engine or engine/tender or a few Auxiliary R/C Power cars.  Will this involve "many" or "few" engines?


Good luck.


Bill

Thanks guys!  I feel like General Sherman marching thru Atlanta


I've posted on the RC Sub-forum about the system I'm using:


https://ogrforum.ogaugerr.com/t...imperial-0-6-0-video


Austin Bill, I feel your pain.  Right now I have 6 sets of PS2 guts sitting on the bench that have been pulled out of my steam engines.  My DCS and TMCC systems are sitting on the floor, lifeless.  Pulling up the middle rail on the Ross switches was not a pleasant thing $$$-wise, but I had no choice.


If someone who owns a "Shelf Queen" IMO this would be the ideal system to bring it back to life.  Up until today (for the past several weeks) I was running my BPRC engines on the same track as my PS2/TMCC engines.  I woke up this morning with wrecking ball in hand and started pulling up rail.  I determined it was less expensive to convert the existing rail than it was to but new and besides, I couldn't find any 2-rail that I knew would allow the Hi-rail flanges.


So far I have a MTH 0-6-0, 2-8-0, Williams brass 2-8-2 (I had my Williams brass N&W J converted but took it out to convert another engine), and a Weaver 4-6-0/scratch built 4-6-0.  I need to get 3 more sets to convert another MTH 2-8-0, a Williams brass 4-6-2, and the J.  At this point I don't know what I'm going to do with my diesels (may give them to my grandsons).


Lighting for passenger cars will have to be batteries/LEDs, yet to come.


One thing I've noticed, I was having derailing issues with my 2-8-2 on a couple of 054 switches.  With the middle rail gone they seem to have disappeared (still debating that).

Originally Posted by Bob Delbridge:

Thanks guys!  I feel like General Sherman marching thru Atlanta


I've posted on the RC Sub-forum about the system I'm using:


https://ogrforum.ogaugerr.com/t...imperial-0-6-0-video


Austin Bill, I feel your pain.  Right now I have 6 sets of PS2 guts sitting on the bench that have been pulled out of my steam engines.  My DCS and TMCC systems are sitting on the floor, lifeless.  Pulling up the middle rail on the Ross switches was not a pleasant thing $$$-wise, but I had no choice.


If someone who owns a "Shelf Queen" IMO this would be the ideal system to bring it back to life.  Up until today (for the past several weeks) I was running my BPRC engines on the same track as my PS2/TMCC engines.  I woke up this morning with wrecking ball in hand and started pulling up rail.  I determined it was less expensive to convert the existing rail than it was to but new and besides, I couldn't find any 2-rail that I knew would allow the Hi-rail flanges.


So far I have a MTH 0-6-0, 2-8-0, Williams brass 2-8-2 (I had my Williams brass N&W J converted but took it out to convert another engine), and a Weaver 4-6-0/scratch built 4-6-0.  I need to get 3 more sets to convert another MTH 2-8-0, a Williams brass 4-6-2, and the J.  At this point I don't know what I'm going to do with my diesels (may give them to my grandsons).


Lighting for passenger cars will have to be batteries/LEDs, yet to come.


One thing I've noticed, I was having derailing issues with my 2-8-2 on a couple of 054 switches.  With the middle rail gone they seem to have disappeared (still debating that).

Gargraves and Ross both make all of their track in 2R Hi-rail if you need to buy some more. Infact I have a whole bundle of Gargraves 2R flex for sale if you are interested. I experimented with 2RHR a while back, but I decided to just go full 2R instead.

Last edited by jonnyspeed

Jonathan,


I think one of your posts clued me in on Gargraves 2R track,  thanks!


I looked at their site and ended up emailing them with a few questions, that's when I decided to remove my center rail instead of buying new.


I didn't know or recall that Ross also made 2R track, I'll have to look as I prefer the way theirs is made (rails bent under, glued and spiked, instead of embedded in the ties).


It's also easier to remove the center rail on Ross (simply get one end lifted then start pulling) and looks better when done (no slot cut in the ties).


I ran my 2-8-2 again last night and didn't have any derailments in the engine facility area where I have 3 switches back-to-back, only thing I can think of is the middle rail was causing the derailments.


LOL, I also found out why I was initially having a problem with power in one location on the layout.  When I laid the track I didn't put a pin in the center rail!!!  There was a nice, big gap there, go figure.  I had fixed it by putting a jumper in the location months ago but now I know why.

Thanks Christopher!


I'm a bit over 50% complete on removing the center rail.  The most difficult pieces are the Gargraves flex track that has been ballasted and glued and the glue is making the rail removal slower than the pieces that haven't been ballasted.  the most time consuming is finding/removing the spikes from the Ross track/switches, a magnet works fine.


I'm trying to think of what to use to fill in the grooves where the center rail was inserted in the Gargraves track, maybe wood putty then paint it over?

Lighting for passenger cars will have to be batteries/LEDs, yet to come.

Just completed my first, a PRR diner*. Evan's Designs chip LED's powered by a pair of AA batteries with an on-off switch nestled, fortuitously, within the sills of the (kit) car. Even though I run at a 3-rail club, all my cars are 2-rail with couplers mounted on swing arms. Converting the rest ought to keep me off the street and out of bars for a long time.


*Bought it off'n the 'Bay; was an American Standard, likely Pullman prototype, but really well done. Figured it would be my test mule.


Last edited by rex desilets
Originally Posted by Bob Delbridge:


I'm trying to think of what to use to fill in the grooves where the center rail was inserted in the Gargraves track, maybe wood putty then paint it over?

Bob,  I'm not really familiar with Gargraves track, but if the ties are wood I'd use the wood putty.....if they're plastic, some type of epoxy. Then paint in either case.


Simon

"I'm trying to think of what to use to fill in the grooves where the center rail was inserted in the Gargraves track"


   A small tube of painter's caulk might be an easy way. Trim the nozzle so it puts out as thin bead, squirt it in and wipe off the excess? It comes  in brown or black to make covering it with paint easier.If you ballast the track after filling the grooves you won't be able to see any flaws in the sides of the ties so only the top surface  will need to be smooth......DaveB

Originally Posted by Bob Delbridge:

......fill in the grooves where the center rail was inserted in the Gargraves track.....

Sounds like one of the definitions of tedious in Webster's,

The caulk option might be the least painful and you might indeed be able to get a good dark color that won't be glaringly obvious (weathering and paint and all....). 


Please share more pictures of your adventure!

I bought some caulk (white's all they had) and some blacktop repair (well...black) so I'll see how it goes filling those grooves.


When I redid the engine facility several months ago all I had was 054 switches and didn't want to spend anymore $$$ than necessary.


Well, I should have spent the $$$ and gotten 072 switches because I've had nothing but issues with keep the 2-8-2, 4-6-0, and 4-6-2 on the track.


Being I still didn't want to spend the $$$ (plus I have a good supply of Ross rail now with all the center taken up) I decided to try my hand at "semi" turnout building.


I had a spare 054 LH turnout so I pulled all the curved pieces up and scrounged thru the pile of center rail until I found pieces that I could use.  I used the 054 straights and tie-base, all I had to do is glue/spike the 072 curves in place and do some surgery on the 054 frog to turn it into a 072 frog.  I printed out a Ross 072 diagram so I could lay the parts over it to make sure things were where they were suppose to be.


I've got one done and need to convert another.  This is also causing me to reposition the track work around the TT and engine house.


So right now there's no movement on the layout, got a few cars stranded at their destinations for a few days.


Here's some pix:


DSCN0263_097

DSCN0256_090

DSCN0257_091

DSCN0258_092

DSCN0259_093

DSCN0261_095

DSCN0262_096


Looks like I get to redo the ground cover and scenery sooner than I had planned, I'm going to have to rip up a bunch of it to make way for the moved roadbed

Attachments

Images (7)
  • DSCN0263_097
  • DSCN0256_090
  • DSCN0257_091
  • DSCN0258_092
  • DSCN0259_093
  • DSCN0261_095
  • DSCN0262_096

" I decided to try my hand at "semi" turnout building.

 I had a spare 054 LH turnout so I pulled all the curved pieces up and scrounged thru the pile of center rail until I found pieces that I could use.  I used the 054 straights and tie-base, all I had to do is glue/spike the 072 curves in place and do some surgery on the 054 frog to turn it into a 072 frog.  I printed out a Ross 072 diagram so I could lay the parts over it to make sure things were where they were suppose to be."


   It's a slippery slope once one has a taste of hand laying their turnouts. Next thing you know you'll be scratch building P-48 #8's from code 125 rail and telling your wife they're just old O-27's :> ......DaveB

Whatever you do, try to do it so you do not have to sand anything.  You can always paint the entire tie.  I might even opt for lacquer-based auto putty - dries fast, you can re-coat it, and carve loose stuff off with a knife.  Plus, if you really need to sand it, it will go quickly.


I have been advocating something like this for years, for those who love sharp corners and hate center rails.  Your track looks a lotbetter now even with the damage in the center of the ties.  You would be surprised how many real railroads have such markings in the center.

"I was "layin a cussin" on those tiny spikes , then I figured if I drilled a tiny hole first they might go in better."


     If the ties are soft enough wood you should be able to push spikes in by gripping them with needle nose pliers about half way up the shaft then when the first half goes in move up to the top and finish. The roadbed under the ties also needs to be soft enough to not bend the spikes when they hit it. After a few feet of track you'll find a method that works for you...DaveB

Bob, didn't think about the Bondo putty, I have a tube I can use.


Dave, some of the spikes Ross uses are pointed, most have a square end   I drill a tiny hole first and they went in fine with enough grab to hold them in place.


I may have found the problem with one of those 054 turnouts.  The end of the points that pivot on the tie were only 1-1/8" wide, instead of 1-1/4".  I ended up drilling another hole and moving the pivot pin to get it back to the correct width.


I'm working on the 2nd turnout now.

Originally Posted by bob2:

Whatever you do, try to do it so you do not have to sand anything.  You can always paint the entire tie.  I might even opt for lacquer-based auto putty - dries fast, you can re-coat it, and carve loose stuff off with a knife.  Plus, if you really need to sand it, it will go quickly.


Most of the REAL ties I see are rough enough that I wouldn't even think about sanding! Just color the filler and they're good to go!


Simon

I'm about 2/3 done with filling the grooves left from removing the center rail.


I'm using a tube of latex caulk that I can squeeze, placing a drop on each tie as I go, then I scrape away as much of what's sitting on top of the ties as I can.  After it cured I went over each spot with a black Sharpie to hide the white-colored caulk.


It came out alright, just need to go back and finish ballasting and such.


Shown is a piece of Gargraves track (on the left side of the 1st photo) before applying the caulk (the piece on the right is a piece of Ross, no groove, spikes instead):


DSCN0264_098


This shows a piece of track with caulk applied:


DSCN0265_099


After curing and coloring with the Sharpie:


DSCN0266_100


It'll take me probably another 4 hours to finish filling the grooves I have left.

Attachments

Images (3)
  • DSCN0264_098
  • DSCN0265_099
  • DSCN0266_100

Add Reply

Post

OGR Publishing, Inc., 1310 Eastside Centre Ct, Suite 6, Mountain Home, AR 72653
800-980-OGRR (6477)
www.ogaugerr.com

×
×
×
×
Link copied to your clipboard.
×
×