Originally Posted by Steamer:

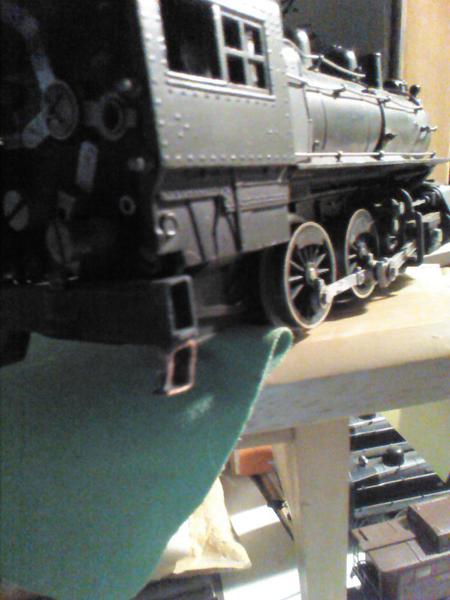
most of these steamers found their way to me as bare shells. The tender behind my 225E is a mixture of a 1680 frame,busted 2046 shell, and some PVC. The green Prewar passenger cars were a $1 each missing roofs and most of their trucks.but the paint was still good.1664 got a 675 motor, and an unfinished 4-8-4 from two broken 1666 shells.


Fantastic work with all of them

Originally Posted by Steamer:

most of these steamers found their way to me as bare shells. The tender behind my 225E is a mixture of a 1680 frame,busted 2046 shell, and some PVC. The green Prewar passenger cars were a $1 each missing roofs and most of their trucks.but the paint was still good.1664 got a 675 motor, and an unfinished 4-8-4 from two broken 1666 shells.


PTDC0005 [1)

PTDC0001

224E

PTDC0014

PTDC0016

1664

2026

PTDC0004

PTDC0001

I have the pre war passenger cars and I added a second center rail roller to each of them for better lighting. I am using regular incandescent lights with them.


Lee Fritz


I had a Lionel # 235 scout engine from the 1960's and the motor went bad in it. A friend of mine gave me an engine with a badly warped shell(I bought a few Lionel items from him as well) and so I found the donor motor for my 235 scout engine. The motor was a newer DC 3 rail Lionel engine from a starter set and I converted the 235 to a 2-4-0 instead of a 2-4-2.

The other project I did was to modify an older 027 switch that was nearly ruined, it's housing was beyond normal repair and no solenoid was in it, most people would have trashed it. I stripped it down to just the tracks and base and then put a DZ-1000 switch motor on it, now I have an 027 switch that has better curve capability as the switch housing is gone from it. This was not hard to do as the 027 switch base throw piece mated up to the DZ-1000 with just one of the switch motor pieces.


Lee Fritz

Steamer,

I see you finally got a Streamline "Torpedo" shell, from the photo you have posted.  The shell you have in the photo is the 1668 shell, which is a 2-6-2 arrangement, versus a 1688 which is 2-4-2.  The shell that you have can use a motor from either a 1668 or a 1666 (prewar versions).  The running gear for both is the same, and can be interchanged.  Just get the proper side rods for the 1668.  Don't know if you have a motor to throw into it, but don't discount the idea of finding a 1666 motor that is cheaper at times in auctions.  If you are confident with repairing and rehabbing a motor, shop for either motor, as they are one and the same.  The one difference would be "nickel rims" from the 1666, which wouldn't look right on the 1668.   Have fun with your project.

Steamer,


What did you mean by headlight bracket??  There is a lens that would go into the hole in the front (clear lens) part # 752-15 which most all parts suppliers have.  If you are referring to the RED marker lights, I think the part # is 249-1 (off the top of my head), which are also very available.  Just curious what you meant.

A big Thank You, again, to the additional "likes" I have received for my posts.  They are very much appreciated.


Marx never made baggage cars for their 3/16 scale line, so here is what I did.  The side of the Santa Fe is a photo print from another car.  The color doesn't match well, because the computer couldn't realize silver as a color, I guess, just a metal.  No matter how long I or my wife fiddled with it, this is the closest we could come.


The NYC, however, uses putty, paint and decals to transform it.


Both cars were coaches, the type that Marx made with windows indented and lithographed rather than punched out.  They came from a junk box and had been poorly painted Baby Blue, with silver brushed on top of that.

IMG_3601

IMG_3478

Attachments

Images (2)
  • IMG_3601
  • IMG_3478

Dave,

A buyer/seller pal, picked some extra Marx NYC. I'll ask for you. He is normally very reasonable price wise.

I picked up the Santa Fe set from BK, and I like them a lot. The slide shoe pickup makes for steady lighting.


TrainsR,

 Are you saying your printing those sides, or using a computer to color match?

If your printing, a good supply house should have a silver paper product of some kind. Printing the details on that, might produce something you like better.

(its great as is all things considered)


 If you wanted to get nuts, try printing on hobby foil. The car modelers use it often. You can get it slightly backed where it holds together in a sheet nicely, or with sticky backing(I find this harder). Or go old school and try your hand at a traditional skill, gilding it on yourself. My family opened the first supply houses for the sign trade in N. America. I have pictures from the early 1900's of a family bakery wagon with "Fancy Cakes" gilded shamelessly across it sides. Its stunning even in sepia. The art is just part of family tradition today. Its slow but fun and looks great. 


I'm thinking my coupling transition car could use this mod too. Thanks for sharing.


Originally Posted by Adriatic:


TrainsR,

 Are you saying your printing those sides, or using a computer to color match?

If your printing, a good supply house should have a silver paper product of some kind. Printing the details on that, might produce something you like better.

(its great as is all things considered)


What I did was to photograph a different baggage car, size it properly, and print it out after trying to get the color as close as possible.  It's interesting to note that the "Santa Fe" and "3152", which were done similarly but from the Marx car, matched.  (The car I photographed for the side panel was very close in color to the Marx car).


Thanks for your suggestions!  You really know how to think outside the box.

Originally Posted by Steamer:

those look great! need one of those NYC

I hope Adriatic can help you with a car to customize.  Try it - I know you can do it.  It's not technically difficult, just time-consuming with the many layers of putty, priming, etc.  All that was needed were white and black line HO scale decals off of Flea-bay, Testor's putty and custom-mixed paint.  Mine is finished with Humbrol enamel, brushed on.  Humbrol brushes beautifully, but reacts badly with most other paints I've tried.

Last edited by TrainsRMe

Teldoc, What's the easy to see difference in shells on the Torpedo's? 


Ok. My garbage can train.

When I was young, I would drive around and pick up scrap metal for extra cash (don't laugh too hard, I was pulling in an extra $150 a day after work in the 80s)

 Any how scanning garbage can tops became second nature, though I don't still scrap.

Not metal, but the shape caught my eye instantly.

 Being true to its nature, I fixed it as little as I felt I could. Tin can cab roof, and a table top folding support arm(old brass scrap) for a long frame mounted drawbar.

  The crossheads fell out all the time, and I hate the kind it has, so I fabricated a cover for them "to keep scrap that has strayed near the track from damaging the gear"   This is my garbage and scrap metal puller. (I think its a one year only too). The tender was fine.

 Edit: Its missing its rear truck.

249prramp250t2-4-0_zps7bebf421

Attachments

Images (1)
  • 249prramp250t2-4-0_zps7bebf421
Last edited by Adriatic
Originally Posted by Adriatic:

Teldoc, What's the easy to see difference in shells on the Torpedo's? 


Ok. My garbage can train.

When I was young, I would drive around and pick up scrap metal for extra cash (don't laugh too hard, I was pulling in an extra $150 a day after work in the 80s)

 Any how scanning garbage can tops became second nature, though I don't still scrap.

Not metal, but the shape caught my eye instantly.

 Being true to its nature, I fixed it as little as I felt I could. Tin can cab roof, and a table top folding support arm(old brass scrap) for a long frame mounted drawbar.

  The crossheads fell out all the time, and I hate the kind it has, so I fabricated a cover for them "to keep scrap that has strayed near the track from damaging the gear"   This is my garbage and scrap metal puller. (I think its a one year only too). The tender was fine.

 Edit: Its missing its rear truck.

Nice one

Adriatic,

In answer to your question on the 1688 shells only, there were basically 5 variations of the body.  There were also 3 different motors used in these variations.  First issues from 1936 used the 1681 style early motor which had tabs (look like wings) on one end of the motor for mounting to the running boards near the cab.  The latter 1681 motor mounted different from the first, and the 3rd motor had plastic pickup similar to a 1654 motor from Postwar.  They all mount differently, depending on the body/shell you have.  Speaking of the 5 variations of body they are as follows:


1. 1688E, no cab wall, roof square + extra windows - rarest
2. 1688E, no cab wall, roof square - second rarest
3. 1688E, no cab wall, no roof square, one nameplate - third rarest
4. 1688E, no cab wall, no roof square - common
5. 1688, cab wall, no roof square - common


The number 1 on the list is the very first issue of the 1688, which had forward cab windows in the casting and is very RARE, compared to the others.  An article in CTT described this RARITY, which piqued my interest to see if I could find one.  I found one about a month after reading the article, and have stripped/repainted the body, and at present it is 99% complete.  I only need the side rods to finish it.  I periodically searched ebay, and lucked out, and found a second one, which I immediately purchased.  That will also get the full treatment as the first.  The second one runs like a champ, without touching anything yet.  That is in my "To Do" pile.


The other noticeable difference is the slot for the E-Unit, on the top of the loco.  The newest version (1654 type motor) will have the E-unit all the way forward, with the lever facing forward.  All the early issues were Gunmetal Gray, and Black didn't show up until later.     Any other questions, let me know.


A photo of the Forward Cab Window version:


1688E twins-a

Attachments

Images (1)
  • 1688E twins-a

Adriatic,

     Here are photos of the 3 types of motors that are used in the 1688/1688E, depending on what year/version you would have.  Two motors are in the first photo, which is the first & second style, and the other photo is referred to as the diecast style, with an OM-26 collector on the bottom.  The motor with attached lamp socket has a manual reverse switch, which is going to be used in my 1681 loco, but the motor is the same one used in the 1688/1688E, with normal E-unit.  Various parts are interchangeable with these motors (reversing mechanisms), number of spokes on the wheels (8 spoke or 12 spoke; with or without counterweights, but most importantly the rear set of wheels have have an extended "HUB" to attach the side rods, if you were to try retain the original setup.


1688 early motors 2

1688 early motors

1662-a

Attachments

Images (3)
  • 1688 early motors 2
  • 1688 early motors
  • 1688 late
Last edited by TeleDoc

 Thank you the great refresher course!

Those were in one of Gramps display cabinets and didn't get ran.

I was a bit too short to have noticed the roof hatch.

I do remember e-units & windows being different was the easy key to a few variations of others in there too.

The die cast motor frame? That I don't think I've seen before. Did any other early trains use a similar frames? (besides critters)

 This glued down flagman's shack was dead as it was pried away from what remained of a neat old PW layout with AF accessories. (A re-laying of the track to Lionel?)


 I removed an incredible amount of spider silk while watching for Widows and Recluses.

And after some cleaning and dry lube, made a mini human recluse, and his lantern see daylight again.


  Not having cross bucks I decided some flagman, somewhere, had to have raised Old Glory outside his shack, and collected shrubbery as a toll. (Ni)


.  flagman1

 The flag's spotlight's sconce? A laser pointer's tip.

 Its a ground feed. I did the pole drop, but gave up on running real power wire to light this, at least till everything is done 99.99%..

IE power on poles will be last, if at all. I like them, but my elbows hate them


 The roof, is trimmings from rough cut lumber, and the flat a pair of chopsticks.

 The red wood alone didn't look right. It didn't blend with the red plastic at all.

  So I dry brushed PW green on, to highlight any red including the plastic reds.

That tied it together and it looks GEFM. The flash made the flatter paint lighter red & green than it really is on the close shot. Its actually a shade darker than the base.


flagmanrear1See the old glue line?

Attachments

Images (2)
  • flagman1
  • flagmanrear1

This is not a very tender story.

I took this un-run tender out of its box and then stumbled and stepped on it before it got to roll on track.


 I plastered JB weld to the inside wall. This is where I learned JB weld can be mixed to match PW black if you're willing to let it cure longer. 


scouttendernewcrack1

scouttendernewcrack2


Now I challenge you to find the JB Weld below.


scoutbash1

scoutbash2

scoutbash3

scoutbash4

ANSWER-

At the bottom, the attachments scoutbash3&4RED have a thin red line around the area, and scoutbash 5-7 shows regular plastic vs my sculpting from below.

There is no paint. Even the wood is Sharpie-d on, not painted. Luckily no rivets were damage but the crack did touch them, down low on the side. 


The frame was a bent one, from the bottom of another deal box, and too short as you can see.

I just bent it in half along the damage till it broke in half, drilled, and mounted it.

I added the hi-tech center brace because the wood I started with, flexed too much.

Its more rough cut scrap, like the Flagman's shack's roof above, from some balsa like tree not normally used for building stuff. This is light, but splintery, flakey wood.

The dollhouse makers in my family liked it for textured laminates & trim, but I don't know its name. 

Attachments

Images (12)
  • scouttendernewcrack1
  • scouttendernewcrack2
  • scoutbash1
  • scoutbash2
  • scoutbash3
  • scoutbash4
  • scoutbash3red
  • scoutbash4red
  • scoutbash5
  • scoutbash6
  • scoutbash7
  • scoutbash8

Adriatic,  Fantastic save, and it looks great.  JB Weld is my friend also.  It can repair a multitude of sins, and salvage old model trains, that others would just toss out.  I have replaced broken marker lights on a few 1615 switchers, with really good results.  It all just takes time, and your tender is a great example.  

Thank you TelDoc.

 I love my style of "junk builds junk" more than most people, I know that

I liked rat rodding cars too.

 Maybe its the freedom to drop it (or step on it).

Maybe its my love of crafts and/or "got it on the spot" engineering builds.

But I do love my junk more than my pretty items.


 I apply and wrap/mask with Handi-wrap to keep JBw thin, and its workable as a no mess putty that way. Once set enough, I peel the Handi-wrap off & have a nice shiny surface.

I work it while still a little soft to ease and speed the cutting & filing.

 Cut don't sand. It changes the texture too much.

 I use files, and knives, no sandpaper. High speed grinding works decent sometimes.


 The spot of lightness, down low, up front is a layer of JBW used as body filler on low spots. I just didn't get the color to match as well.

 I also knew that most would see that as the whole repair, or guess the other flaws were the JBW.

(I cant tell what that one nickel sized spot is. Old paint, glue, JBW, chemical spill, heat damage??????)


If you compare the two front corners vertical lengths you can see one is rounded & the other has lines revealing two "flats" from filing on it. I got lucky with the plastic(vert.) seam were the front wall meets the coal access. 

All screw bosses had to be made of JBW too, as there were none left.


Fun and easier than most would think it is. 


My first use for JB Weld was repairing brok marker light on a 1615 switcher.  I found the replacements from Olsen's, and did some cutting, trial fits, and was quite successful with the repair.  I have since added other repairs with restorations, of Junkers, and can't complain with results.  It's great stuff, once you get used to working with it.  


I am toying with an idea that will require using JB for construction of parts.  It will be centered on a 1688 body, modified of course.  Just rolling the idea around in my head.  If I think I can accomplish my idea, I will have to get another 1688 body, to work with.  Time will tell.

 My first real use was on a VW Bug motors carb flange. Not pretty, but got me 100's of miles back to home for a few bucks. (Ah, good times!)


Just a simple one tonight.

 One of three Pyro and Marx toys that "survived" all the Grandkids.

   A little played with isn't how you would put it.

 They lived in the kids toy box as junk because they were less than perfect. (yep, told you Grandpa collected big, "Pyro junk" as toys here)

 Dad was tossing the box one day, and I remembered these Marx, and a few other things I didn't feel I was ready to let go of. I saved them.


The most broken but least repaired right now is the half-track.

 It will be finished some day, maybe sooner than later now, but as of right now, an older axle holder repair is all that's happened. The rear axle is now the front as the whole front end, axle, and windshield thing happened in one swoop(???) Consider it a "before" right now. 

 It's car is one of two metal flats from my youth.   It is missing the load bearing inserts. I cant remember what inserts this one had. Tanks (Liquid Gas)? (the yellow one was the lumber car. Those inserts are gone too).

 So on the list, front bumper, windshield, & gun.

I like it sitting on the tracks vs wheels so that's the end of that issue now...

..or here at least.  


Originally Posted by TrainsRMe:

Here's a Marx E7 that was so bad I had literally cut a section out of it to use on another engine.  After gluing, puttying and priming, it's almost ready for a top coat.  I'll add a photo when it's done.

IMG_6507

IMG_6568

Well folks, I had a wee bit o' bad luck.  The Bondic-repair gave way when the front truck was being reinstalled.  So I just sanded the back side and laid on a good bit of old reliable JB Quick epoxy.  The crack does still show to some degree, of course.

IMG_6656

Attachments

Images (1)
  • IMG_6656
Last edited by TrainsRMe

The real secret to hiding cracks is to run them


The faster the better


 I do hope some find this thread inspiring and realize spending a bunch isn't the only way to have a fun time, cool layout & trains they can love and be kinda proud of.


Scrounging for parts for "junk" modeling goes right back to where this all began

Sorry buyers of new stuff, this is more "modeling railroading" if you ask me

(But I'm sure others feel the same way about their favorite part of the hobby too  


I would agree with Steamer's encouragement to anybody, and add that if you have previously built and customized model kits you a good background for this.  You would already be familiar with plastics, Testor's putty, the use of spray paint, and many of the tools involved.


Just like with restoring a collectible auto, though, make sure you can get an engine running okay before starting the body work.  

Great thread...somebody mentioned JB Weld. If I had a dollar for every steam switcher marker light I repaired, I could pay off my mortgage.


As far as my favorite "save," I bought a Lionel prewar steam switcher on eBay from a guy who swore there was no number on the smoke box door...so I bought it not knowing what it was. All I knew was the wiring looked so bad it looked like it had an actual boiler explosion! When I got it in the mail, I found out it was a # 231 in various pieces, but relatively complete. My friend rewired it for the price of a pizza and I used a pair of plyers to straighten the pilot and good old JB Weld and copper to reinforce the screw loops which were broken off. JB Weld and some more copper and I fabricated a rear cab step (not perfect but close enough for me). Almost forgot to mention...a little more JB Weld epoxy to add the (often) missing marker lights.

From the same guy on eBay, I got the tender which is from a Lionel #230, which is also fine with me.


It runs like it just came out of the Lionel factory...just 75ish years later now.

Tom 

IMG_20141026_165136

IMG_20141005_162619

Attachments

Images (2)
  • IMG_20141026_165136
  • IMG_20141005_162619
Last edited by PRR8976

Yay! A post I can relate to! 


First on my list of Junk to Second Life is some of my Marx 666s. I bought a box of 7 motors and 3 shells at a train show for $20. I also had a 1666 motor with a traction tire that ran well so I put it in the best shell (the one with the white striping). I still had more surplus so I fixed another motor and stuck it in another shell. I had to pull and press wheels on that one! 


Next is a Lionel 1666 I bought in a junk lot that was missing a wheel. Thankfully, I had another wheel that I could put on it. The contact shoes were pitted but a little solder did the trick! It still needs side rods, front and rear trucks, and a tender but it runs!


Last on my list (and maybe the coolest) is my American Flyer Prewar 565. Its missing the tender, front truck, and steam chest but it looks fantastic! It was one of my most difficult jobs!


Attachments

Images (21)
  • DSC00307
  • DSC00308
  • DSC00309
  • DSC00310
  • DSC00311
  • DSC00312
  • DSC00313
  • DSC00314
  • DSC00315
  • DSC00316
  • DSC00317
  • DSC00318
  • DSC00319
  • DSC00320
  • DSC00321
  • DSC00322
  • DSC00323
  • DSC00324
  • DSC00325
  • DSC00326
  • DSC00328

 I must look wealthy or stupid. I never get good under table train prices like that, or I'd own more junk.

 I do better trading. 


What a little brute of a switcher


How do rods even end up like cut that? Its a mystery I see much too often.


And that flyer is very cool. And you have a license to "ill" with that any way you want to.

Speaking of, that's how the former owner must have felt when he broke it. .


Originally Posted by MNCW:

Great thread...somebody mentioned JB Weld. If I had a dollar for every steam switcher marker light I repaired, I could pay off my mortgage.


As far as my favorite "save," I bought a Lionel prewar steam switcher on eBay from a guy who swore there was no number on the smoke box door...so I bought it not knowing what it was. All I knew was the wiring looked so bad it looked like it had an actual boiler explosion! When I got it in the mail, I found out it was a # 231 in various pieces, but relatively complete. My friend rewired it for the price of a pizza and I used a pair of plyers to straighten the pilot and good old JB Weld and copper to reinforce the screw loops which were broken off. JB Weld and some more copper and I fabricated a rear cab step (not perfect but close enough for me). Almost forgot to mention...a little more JB Weld epoxy to add the (often) missing marker lights.

From the same guy on eBay, I got the tender which is from a Lionel #230, which is also fine with me.


It runs like it just came out of the Lionel factory...just 75ish years later now.

Tom 


Very nice work looks great

Add Reply

Post

OGR Publishing, Inc., 1310 Eastside Centre Ct, Suite 6, Mountain Home, AR 72653
800-980-OGRR (6477)
www.ogaugerr.com

×
×
×
×
Link copied to your clipboard.
×
×