Curious why they are two pieces first and second why they say use testors plastic glue for joining them together. Don't have any on hand but if it makes a difference I'll get some.
Original Post


|
|
Replies sorted oldest to newest
Radar,
Ameritown kits are made of styrene plastic. Testors liquid glue or Plastruct bondene or plastic weld liquid glues work very well for this application. These glues will also dry very quickly.
Alan Graziano
I may be out of line here, but one needs to make sure that the parts have been thoroughly washed an dried to ensure all traces of release agent are gone. The liquid glues have never worked for me when I've forgotten this very important step.
I used Testors Model Master #8872 on mine and it worked very well. My LHS recommended it when I bought my first kit. I only have a couple of the two story buildings. The rest of mine are single story, but I didn't find anything out of line in the assembly of either one and I am pretty much a novice to all this as well. I was a bit nervous about starting my first one, because I didn't know what I was doing. Everything turned out just fine though, and prompted me to want to try another one. I have gotten better with each one as I learned more with each assembly. Painting has even improved too. ![]()
Not sure what you are talking about on the difficulty with fronts and backs, unless yours were different than mine? Could be we had different types of kits? Overall I think they have very nice kits, made from good solid, strong materials and very reasonably priced. I enjoyed building and painting them and I think it's about time for another one pretty soon. Sorry to hear you are dis-appointed with the kits.
Now, if I could build things like Alan Graziano above, I wouldn't need kits. He does some simply amazing things and all from scratch with no kits. Doubtful I will ever get to that point.
I may be out of line here, but one needs to make sure that the parts have been thoroughly washed an dried to ensure all traces of release agent are gone. The liquid glues have never worked for me when I've forgotten this very important step.
radar,
I never had much luck with Tenax either - evaporates too fast.
If you try one of the liquids recommended by Alan above, you will see a big difference. They are a heavier consistency and produce really strong bonds quickly.
As far as the design of the kits is concerned, some of us prefer to see as many separately molded parts as possible in a kit. It makes it that much easier to customize the kit by combining wall segments in different arrangements. Usually, you hear this called kitbashing.
Jim
I don't know if you are having issues with alignment and adhesive application, but I have used the corner bracing mentioned by rattler. I washed my walls in warm water and mild soap to get rid of the release agent as you did and warm water seemed to help the panels to flatten out if they were bowed a little. When I assemble my stuff I do so on graph paper to help these tired eyes align the parts. I have bashed a kit to make a 3 story building, and have 3 other bldgs. on my layout. Sometimes the edges may need a sanding to insure a tight fit. I hope your project goes well.


Having a good work surface is critical to building kits of any material. Most will recommend that you get a good section of 1/4" plate glass to work on as it provides a flat surface that even if you glue something to it, you can almost always separate it from the glass. I have 4 such work surfaces that are ~ 18" x 30".
You should also have an array of weights to hold thing down and also in place; some with good right angles are also useful for keeping things in alignment.
I prefer to use Pastruk, but the advantage Testors in a tube has is that you can put on a thick bead of it and then shove the two pieces together and get a lot of the cement there. Plastruk is brush on and its difficult to get that much, quickly. Still, I buy Plastruck by the twelve pack and seem to use a ton of it annually, I just like it much more, not just for Ameritowne, for for that, too.
We do not recommend the Tenax 7R glue for our kits. It is not well suited for the type of plastic we use. It just doesn't work very well.
Get the Testor's product. You will be much happier! ![]()
We do not recommend the Tenax 7R glue for our kits. It is not well suited for the type of plastic we use. It just doesn't work very well.
Then they are not styrene as was posted above?
I don't know if they are styrene or not, but experience with a lot of them and other kits as well as scratch-building with styrene has taught me, Styrene-only cements don't work nearly as well, for me at least, as general purpose plastic cements like Tests and Plastruck General Purpose Plastic Solvent.
I don't know if they are styrene or not, but experience with a lot of them and other kits as well as scratch-building with styrene has taught me, Styrene-only cements don't work nearly as well, for me at least, as general purpose plastic cements like Tests and Plastruck General Purpose Plastic Solvent.
Well, this is why it's important to know what materials one is working with so that good choices can be made - Tenax will work fine with styrene, but it's not going to work with many other plastics and polymeric materials. The general ones might work adequately, but using specific adhesives and glues matched to the materials is going to work better. Would be useful if kit makers would actually specify what the material is and then we could actually go get the best appropriate glues and adhesives.
Another good reason for scratchbuilding - at least you are in control of the materials you are using and can make optimal choices on adhesives.
radar,
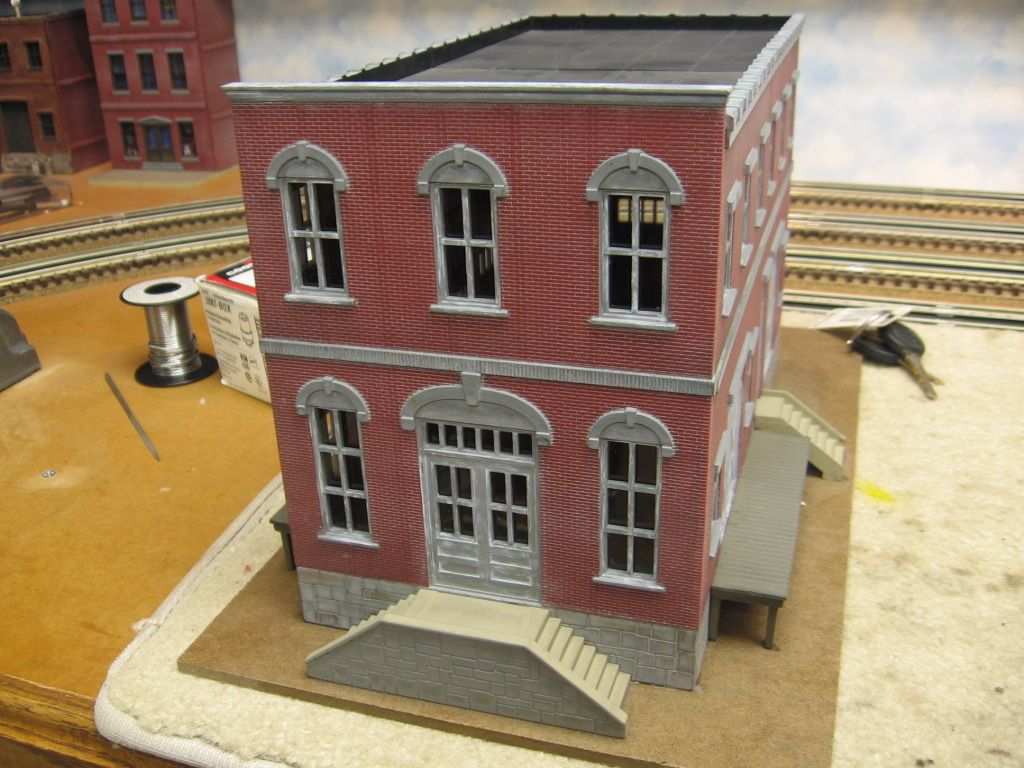
The Ameritowne kits are one of the best kits on the market(my opinion). They're easy to work with, once you get the hang of it. Before you do anything, wash all of the pieces with a good dish soap(I prefer Dawn). I like to let the pieces air dry. As suggested above, use the old fashioned model airplane glue. Test fit all pieces and make adjustments before any glue is used. The hardest thing for most of us comes into play on these kits. Do not get in a hurry working these kits. Sure as you do, everything will get messy and a whole lot on the sloppy side. Take your time, don't rush and keep your work area clean.
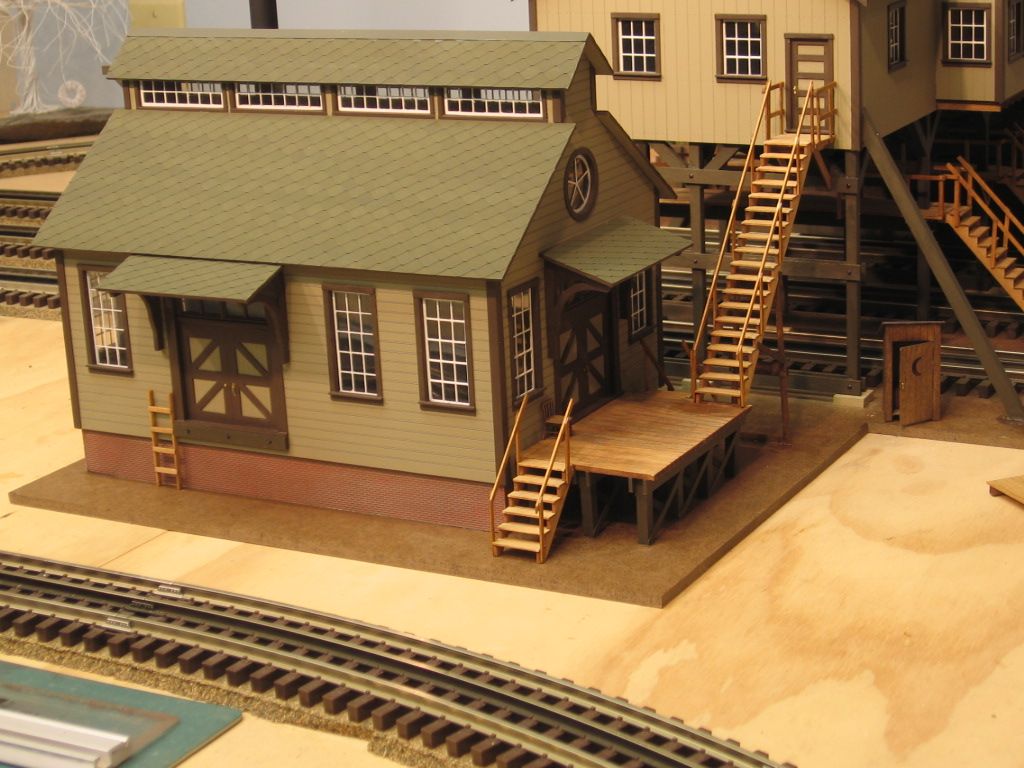
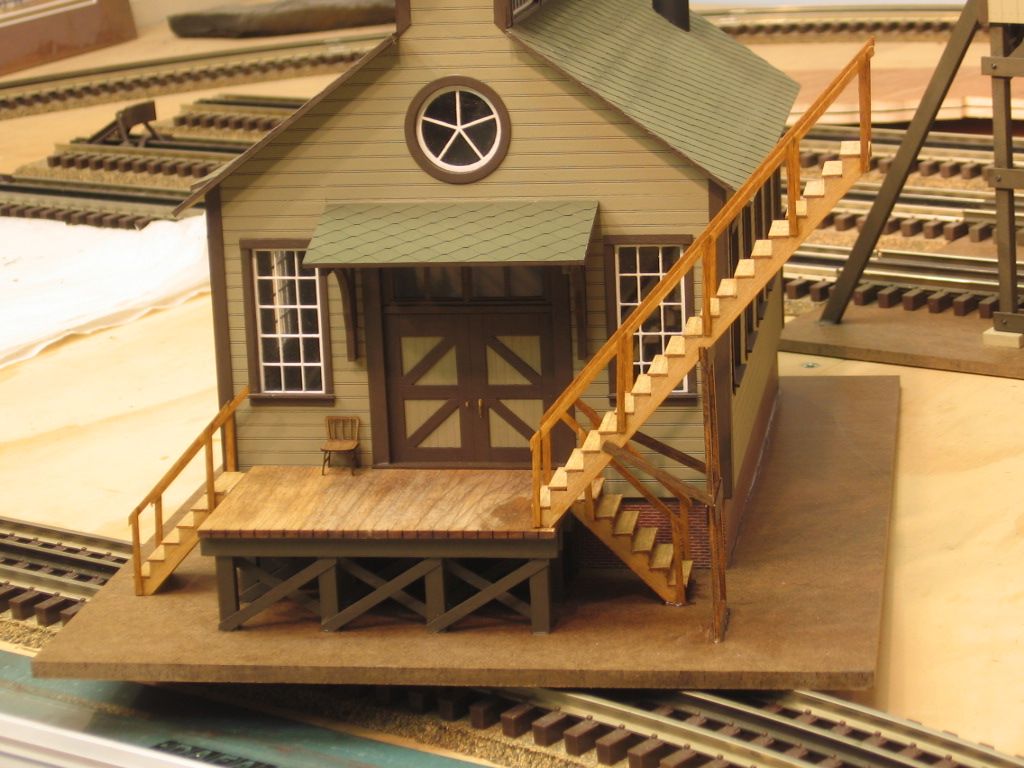
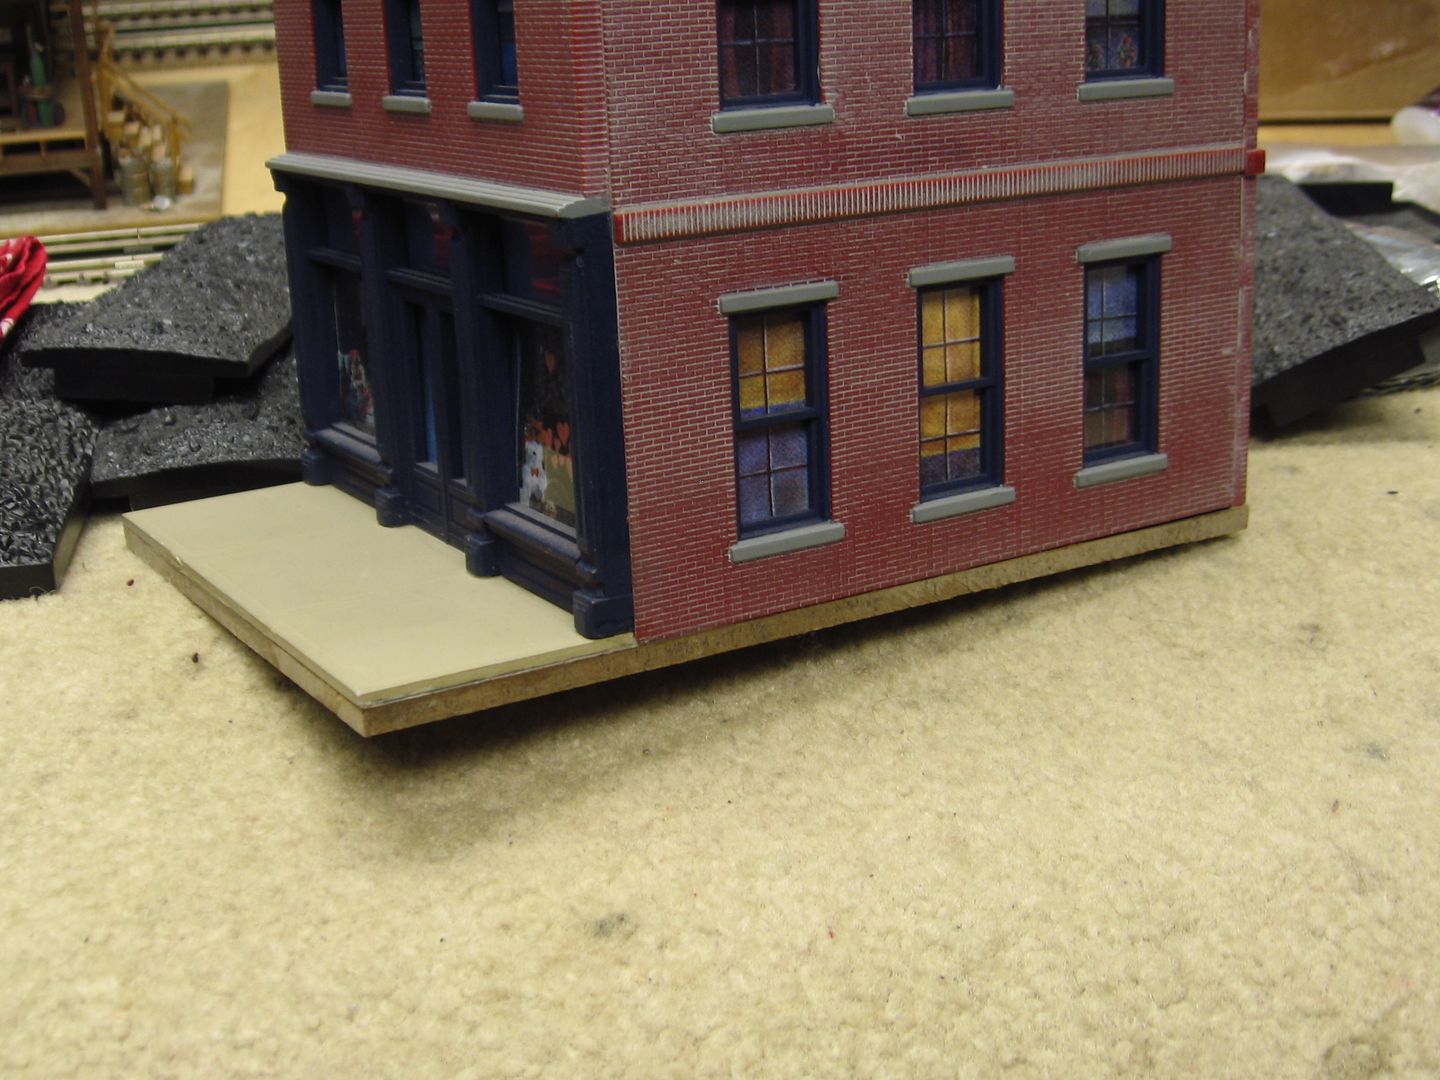
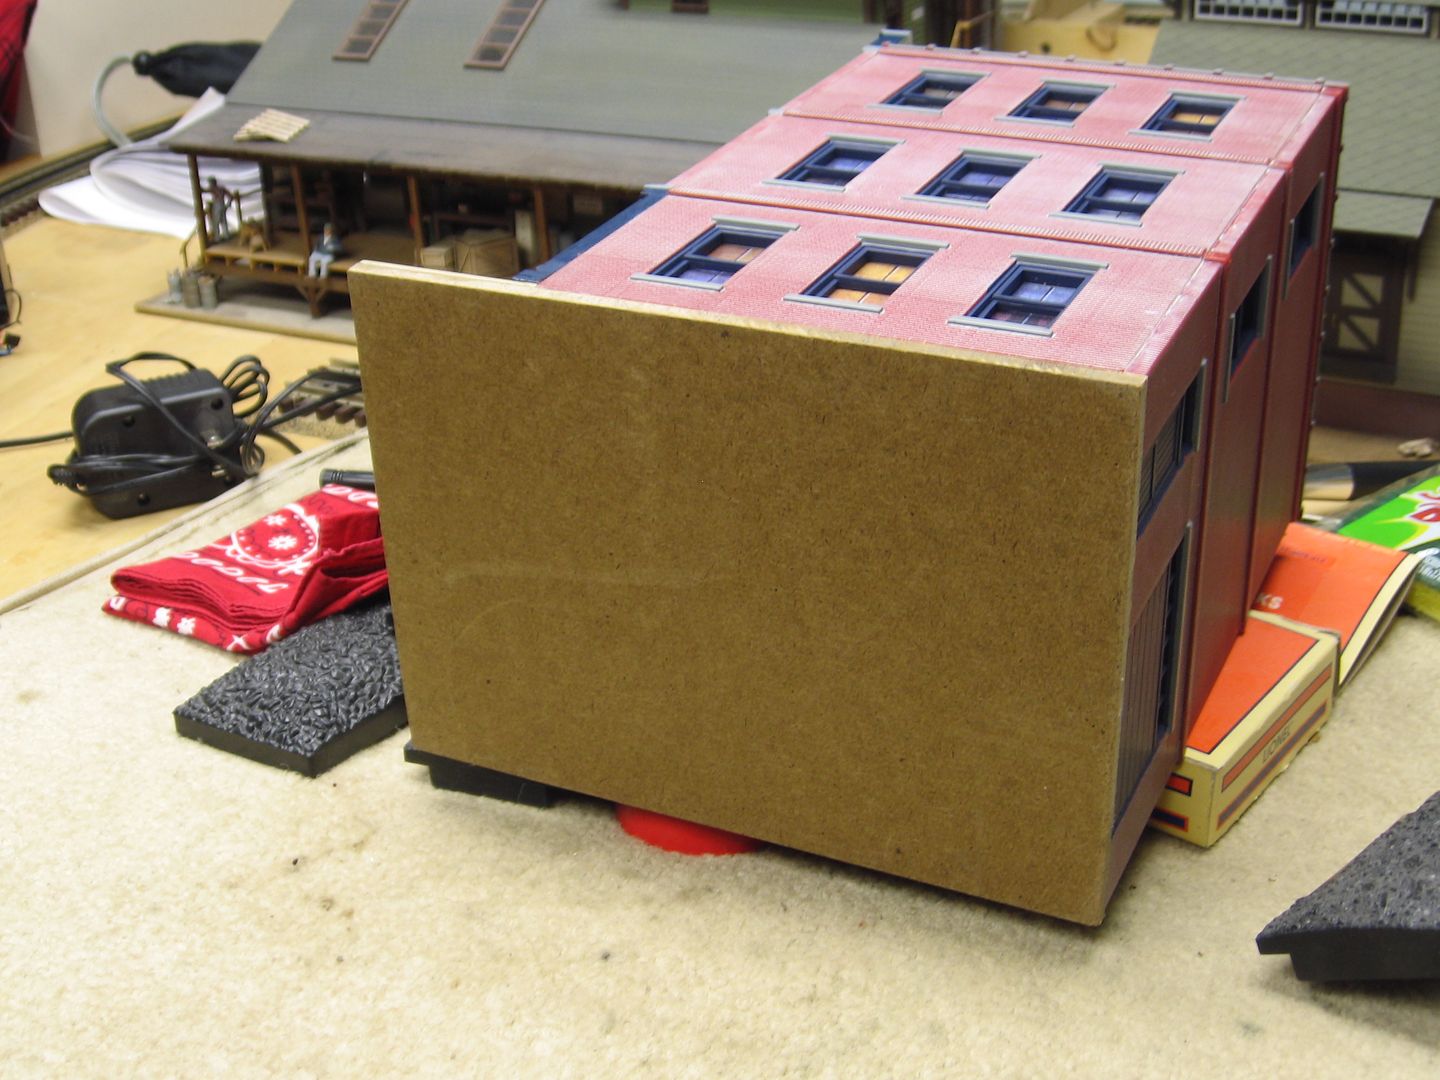
One of the interesting features, not included, in most kits, is a substantial base. Ameritown kits, as with most kits, don't have a base. I spend a good bit of time with all my kits, fabricating a base. IMO, It adds a degree of stability and easy of construction, regardless of the adhesive used.
Note the base on each model.

One of the interest features, not include in most kits, is a substantial base. Ameritown kits, as with most kits, don't have a base. I spend a good bit of time with all my kits, fabricating a base. IMO, It adds a degree of stability and easy of construction, regardless of the adhesive used.
Probably left out to cut costs.
All of my structures are mounted to a 1/16" Masonite base regardless of their coming with one or not. As you stated -- adds stability.
In addition to that excellent idea, I wish they would recommend a glue to use with their products as well. I have no idea what most of these materials are or what glues to use with them and that would be a big help to me. For me, finding the proper glue that works with something is sometimes a royal PITA.
It would be useful. But some do, or you can find it on their websites, etc. I recall DPM did way back when - there was a small slip of paper in the bag with the building panels, etc., that listed some recommended cements.
However, I think the best course it to find what works for you, because often the best glue/cement/adhesive/whatever for you to use is as much a function of how you build as the material. Often, for Ameri-Towne and some other thick, heavy plastics, I like Testors plastic glue in a tube (orange type). It goes on super thick bead, then spreads and gradually cements well when clamped or taped - which I always do with buildings. However I use brush on Plastruck for styrene sheets and such, particularly if thin, as it is easier to control, hardens slightly faster, and is less likely to "melt through" thin styrene, as the Testors can.
One of the interest features, not include in most kits, is a substantial base....
Probably left out to cut costs.
No, we didn't leave it out to cut costs, our kits have never had a base. We allow a modeler to choose a specific preference as to how he wants to build these models. Some like to build it on a base, others do not.
The reference about type of glue leads to: How is the assembly being done?? You eventual are attaching (4) wall pieces, hopefully, square, plumb, and neatly so that the roof fits. An assembly jig, or as was posted a base helps. May be add a base to the individual parts, that can be purchased separately. There are sidewalks there, I added them to the fabricated base, as part of the bash project pictured above. May be add the base suggestion to the assembly instructions.
Note the sidewalks. The fabricated base extends under the side walk.
These are great kits. I sand off the molded oxidation layer at the joint I am going to glue.
This gives the glue a bite to make the joint stronger.
One of the interest features, not include in most kits, is a substantial base....
Probably left out to cut costs.
No, we didn't leave it out to cut costs, our kits have never had a base. We allow a modeler to choose a specific preference as to how he wants to build these models. Some like to build it on a base, others do not.
Just one more reason why they are good kits. Bases in kits and ready=made buildings are annoying, frankly, because if you want to mount them on the layout the base almost never matches the area and scenery you want. A base means extra work, either in a kit that has been made so the base is sort of the master template showing where everything fits to make a good fit (the worst possible) to a building that comes with one and must be carefully removed.
Note that Woodland Scenics' built ups, the best mass-market ready made building you can buy, come without a base.
-----------------------------------
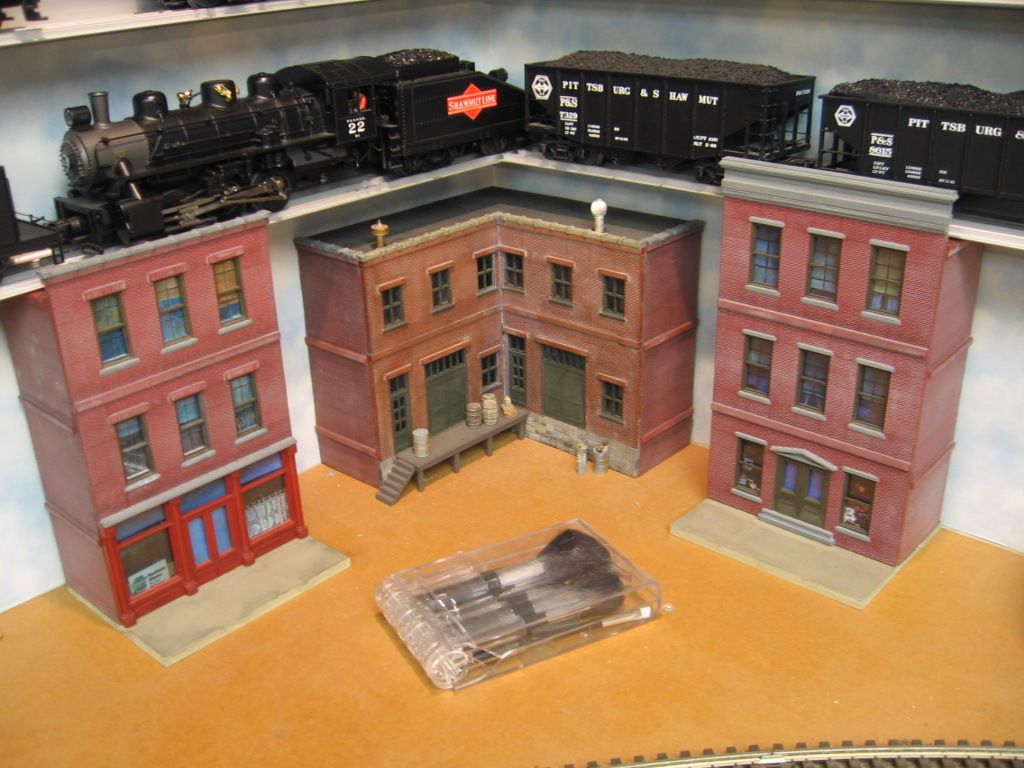
Edit added a few minutes later: The only thing I wish OGR would do to its Ameri-Towne buildings is add a line of wooden and stone buildings to match its brick ones. The current brick surface detail could be replaced with granite/stone blocks to provide a variations in look. And it is certainly possible to do the same type of modular, four panel facade and variations in windows, etc, on wooden siding, and it would provide.
Edit added a few minutes later: The only thing I wish OGR would do to its Ameri-Towne buildings is add a line of wooden and stone buildings to match its brick ones. The current brick surface detail could be replaced with granite/stone blocks to provide a variations in look. And it is certainly possible to do the same type of modular, four panel facade and variations in windows, etc, on wooden siding, and it would provide.
That's really a great idea! I hope they will be able to do it, that would give much more variety to choose from.
Radar:
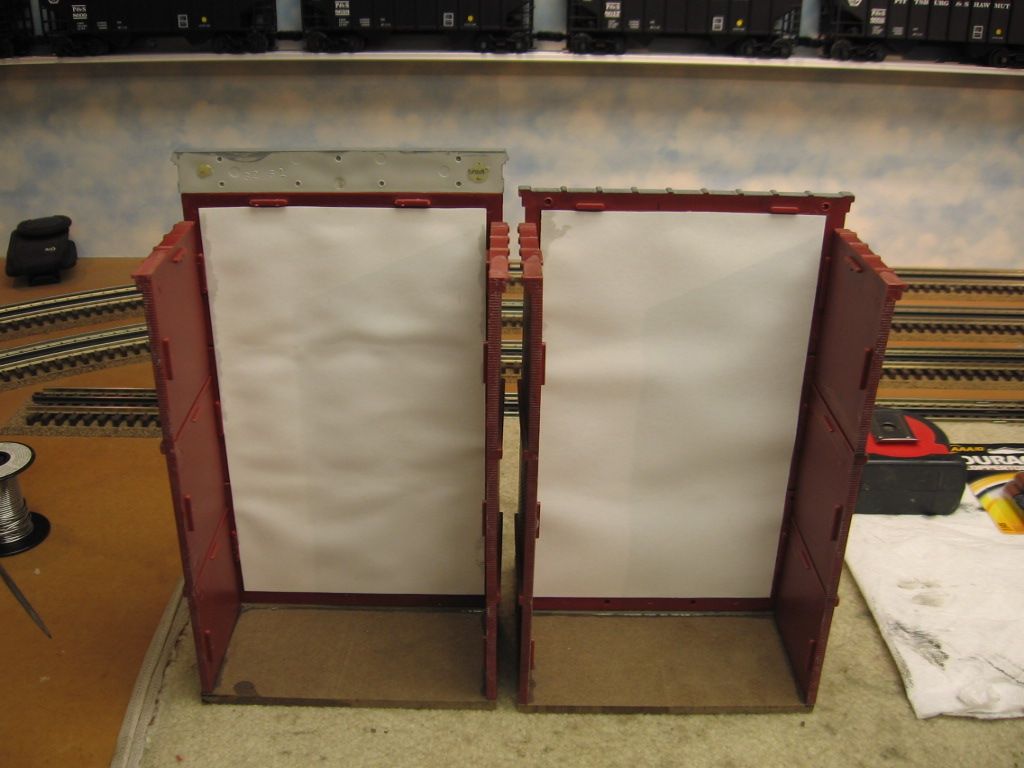
I cut and glue a lot of OGR walls. I have found that (and this is overkill but I need to worry about shipping) the following approach works well for joining two flat walls pieces together to make one wall.
1 - sand or saw the cut edges flat so you have as much glue surface as possible and the walls fit together flat w/o any bow. I use my table saw.
2 - as mentioned wash the walls
3 - initial glue up I use Plastruct Plastic weld. After cure I add Zap A Gap into the glue line on the back side.
4 - I then glue on a styrene strip on the back side using Plastic Weld as a reinforcement. Between the Zap A Gap and the Plastic Weld the strip is staying put.
Like I said this is most likely overkill. You could eliminate the Zap A Gap if you are building for your layout.
Having a table saw comes in real handy if you are cutting 1/2 inch side walls however you could use a band saw also.
Joe
One of the interest features, not include in most kits, is a substantial base....
Probably left out to cut costs.
No, we didn't leave it out to cut costs, our kits have never had a base. We allow a modeler to choose a specific preference as to how he wants to build these models. Some like to build it on a base, others do not.
Just one more reason why they are good kits. Bases in kits and ready=made buildings are annoying, frankly, because if you want to mount them on the layout the base almost never matches the area and scenery you want. A base means extra work, either in a kit that has been made so the base is sort of the master template showing where everything fits to make a good fit (the worst possible) to a building that comes with one and must be carefully removed.
Note that Woodland Scenics' built ups, the best mass-market ready made building you can buy, come without a base.
-----------------------------------
There are projects, that are very difficult, without a structured base. Tipple construction slideshow A lot of time is spent on the base.
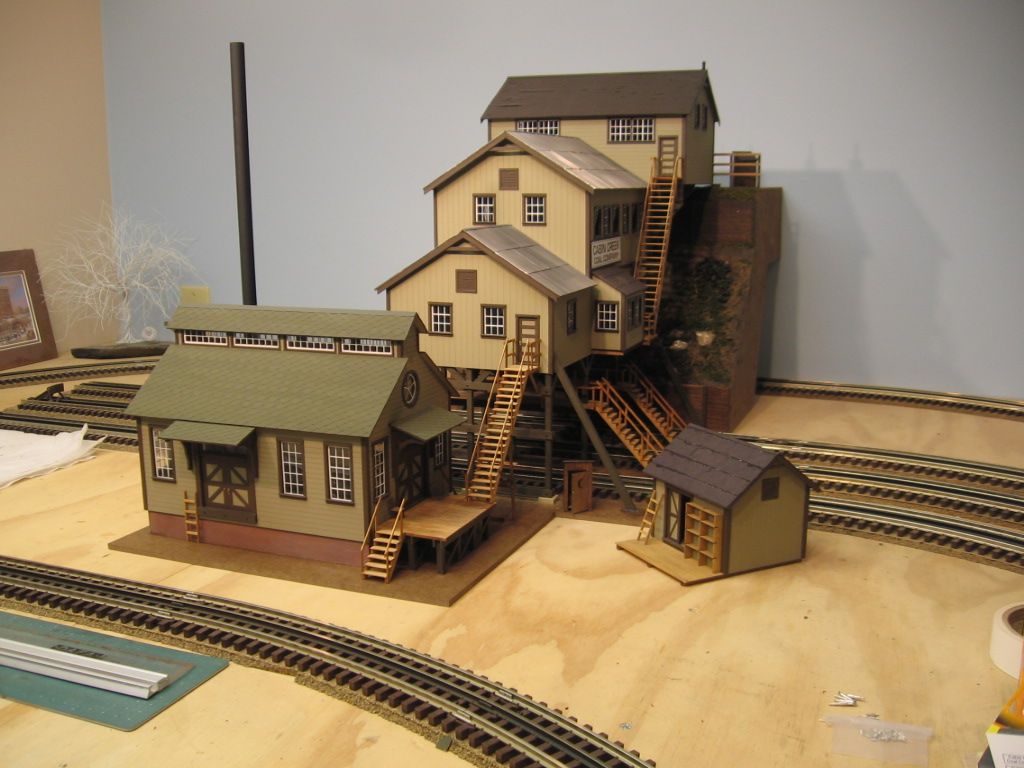
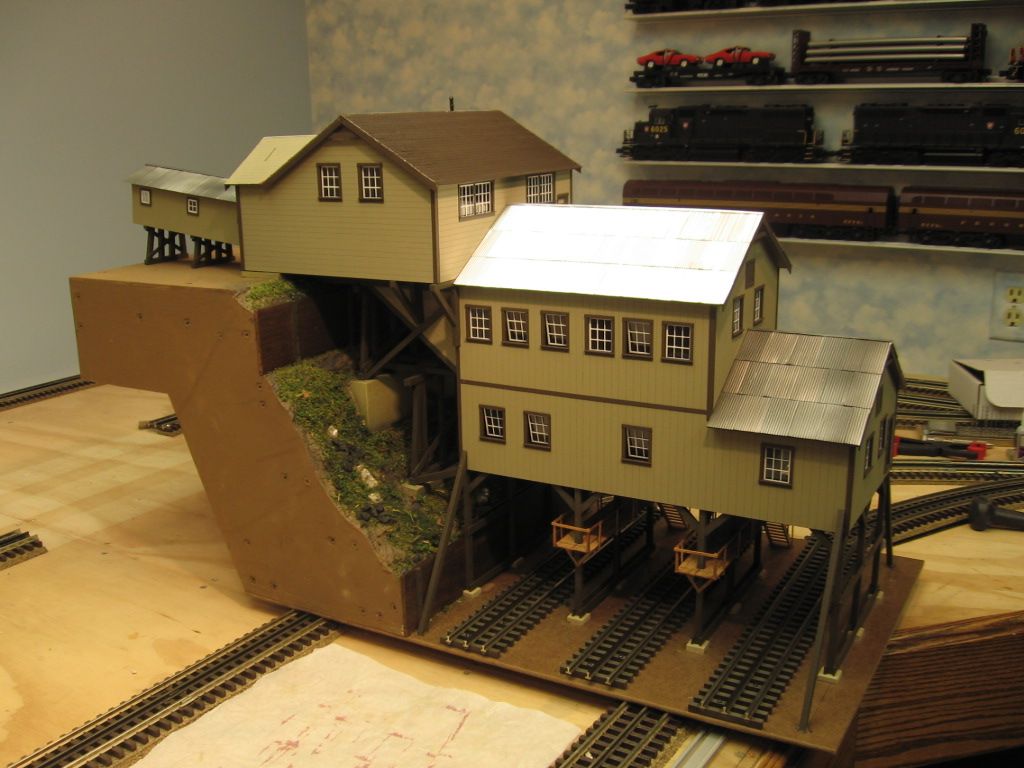
Base added to an OGR full kit. Building is square, and plumb. May be a bit more substantial than without a base, IMO. At the least, the sidewalk is well attached.
![]() Mike CT
Mike CT![]()
Another FWIW comment or two...
We (LHS) sell a wide variety of plastic bonding agents....Tenax 7r, Plastruct Plastic Weld, Testors tube and liquid for styrene, several CA's, etc., etc., etc..
Personally, I gave up on Tenax a long time ago....as well as it bonds a variety of plastics, once the bottle has been opened for the first time, it's as good as gone the next time you reach for it.![]()
![]() Customers seeking it by name (buddy's recommendation, word-of-mouth, pro magazine article...whatever) are advised of its volatility with the following recommendation: Re-cap the bottle tightly, seal the capped bottle into a zip-loc bag, place the bagged bottle in the refrigerator for overnight...or longer...storage. (Hey, a good reason to have a small fridge for the Tenax....and libations!...in your workshop!!
Customers seeking it by name (buddy's recommendation, word-of-mouth, pro magazine article...whatever) are advised of its volatility with the following recommendation: Re-cap the bottle tightly, seal the capped bottle into a zip-loc bag, place the bagged bottle in the refrigerator for overnight...or longer...storage. (Hey, a good reason to have a small fridge for the Tenax....and libations!...in your workshop!!![]() ) This greatly increases the odds of long term survival of Tenax!
) This greatly increases the odds of long term survival of Tenax!
However, Plastic Weld (Plastruct) works just fine for styrene and ABS...most common plastics used in the hobby. Micromark sells something called "Same Stuff" in a bottle, which seems to work as well as Plastic Weld and the now-defunct Ambroid Pro-Weld product. CA's (esp. medium viscosity) work best for bonding dissimilar materials.
Also, regarding reinforcing the corners... Rather than using square wood sticks in the corners of the Ameritowne structures for reinforcing, I use 1/4" square tube or angle stock styrene plastic...Plastruct or Evergreen products. Being of the same polymer as the walls, the same liquid welding agent works really well. And I only use a few short lengths of the reinforcement in a corner...e.g., top, bottom, mid-point...to achieve adequate strength...saves on plastic costs and uses up odd lengths from the scrap box.
OTOH, sanding the mating wall edges for an intimate fit does pretty well on its own, I've found. After all, I'm not prone to playing rugby with my town structures. I also have a Micromark squaring jig (magnetic) that helps me get the first corner, at least, properly aligned.![]()
But TEHO, I say. Experience leads everyone to their own conclusion and best practice.
KD
![]() Excellent summary, KD
Excellent summary, KD![]() . Each to his own methods and stick-em material.
. Each to his own methods and stick-em material.
One that wasn't mentioned, that I have on occasion used is contact adhesive. Primary use is to apply laminate materials to base structures. Example: kitchen counter tops. Usually requires application to both surfaces/let dry/carefully assemble the pieces, once placed, there is little movement. Caution: Contact adhesives can be very aggressive.
Personally, I gave up on Tenax a long time ago....as well as it bonds a variety of plastics, once the bottle has been opened for the first time, it's as good as gone the next time you reach for it.![]()
![]() Customers seeking it by name (buddy's recommendation, word-of-mouth, pro magazine article...whatever) are advised of its volatility with the following recommendation: Re-cap the bottle tightly, seal the capped bottle into a zip-loc bag, place the bagged bottle in the refrigerator for overnight...or longer...storage. (Hey, a good reason to have a small fridge for the Tenax....and libations!...in your workshop!!
Customers seeking it by name (buddy's recommendation, word-of-mouth, pro magazine article...whatever) are advised of its volatility with the following recommendation: Re-cap the bottle tightly, seal the capped bottle into a zip-loc bag, place the bagged bottle in the refrigerator for overnight...or longer...storage. (Hey, a good reason to have a small fridge for the Tenax....and libations!...in your workshop!!![]() ) This greatly increases the odds of long term survival of Tenax!
) This greatly increases the odds of long term survival of Tenax!
Actually, you can keep Tenax at room temperature almost forever if you actually use a bottle or vial with a proper polypropylene compression seal. I'll see if I can get a photo of one posted. But, I've got 5 bottles of the stuff on my bench now since 2012.
Part of the marketing of the stuff is to sell it to you in bottles that don't seal properly, ![]() and then charge you about a bazillion % markup on the solvent as well.
and then charge you about a bazillion % markup on the solvent as well.
Similarly, I've stored open bottles of CA in my shop for 2-3 years w/o it failing - having a bit of an understanding regarding the storage of chemicals helps just a bit. ![]()
On a related note, there are very common caps that can be used to replace those old metal caps on those bottles of Polly Scale and Floquil that you've been hoarding away that twist off very neatly and have a built in compression seal.

Martin, ol' buddy!...
Re "caps" and "seals"? Any chance you might have Dave Gauss add the pertinent poop to the 'Tools' listing in the Scenery Sourcelist?? Or give us a link or two? The who/where/how/what/when/why info?
Speaking of paint bottle caps, I've always admired the Tamiya paint bottle/cap design. EXCELLENT seal and wide mouth... Oh, and their paint ain't too shabby, either!
I don't know, though. Having to buy a special seal in order to preserve Tenax?....what does that say about the quality of the brand in the first place?![]() (GONG!) If the stuff is so great, they ought to put it into a quality container that doesn't frustrate the customer with its ephemeral nature or the extraordinary lengths to which one has to go in order to have in linger longer. (Of course, that little cube fridgy with a six-pack inside is kinda nice!
(GONG!) If the stuff is so great, they ought to put it into a quality container that doesn't frustrate the customer with its ephemeral nature or the extraordinary lengths to which one has to go in order to have in linger longer. (Of course, that little cube fridgy with a six-pack inside is kinda nice!![]() ) Your whiz-bang seal?...how much would it cost for them to include it? Another two bits, maybe? Y knot? Good grief, Charlie Brown!
) Your whiz-bang seal?...how much would it cost for them to include it? Another two bits, maybe? Y knot? Good grief, Charlie Brown!
Meanwhile, back at the ranch....
KD![]()
Much obliged!![]()
Access to this requires an OGR Forum Supporting Membership
