GNM201

GNM202

GNM203

GNM204

GNM205


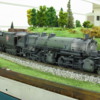
Happiness is hearing the UPS truck coming

My first brass 3 rail engine.

Surprised it was made in Korea and not China. 

When I was buying my HO engines back in the 80's, they were made in Japan.  They got too expensive to they started making them in Korea and, then, they got too expensive and started in China.

They packed her well.  Lots of foam (rubber and styro) plus taped to thin ply bases.  Good thing as the top of the box had a crack in it from the smoke stack.  No harm done but they must throw those things around pretty good.

The front of the boiler was off slightly, but it's just a 'force fit' so easy to rotate it.


MMM: looks like when you submit a picture vertically, it rotates it 90 degrees!

Attachments

Images (5)
  • GNM201
  • GNM202
  • GNM203
  • GNM204
  • GNM205
Last edited by samparfitt
Original Post

Replies sorted oldest to newest

GNM206

GNM207

GNM208

GNM209

GNM210


GNM211

GNM212


GM M-2 (cont)

They painted it correctly.  Green boiler with domes, appliances and piping painted black. Also, black band along the front of the belpaire fire box and oxide red cab roof.  No white strips on the running boards or tires. All wheels and running gear has a nice blackened tone.

Proper nomenclature under the cab window and nice back head detail, including a plate between the cab and tender.

Nice piping going to the air compressors.  Will dress up the knobs with some red paint.

Brake shoes and the traction tire has treads.

Boiler stays along the top painted black: my HO version doesn't have that detail.


Attachments

Images (7)
  • GNM206
  • GNM207
  • GNM208
  • GNM209
  • GNM210
  • GNM211
  • GNM212
Last edited by samparfitt

GNM213

GNM214

GNM215

GNM216

GNM217


GN M-2 (cont)

Tender:

Usual vanderbilt tenders, oil burner, as found on just about all GN steam locos.

Has 4 doors that open.

The railings seem a little large, probably to keep hanger rash down.

Comparison to my HO Tenshodo M-2.  Back in the 80's, they were the 'cadilac' of the steam locos but, like most things, the detail has improved much since then.  Back then, the only good steam engine was brass.

Attachments

Images (5)
  • GNM213
  • GNM214
  • GNM215
  • GNM216
  • GNM217

Samparfitt, you won't be disappointed with your purchase.  It took just one purchase of a 3rd Rail model to start a snowball effect where I became a collector of them.  Oddly, I haven't gone down the GN path yet but should soon, especially being a MN resident with relatives that had worked for the GN railroad. 


I really gained an appreciation for this model when I was invited to run with a great group of guys at Trainfest 2 years ago.  I snapped this photo of a beautifully weathered model that belongs to gnnpnut here on the forum.  I find myself sharing it often to people outside our hobby that think trains are just toys.  Every single response is literally the same.   "WOW"!!!   


Jerry, I hope you don't mind me sharing it.  It's an amazing model and the photo brings back some fond memories of a time a was truly grateful to be a part of.  


Nick


image

Attachments

Images (1)
  • image

Great engine. I don't model the GN but I have to say your photos make me wonder if I should have done.


Regarding this being built in Korea, I think this being an Anniversary Series issue it was made in 2011, which seems to be confirmed by the 3rd Rail website. At that time 3rd Rail used a Korean manufacturer and I think one of my steamers from them was also built there. Later models are Chinese-made.

Norton,

You're right on the PFM owner being a GN fan.  Not sure how I got hooked onto GN, living in Ohio, all my life!  Being in the Marines, I was in Japan for 7 weeks and, every week end, I take a pocket full of yen (back then it was 360 Y to the $1) and go to a different city and check out their hobby shops, looking for brass engines: the bulk of them being Tenshodo and GN.  I've always like the glacier colors with the air compressors usually on the front and the vanderbilt tender look. I've got an HO layout in the basement (33'X47'), 1500' of handlaid track on individual wooden ties (back in the 80's, they didn't have very good looking ready track, plus it was a lot cheaper),  mainline 400' long, point to point,  two huge yards (500 cars and 400).

I've belong to GNRHS (great northern railway historical society) since 1976.


=========

Audidriven,

Nice weathering.  The bulk of my HO stuff is weathered but nothing in 3 rail.

I'm also into RC planes and go to Owatonna, MN every August.


Here's a video of one of my planes:

Make sure you watch the entire video on after landing and the plane taxis back.


https://www.youtube.com/watch?v=ERTe1bnuPck

Last edited by samparfitt

I thought he did a great job of weathering it as well.  Several of the guys at the show had their models weathered, which really adds to the look when running.  At this time I'm finishing by basement so the layout I did have has come down.  For now my engines are either in display cases in another area of the house or in boxes.  After seeing the weathered models I can surely say mine will be weathered when I do run again.


RC planes have always been the other hobby I wanted to jump into, especially seeing the Byron Originals P-51 Mustang in all of the magazines in the 80's.  Unfortunately, cars and trains take any extra funds leftover after my wife and daughter get done with their heavy spending.

I can relate on hobby funds.  Back when raising the three kids, there wasn't a whole lot of extra $$ so I used to paint brass steam engines for extra income. 

Now that they are all gone, the house and vehicle paid off and, the best part, retired, I can buy more stuff that I 'need'.  It's amazing how much extra money you have to spend once that mortgage is paid off.


ps: I updated my previous post routing to youtube on one of my rc planes.

Last edited by samparfitt

Funny thing is that I had seen that video previously.  As much as I liked that P-51 back in the day, it is actually a Corsair that I would want in RC and spent some time looking at them on youtube one day.  The folding wings are a great touch.  It's always been my favorite plane, but I have yet to see a real one fly.  They had one in St Paul several years ago that was going to go up for a missing man formation, but they couldn't get it started.  It was actually one of the hottest days I can remember.  They sent up a P-47 instead, which is another cool beast as that thing shook the ground when it buzzed the field after. 


If you are going to have that in Owatonna I may have to make a trip down to see it in person.


Nick


audidriven,

It's definitely worth the trip. 

It's one of the largest rc warbird event that I've ever attended.

It's a warbird and any scale plane built before 1962.

There are 150 pilots and about 500 planes. Minimum size is 80" wing span but most are 8' to 20' wide.

Here's the club's site and directions:

http://www.smmac.com/directions/


Funny you should mention P-47's as I just built one last year:

Taxi and take off:.
https://www.youtube.com/watch?v=yATZhz6mAKc

flyby:
https://www.youtube.com/watch?v=cv-D...ature=youtu.be

landing and taxi back:
https://www.youtube.com/watch?v=YFoY...ature=youtu.be

Last edited by samparfitt
Originally Posted by samparfitt:

gnnpnut,

Thanks for posting the videos.  She looks great on the layout. 

I see you also like NP.  They had some great engines.  The Z class, especially the Z-8: love that solid pilot.  Probably the large challenger ever made.

You might want to contact gnnpnut (his eMail is in his profile), as he currently has his Sunset/3rd Rail Northern Pacific Z8 for sale at an excellent price.

Had a few problems loading the engine into the original cab remote.

Took it over to Bob's house and he had no problems up loading the engine and all worked well at my house.

One thing I did do before going to Bob's house was to firmly attach the end of the antenna to the tender shell.

Originally, the end of the antenna wire was loosely connected to the tender shell.

I replaced the blackened bolt with a plain steel bolt plus I used a nut to secure the wire to the tender shell.  This may have been the 'problem'.

Bob said 'they' were having trouble with radio reception and it looks like 'they' have solved it: the tender is isolated from the wheels, the wheels are insulated on both sides and a 4-way brass makes contact with the inside of the insulated wheels (see pic below).


Smoke problem:

This is my first TMCC engine and, all my contacts don't use smoke, this unit doesn't smoke in TMCC mode.  I put the smoke switch in conv mode and she smokes (but no where near what my MTH engine do).  Aux 1 + 9 is suppose to be for engaging smoke but it's not working.  I'm using the ZW-C (with the 180w bricks added).  I'm thinking that maybe the 18 volts isn't enough 'juice', especially if lighted passenger cars are also on the track.  I put another brick on the B terminal, hoping it may draw more volts but nada.  On the MTH, I'm using the Z-4000, which puts out 22 volts and, maybe that's why the MTH engines 'puff' like the 12" to the foot engines do!  I'm a little reluctant to put 22 volts on the TMCC engine as the manual says don't go over 18 volts.

I'm assuming the following is the proper way to run the engine:

TR + 1 and throttle to get power to the track.

ENG + 81 and throttle to operate the engine.


I'm thinking the next step is to take the boiler off and look for some loose wires.


GNM216

Attachments

Images (1)
  • GNM216
Last edited by samparfitt

Engine dis-assembly to check smoke switch.

After removing the one screw holding the lead trucks, the two screws holding the cow catcher assembly was removed. This base is the ground for the lights since the paint on the bottom plate was filed off for grounding the negative side of the head light bulb.

The two engine assemblies (driver assemblies) remove similar to HO models with two long screws holding the front of the back engine assembly to the boiler with two more short screws at the back.

The two selection switches located at the back below the cab are attached to two long narrow plates, each has 2 screws that have to be removed so the large motor will come out of the boiler. 

The wires to the smoke switch appeared good as well as the wires going to the small circuit board where the tender tether connector is connected.

Looks like I'm going to have to be satisfied with no smoke in the TMCC mode.

The motor has a brass fly wheel on the back and a belt is used to transfer power from the motor to the driver train. 


GNM225

GNM231

GNM226

GNM227

GNM228

GNM229

GNM230

Attachments

Images (7)
  • GNM225
  • GNM231
  • GNM226
  • GNM227
  • GNM228
  • GNM229
  • GNM230
Originally Posted by samparfitt:

Engine dis-assembly to check smoke switch.

After removing the one screw holding the lead trucks, the two screws holding the cow catcher assembly was removed. This base is the ground for the lights since the paint on the bottom plate was filed off for grounding the negative side of the head light bulb.

The two engine assemblies (driver assemblies) remove similar to HO models with two long screws holding the front of the back engine assembly to the boiler with two more short screws at the back.

The two selection switches located at the back below the cab are attached to two long narrow plates, each has 2 screws that have to be removed so the large motor will come out of the boiler. 

The wires to the smoke switch appeared good as well as the wires going to the small circuit board where the tender tether connector is connected.

Looks like I'm going to have to be satisfied with no smoke in the TMCC mode.

The motor has a brass fly wheel on the back and a belt is used to transfer power from the motor to the driver train. 


GNM225

GNM231

GNM226

GNM227

GNM228

GNM229

GNM230

Send it back to 3rd rail and they will fix  the smoke unit; beautiful engine!

I think I'll just 'suffer' without the smoke.  If she wasn't running, I would, but not just for smoke.  Being a GN nut, the bulk of my engines are MTH as they are the only ones that have made any scale GN steam/electrics.  The M-2 is my first TMCC engine.  I've got a NP Z-5 coming in a week, or so, and I'll see if she smokes well or if that's the nature of TMCC smoke units.  My MTH GN Z-6, R-2 and S-2 smoke like the full size engines. 

Thanks, though, as that does give me the idea of emailing Scott and checking if he has any suggestions. 

Last edited by samparfitt

Scott had a few suggestions.

Re-loaded the engine back into the CAB-1.

There is a heat sensor on the smoke unit that may need adjusting.

The heater coil sometimes is too high in the smoke unit's stack and needs to be pushed down with a toothpick.


I reloaded the engine and the engine puts out a light smoke exhaust (more like a full size drifting down hill).  I think that's as good as it's going to get.  No big deal as the engine is a fine, smooth runner with lots of detail and excellent paint job.

I took off the boiler front plate (held on by friction) but unable to move the smoke unit out of the boiler (it appears to be glued in) for any sensor adjustment.

The heating coil was difficult to look at from the smoke stack so I left it as is (no use rooting around in there with foreign objects).

I was just expecting too much after having MTH's engine smoke.

Each brand has their strong and weak points.


GNM232

Attachments

Images (1)
  • GNM232
Last edited by samparfitt

Chuffing stopped/fixed:

I was enjoying some reading with the pleasant background of a GN M-2 chuffing along when all of a sudden there was silence   

I did all the usual stuff (even read through the manual!).

Logged onto OGR and advanced searched 'no chuff' under TMCC threads.

Tried all those suggestions, nada, but still knowledgeable and good info.

Reload, reset, move chuff switch, shake real hard (no, not that!), etc

Initially, I thought the chuff was electronically controlled.

I put her on her back and started rooting around:

Found a plate on the front set of drivers, removed it and voila, two cams (one for 2 chuffs and one for 4 chuffs).

Hooked up  the ZW and TMCC to the wheels and started her up.

Some contacts inside are moving against the cams, that's good: must be something else.

Remove two engines from boiler and the two green/blue wires going to the cam mechanism are no longer attached: MMM, looks like a possible problem !

The original wires were pretty short to I added about a 3" long extension to them.  Got some 22 gauge, multi strand wire, some heat shrink tubing and reconnected everything using electrical solder. 

Tried her again and "all's right in the world again'


The original wires have a stiff insulation on them and I think that caused them to break.  I used some very flexible wires (got them from my RC plane stuff).  I also had the engines removed from the boiler, previously, to check out the smoke system so that also may have weakened them.  Obviously, this break is most applicable to articulated engines since the front engine is always rotating on curves.

I did not worry about which way the wires were originally connected as I figured it's like a light bulb (either way works).


Also, it appears the cam system feeds the cruise control because the engine would slow down on the far side of the loop when not chuffing but works OK when the chuffing is operating.


Oh, and don't be an idiot, like me and use a red wire: best to use black,green,brown: something that is less visible.


One more item: there is a short piece of wire wrapped around the wires going to the cam and head light.  It is held in place, by friction, under the two valve mount brackets, so one bracket's screws need to be loosened to easily solder up all the wires.


GNM233

GNM234

GNM235

GNM236

Attachments

Images (4)
  • GNM233
  • GNM234
  • GNM235
  • GNM236
Last edited by samparfitt

SMOKE PROBLEM RESOLVED:

She's smoking pretty good now.

Again, after searching OGR, I find JT's mega smoke to work best on this engine.

After a few hours of running, the smoke improved.  Probably due to having to burn out the existing smoke fluid from other manufacturers before the fluid was all JT's.

Also, I find putting the switch to conv for smoke gives me the best output: still not as much as my MTH's units but at least I can see it, now, from a distance, and not have to be with 2 feet!

Last edited by samparfitt

Now this is how I like 'em to smoke

This MTH GN S-2 4-8-4 is nicely detailed.  This is the only 3 rail engine that I have that has lanyard lines going to the bell and whistle. 

I noticed that the M-2 has an 'eye bolt' along one side of the sand dome so I'll have to get some fine brass wire and paint it black (probably can use some stranded 22 gauge wire and strip the cover off for the needed material). 

There's also a hole in the top front of the cab to run the lines through to the cab interior.


GN S-2 4-8-4 01

GN S-2 4-8-4 02

Attachments

Images (2)
  • GN S-2 4-8-4 01
  • GN S-2 4-8-4 02
Last edited by samparfitt

Lanyards added to bell and whistle.

An easy mod that was cheap and quick.

Stripped some 22 gauge wire and sprayed the strands black. Best to separate the strands before painting and leave hanging over a table top to dry individually.  Had to do 3-4 sprays by the time I finally covered all sides.

The holes in the bell and whistle arms had paint in them so they had to be re-drilled.

First I put the wires through the eye bolt on the side of sand dome and then ran it into the hole in the front of the cab, then the wire could be bent and placed into the hole on the bell arm.  Same with the whistle, only on the engineers side.

Bending the wire removed some of the paint but a black magic marker worked well on covering the brass wire.


GNM237

GNM238

GNM239

GNM240

GNM241

Attachments

Images (5)
  • GNM237
  • GNM238
  • GNM239
  • GNM240
  • GNM241
Last edited by samparfitt

Add Reply

Post

OGR Publishing, Inc., 1310 Eastside Centre Ct, Suite 6, Mountain Home, AR 72653
800-980-OGRR (6477)
www.ogaugerr.com

×
×
×
×
Link copied to your clipboard.
×
×