I am just starting scenery on my layout - never really done much with scenery at all but ready to give it a shot.  I have posted some pictures I would like your expertise on.  The basic scene is a freight yard next to a elevated track.  I will have building fronts along the wall.  Some general questions.

1.  Any thoughts on grass and plants.  Using woodland scenics paint and grass 

2.  I have a glue water mixture used to glue the ballast.  Don't get a spray get more of a stream, any tips on that do i need to dilute the glue to make it thinner or try a different sprayer?  The stream displaces the scenery some

3.  Don't like my sky really and have not attached it permently yet.  Have an artist friend that would paint clouds for me.  Don't really want to spend the money on that though expensive to do the complete layout.

I am just open to any thoughts/comments as to how to next steps.

thanks for taking the time.IMG_1225IMG_1226IMG_1227IMG_1228IMG_1229IMG_1230IMG_1231


Attachments

Images (7)
  • IMG_1225
  • IMG_1226
  • IMG_1227
  • IMG_1228
  • IMG_1229
  • IMG_1230
  • IMG_1231
Original Post

Replies sorted oldest to newest

MSP, for grass and plants, get various types of WS ground cover, (I use Soil, Earth, Burnt Grass and Summer Grass, sprinkled in that order with a large spoon). That gives you a varied natural look and you can vary the amounts based on your preference of color. Then I add various foliage types, in different thicknesses (fine, medium, coarse) as desired. I first spray with Matte Medium so the ground cover has something to stick to and is less likely to move around. Then sprinkle, then saturate again until it's all wet. Make sure your sprayer has a fine spray adjustment (try it with plain water to test it). Also, clean out the sprayer each time you use it so the glue doesn't clump up inside. If you use white glue, you can buy a whole gallon of it and dilute it anywhere from 1:2 to 1:4. Very inexpensive way to do it. The Matte Medium comes diluted or for a cheaper way, you can get the product that then gets diluted 1:4. It's from Scenic Express. The mountainous areas should be painted a base color (earth or something dark) so you're not trying to cover all that white with ground cover/foliage. You can dilute the paint to it's more of a wash if you like that effect. Also, you can add some alcohol/india ink mix to bring out some highlights before adding the ground cover. 

For ballast, I wouldn't use a sprayer. Use squeeze bottles which are much more precise. But, first, squeeze on "wet" water (tap water with a few drops of dish detergent), then squeeze on the diluted glue. The "wet" water reduces the surface tension so the glue doesn't ball up and you'll find it flows very easily throughout the ballast wherever you've added the wet water. 

Since the lower portion seems to be yards, you don't really need much grass/foliage between the tracks. You probably want to use cinders or very fine N or Z scale black ballast. Then add a little greenery on top.  

Hope this helps some. 

Last edited by Jerrman

FWIW, regarding the yard area a little research on real life train yards might give you ideas on what you might like.  If it is an active yard scene as opposed to an old abandoned yard perhaps less vegetation.  There isin't a lot of space between your yard tracks and some yards have very little if any raised ballast road bed.  Perhaps just a mix of dirt , some rocks and weeds and some grass.  Youtube has some excellent videos and ideas on the hows to do it.  I don't know how large your layout is, but the area in your photos shouldn't be too expensive using woodland scenics or other commercial products.  

Regarding your dilluted water /glue, sounds like its not enough water.  I usually use straight glue with just a little bit of water and pour it in a small bowl and paint it on the surface with a brush and sprinkle on the ground cover elements, ground foam grass, weeds, sand, and glue on bushes. After that dries, If I add more, I sprinkle it on and hit ti with some soap water (squirt bottle with 2 drops of soap) and then spray it with dilluted glue mixture.  If you spray too close then the ground foam stuff will move on you. 

Again, I suggest watching some youtube videos on model rr scenery.  Lots of great ideas out there.  Good luck, enjoy!


at very end wall , i would use mirrors at angle to give yard an extended look.

On top shelf on right I would extend land contour at angle up towards back drop using foam.  Dont make it uniform.  Maybe include a HO or S scale out building. This would continue the contour of the tunnel and make it more realistic

break up long concrete wall with ivy and rust stains running from down sides

For yards use a darker cinder ballast


Last edited by wsdimenna

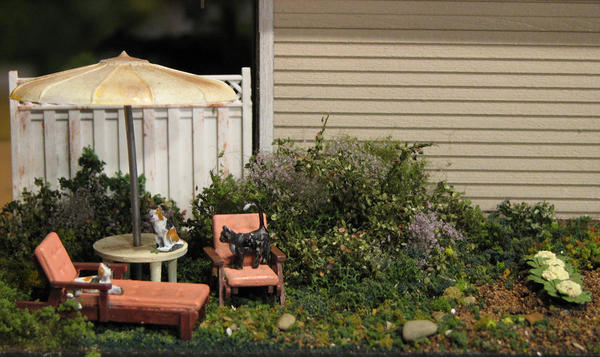
IMG_5909xxIMG_7871xbackyard details of #3IMG_8645_edited-1This might be a small point or a big one, but I advise you to stop gluing the ballast down. Don't glue any more of it in-place. My reason is that, in my opinion and experience, no matter how sure we are that we have the track exactly where we want it and will never move it, we are wrong. We will move it, someday, even if just a 1/4" or 1/2"inch to the right or left, but you will move it, eventually. And having it cemented into place causes loss and damage. Wait until absolutely every inch of landscaping and buildings is where you want it; then, wait some more.

For example, positive as I was of not needing to move the track in the photo immediately above, I did end up changing the brand of track of the inner loop and was very, very glad I had not glued any of the track in this area in-place.

Also, I bought a good-sized eyedropper from a pharmacy to use for dripping the white-glue mixture when I was ready. It's a neater system and does not cause spray to go where you don't want it. I use the eye-dropper system, also, for all ground covers and very low foliage, around where I have used Gorilla Glue to cement major foliage features into place (see the photos above for examples of my work using a dropper.) Precision and neatness are afforded by using a dropper. IMO.

FrankM.

Attachments

Images (4)
  • IMG_5909xx
  • IMG_7871x
  • backyard details of #3
  • IMG_8645_edited-1
Last edited by Moonson

Wow! You have got a lot of track going down in this area...

IMG_1230


1) What do you want to achieve here? Focus on the bigger picture to make the scene more believable. Why is this yard here? Is this an industrial area? or mountain mine area? Sketch this out and see what is plausible.

2) Concentrate on the back and work forward... Look at some printed back drops. and look at the rear wall. Maybe this would be a great spot for an industry for these cars? Just painting this area with latex light sky blue paint will yield a huge difference.

3) You may want to focus on the upper deck as a place for false building fronts. Which you could execute your exits and entrances more effectively.

4) You could also consider a mirror for that back wall.

Step one - would be to just paint the walls a light blue. Don't worry about clouds.

Step two  - Establish a scene - look at the bigger picture

Step three - Add your buildings to complete this scene,  wire in your lights, and switches, paint track, and detail your scene with people and cars. More is less. You may end up removing a couple pieces of track here.

Step Four - lay in your scenery  - ballast, grass, etc.

Step Five - have fun and run your trains...


Thanks

Yes I do have a lot of track...I always struggle with trying to probably cram to much.  I just like yards..if you think that is crowded i better not show my passenger yard

I have thought about just painting the wall blue and calling it a day.....might be a better option than what I have

Yes the upper level is too high but that was a miscalculation early on I will have to live with.

I am going to add building front on the top....will post some updated pics in a couple of days

will probably get a mirror for back wall

yes the yard is basically a stub yard there is lead on other side I can do switching from

used dropper for ballast - didn't do as well with it on grass scenery make for clumpy....will work on it.


Adding a building front on top? Why not use one or two over the portal and lower the portal height that way by covering the hole with a building front ?  That tunnel wall could be cement, earth, or rock that way.

The black walls on level one. I think a continuation of the cement wall look, is what I expect to see on the other two tunnels also. Framing the top and maybe the sides of the two open tunnels making smaller portal openings would effectively make the tunnels more realistic size wise, the elevation height isn't the big issue. Do them as removable faces and you can still reach in up to your shoulder if necessary too.

The same blue/white effect on the wall vs boards won't have seams, you'd have room for clouds, and you can always find something else to make with the foam board, just repaint it

I havent done a ton of ground cover, but I hated spray, I liked the dropper method. 50-60% glue, 25-35% water,15-25% alcohol, two applications, depending on the glue and subject, maybe even thinner. If glooped, i went thinner until it soaked instead.

IMG_1297IMG_1300IMG_1301IMG_1302IMG_1303ok, I have uploaded some more pictures.

1. added building front on top, plan on adding two or so more fronts on top level coming toward unfinished tunnel.

2. After thinking about it some I think i could remove two of those tracks - make some room for some buildings in there. The track that is ballasted by the concrete wall is main line and is staying the vacant track i also a main line. I could move it either way and remove two tracks - add structures or other. thinking about moving it towards the yard - leaving a two track space between the two for structure positioned a building on what it might look like.

3. Think i will go with the painted blue sky backdrop


Attachments

Images (5)
  • IMG_1297
  • IMG_1300
  • IMG_1301
  • IMG_1302
  • IMG_1303

Add Reply

Post

OGR Publishing, Inc., 1310 Eastside Centre Ct, Suite 6, Mountain Home, AR 72653
800-980-OGRR (6477)
www.ogaugerr.com

×
×
×
×
Link copied to your clipboard.
×
×