Model Train Photography • Helicon Focus / CombineZM

Have you ever used Helicon Focus or CombineZM for model train photography?  The purpose of this post camera software is to stack seven or more images to better manage depth of field.

Here are the links:

Helicon Focus http://www.heliconsoft.com/helicon

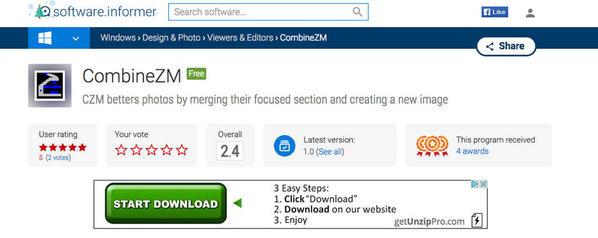
CombineZM: http://combinezm.software.informer.com/

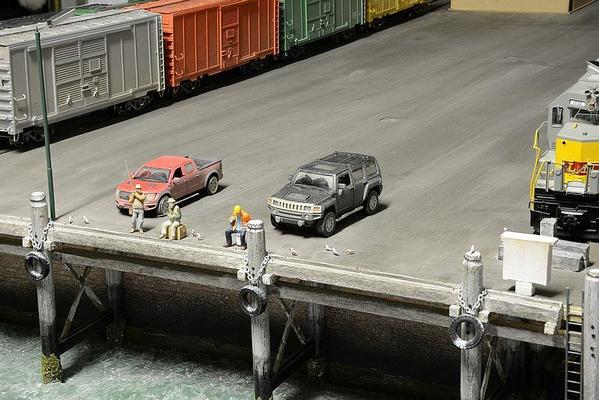
Helicon Soft StackingCombine ZM StackingTrainroomgary Pan Shot OGR Signature A

Attachments

Images (3)
  • Helicon Soft Stacking
  • Combine ZM Stacking
  • Trainroomgary Pan Shot OGR Signature A
Last edited by trainroomgary
Original Post

Replies sorted oldest to newest

Hi Gary

I use Helicon focus for my day to day layout photography.

It doesn't help that much, as the forum degrades the images when they load up, but it obviates all depth of field issues.

You must use a tripod, though.

Helicon will work with as few as two photos.

PE 154

You can see the grainy image created by the forum software, but the whole shot is in focus.

This shot was the result of about 5 images.  I set my camera up on the tripod and manually take about 20 shots, with gradually increasing focus.  Then, using Faststone I select the two ends of the focus spectrum and load them into Helicon.  It's usually the half dozen in the middle somewhere.

Attachments

Images (1)
  • PE 154
Last edited by MaxSouthOz

Hi Gary

Could I suggest another trick which you can do for not much money?

I have a Raynox Macroscopic Lens Model M-250 which clips on to the front of my Nikon D 7000.  It's not a top of the range camera, and I only have an 18 - 105 lens on it, but the Raynox can produce images like this . . .

GNL 02

Once again, there have been some losses during the upload, but my copy is crisp and clear.

http://www.raynox.co.jp/englis...50/indexdcr250eg.htm

For around US$50.00 it is value for money; and once you combine it with Helicon, the results are fantastic!

Caveat:  You need to use a tripod.

Attachments

Images (1)
  • GNL 02

Hi Max & Jim

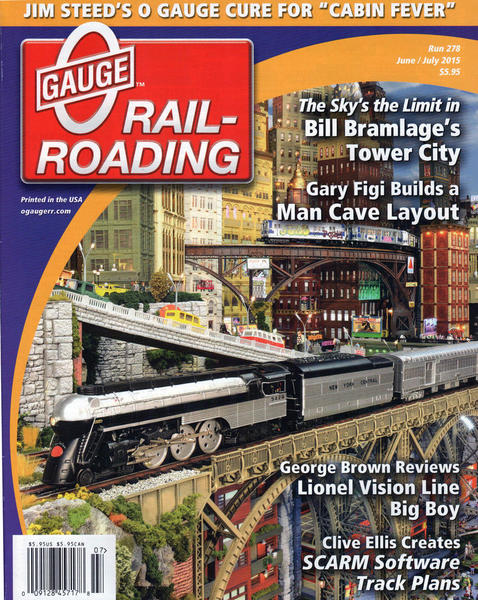
Thanks for the feed back on image stacking.  I first heard of Bill Bramlage, in July of 2015.  I had the honor to have my name on the cover of OGR Run 278 • June /July with Bill.  I have tried image stacking, but I am old school.  Keep going back to controlling the depth of field with my camera on a tripod, using critical focus and aperture priority.  I still use my home darkroom for B&W Prints.

Like going to antique stores and buy a shoebox filled with old negatives. Bring them home and make B&W Prints.

Cover of OGR Magazine Figi Run 278 June July 2015

Gary & Happy New Year from Michigan

Attachments

Images (1)
  • Cover of OGR Magazine Figi Run 278 June July 2015

Today I went to my local camera shop looking for a lens that showed the feet from object on the focus ring. Like they used to do on all the SLR film cameras.  Canon has a series of lens called, Canon Red Ring Lens / All these lens show the feet from the object, infinity down to 1.2 feet.

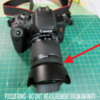
Below is a photo of the focus ring on my Canon T6i.  The focus ring does not show feet from object.

Canon T6i Focus Ring

As one gets older, it is hard to do the manual focus for the stacking of images.  He did not have the lens that would fit my camera, at this time.  I did see it on line. 

Hope this helps - Gary

Attachments

Images (1)
  • Canon T6i Focus Ring

Hi Gary

I'm getting old and feeble of sight.  Another trick . .

Open the image viewer on the back of the camera and turn the focus ring until the image goes out of focus each way.  Then take each shot, advancing the focus ring one lug on the grips at a time until it goes out of focus the other end.

When you download your images, delete the ones completely out of focus each end and then open the remainder in Helicon.

Cheers

MaxSouthOz posted:

...It doesn't help that much, as the forum degrades the images when they load up, but it obviates all depth of field issues...You can see the grainy image created by the forum software, but the whole shot is in focus.

Where did you get the idea the this forum "degrades" images?

I work on images  in Photoshop literally every day. I have retouched, adjusted and prepared every image that has appeared in OGR for the last 10 years. I know what a good digital image is supposed to look like.  

I have uploaded hundreds of images to this forum and have never seen any evidence of image degradation. And I don't see any grain in your photo either.

Before you take any more shots at us, how about some evidence.

It's impossible to produce evidence, Rich.

I see a clear image on my computer and I see a grainy image on the forum.

Unless you want to come over and have a look; I can't think of another way.

My own forum is the same - as is yourmodelrailway.net and others, including protomodeler.com

It's the nature of forums.  It's the way they are.

I'm sorry if you don't like it.  I'll remember not to mention it in future.

Jim Policastro posted:

Gary,

This is the process used by Bill Bramlage in the new photo book of his layout that OGR has been advertising

Tower City Train book

Bill has produced some stunning photos this way. I believe his software combined upward of 100 photos into a single image in some cases - an amazing process.

Jim

Hi Jim   /   Question for Jim or Max or any member, who uses Helicon Soft Focus.

(1) Have you ever used Helicon Focus or CombineZM for model train photography?  

Here are the links:

Helicon Focus http://www.heliconsoft.com/helicon

CombineZM: http://combinezm.software.informer.com/

Hi Max

(1) Are you satisfied with the end results, using Helicon Focus and do you plan to continue using Helicon Focus. 

Gary: I am still using Photo Shop, with transparent layers, not pleased with the results.

Gary 

MaxSouthOz posted:

Hi Gary

I am on a PC Win 10, but I understand that there is a Mac version available.

http://www.heliconsoft.com/helicon    has a forum.  Someone there will guide you.

Hi Max - I am up loading the free 30 day trail for the Mac . I will keep you posted


Focus stacking and 3D model building


 VersionSizeCompatibility 
Windows 6.7.1310 MbWindows Vista / 7 / 8 / 10More...
Mac OS 6.7.1335 MbMac OS 10.8 and laterMore...

Hope I have the correct one for stacking images.

Gary

Hi Max: I have the software installed and it all seems to work.  I have watched their instructional videos but I need your help for my first image.

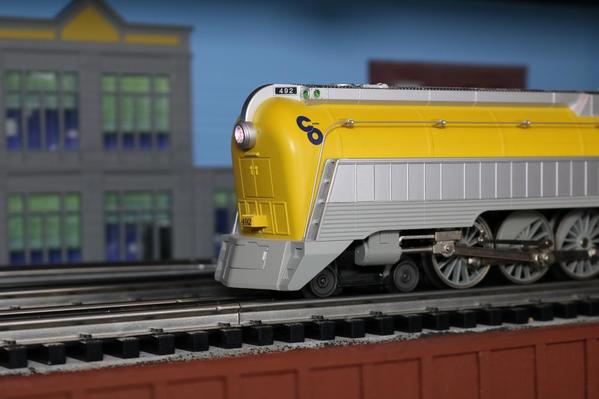
I am going to take a side image of a Stream Line Hudson Locomotive, C&O Yellow Belly.  What should I be changing on each shot? Focus, Aperture, Shutter Speed Etc.

What is the shooting plan?

Helicon Focus Icons

Thanks Gary: Need some homework.........

Attachments

Images (1)
  • Helicon Focus Icons

Hi Max: These are the steps, for lesson one.

  • Set your camera to manual focusing mode (very important!!) and set the focus to infinity.
  • Note: manual mode (shutter speed and exposure) is also preferable to avoid fluctuations in brightness.
  • Adjust the lens to make the closest area of the object sharp.
  • Take a shot.
  • Focus a little farther away in the image.
  • Take a shot.
  • Use small, roughly regular steps while adjusting the lens and taking shots. It's better when sharp areas overlap.
  • Take shots until you reach the farthest part of the scene.
  • Copy the images from the camera to your computer.

I will be trying this tonight........

Looks like I will pick the shutter speed and aperture, lock that down and just change to "focal plane".  I will post my first photo, any tips........

Gary

Hi Gary

I use a Nikon D 7000 on a tripod - very important.

Set on A for aperture priority.

I have the aperture set on midway (6.3).  You can play around with it.

Focus on Manual on the lens and on the camera base.

Turn off the Vibration Reducer.

Frame the shot in the viewer on the back of the camera.

Turn the manual focus ring right around to one side and take a shot with the remote shutter release.

Turn the focus ring in the opposite direction, about two of the knurling marks .  Take a shot.

Keep turning the manual focus ring a couple of marks until you reach the end, taking shots.

After a while, you will be able to reduce the number of shots, but it's a good starting point.

Download the string of images into your computer and select the ones at each end of the focus range and note their numbers.

Open Helicon and open the images file.  Click on your first number and then hold the Shift key and click on your last number.  That will highlight the string you want.  Open them and hit Render.

Select save.  Change the image number to aaaaa  That will put it at the front of the image string.  Select 100%

Open the image aaaaa in your Photoshop etc (I use Faststone) and crop and resize to 800 x 600 for uploading.

Then I go to Irfan and do one Sharpen and you're good to go.

I have to go out now, so I'll check in later to see how you went.

Cheers


Hi Max & Members: This is my first try at Helicon Focus

Both images shot at: 1/60  •  f 5.6  •  ISO 400  • Tripod  • Delayed shutter, to prevent vibration.

Image (1) The front of the locomotive is in focus

Image (2) The building in the background is in focus

Image (3) The final image is rendered in Helicon Focus, to have everything in focus.  Just like the human eye would see this.  Makes the image look more prototypical.

Image 1 FrontInage 2 BackHelicon Stacked C&O Yellow Belly 

These are the 3 steps for Helicon Focus, my next step is to upload the image to Photoshop for color correction, highlights, cropping and special filters.

Camera: Canon T6i  /  DSLR 18mm to 55mm  / Lighting, two color corrected soft boxes, 24 inch and one small LED light on camera.

Bottom line, I am impressed at this point.  I will keep testing.  Helicon Focus can also do video images, not sure how this works.

Gary

Attachments

Images (3)
  • Image 1 Front
  • Inage 2 Back
  • Helicon Stacked C&O Yellow Belly

I agree with Max. 

I have never tried Helicon focus. When Im shooting down in the train room, I make sure their is ample light, so I installed 8 Daylight spotlights above the layout, for minimum shadows. 

I usually shoot my models outside on some of my dioramas, nothing beats real light!

I have a Nikon D3400 with a 18-55mm.  

When I was using a PC I used CombineZP, but couldn't find  free stacker for the MAC. So I purchased ZereneStacker which was less expensive than Helicon, but works very well. I have a Canon EOS. I set it on manual focus and use the 2-second timer so the camera steadies out before the shutter release. This picture was taken with about 8 different exposures. I didn't realize I could use aperture priority. The software adjusts the exposure, but I usually go into a photo software to brighten them up a bit. I don't use focus stacking for my general progress pics because it does take much more time. I reserve the stacker for either pics that are going to final shots or pictures with lots of detail at different focal distances. This pic was taken using ZereneStacker. Of course, if you have photo studio you can use very bright photo floodlights and then stop the camera down to the finest aperture. That's the old-fashioned way to get deep depth of field.

Layout as of Jan 17

Attachments

Images (1)
  • Layout as of Jan 17
Trainman2001 posted:

Of course, if you have photo studio you can use very bright photo floodlights and then stop the camera down to the finest aperture. That's the old-fashioned way to get deep depth of field.

I guess I'm old fashioned.  Why go through the hassle of stacking when you can just change the aperture to increase depth of field?  And you don't even need flood lights as the camera will increase the exposure time to make up for it as you are already using a tripod and a static scene.

Image stacking is for macro photography where due to close focusing (Think a couple inches away from the lens at most.) depth of field even at small apertures is very very narrow.  This allows photographers to get bugs, flowers, and snowflakes all in focus.  When we are at the size of our trains, image stacking is a waste of time, IMHO, when you can get the results you want in camera.  The only exception would be to achieve a very specific artistic look.

Add Reply

Post

OGR Publishing, Inc., 1310 Eastside Centre Ct, Suite 6, Mountain Home, AR 72653
800-980-OGRR (6477)
www.ogaugerr.com

×
×
×
×
Link copied to your clipboard.
×
×