Hello All!!!


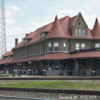
I am finally getting into painting my buildings.  I had built the Lionel Rico Station without painting it first several years ago.  Now I'd like to give it a little personality.  I decided on colors and it now looks like this...


IMG_2359


Please keep in mind, this is a first effort and painted after built, so the job is far, (really, really far) from perfect. 


I have a couple questions, one, how should I age the roof, keeping in mind, a small skill set.  The roof comes off in two parts, the freight side and the main station.  Next, how can I make the freight walkway look like old planking and what treatment should I use for the block supports that go around the walkway...


IMG_2361


I plan to paint the simulated gravel some color of dirt and use fine sand colored ballast to finish off the base.


IMG_2362


Thanks for any tips/advice provided

Attachments

Images (3)
  • IMG_2359
  • IMG_2361
  • IMG_2362
Last edited by Charly
Original Post

Replies sorted oldest to newest

I can't offer much advice as I am fairly new to this as well. I have built a few Ameri-Towne buildings and painted them after assembly as you have done, but before installing the clear plastic for the windows. Seemed to work very well for the buildings I had. One was two story and the rest were single story. Your building looks just fine to me, it looks very nice, paint looks good, I don't see anything wrong with it.

I would do a wash of the stone wall joints with the color used for brick building mortar and spray dullcote as a finish. I can't recall the product name.


Since the building is in a newly constructed or painted state, I wouldn't mess with the roof. Every roof started out new.


George's ideas for the planking should provide a good result.


Nice looking result already!

Thank you for your responses!!  It helps a lot.  I have Roberts Brick Mortar, so I was thinking of using that.  The Depot in Durand, MI has large quarried rock for it's base and it has a pink/beige tone mixed into the gray, so it just didn't seem natural not to give those blocks some color.


I do plan to dull cote the whole thing to take the shine off anything I'm not painting.  I don't plan to paint any more on the building, but thought the roof needed something to give it some "pop."  Also, not in the pix, there are two glue stains on the roof that I need to cover.


I do have an interior planned and am going to use "Just Plug" lighting from Woodland Scenics.  I am having trouble with the first floor design (made from wood) warping in the freight room so I am trying to recover from that set back.


Initially I used corrugated cardboard for the floor and had benches and figures in the waiting room, luggage and freight in the (surprise) freight room and conductors, etc. outside.  It looked pretty good, but I thought the building deserved a more permanent treatment.


As I make progress I'll post, and thanks again!

Last edited by Charly
Originally Posted by George Lasley:

Try Pollyscale Railtie brown on the planking, followed by a wash of India ink and rubbing alcohol .  One of the craft paints form Michaels or Moores is called Asphaltum and looks good on the roof with a few highlites of a grey drybrushed on.


Your efforts look quite nice so far.


George Lasley

Don't have a source for Poly Scale, we're out at the store.  Will Modelmaster Rail Tie Brown give the same result?  Would the wash be a 50/50 mix?

Last edited by Charly
Originally Posted by Moonman:

I would do a wash of the stone wall joints with the color used for brick building mortar and spray dullcote as a finish. I can't recall the product name.


Since the building is in a newly constructed or painted state, I wouldn't mess with the roof. Every roof started out new.


George's ideas for the planking should provide a good result.


Nice looking result already!

Carl,


I may yet weather the building, it's still in flux, so to speak.  The roof has some glue blemishes I need to cover and it shines so something needs to done with it. 

Cheryl,

I've used a mixture of a couple of drops of india ink in a spray bottle of water for weathering. When first sprayed it looks dark but dries lighter. In addition, it tends to run down the structure giving it a realistic look since dirt stains follow the water in a real building. You can give it a light coat and when it dries if you want it darker give it another coat.


As for the stones, i use artist acrylics in earth tones dry brushing different tones on the stones. Then a spray of my india ink solution. The ink pools in the crevices and creates shadows. A final drybrush of white to give it highlights and I'm done. 


You can try dragging a razor saw across the planks before painting to give them more of a wood grain.


Don't be afraid to experiment. You can always paint over an area that doesn't come out good and learn in the process.

Originally Posted by Charly:

Thank you for your responses!! It helps a lot. As I make progress I'll post, and thanks again!

Ms Cheryl,

You will find George's recommendations just might give the results that you're working so hard to achieve. I've had better results with Hobby Lobby over Michaels. It may depend upon the area. Don't worry about getting it perfect. I don't think Super. Tux will complain. I'd go a little lighter on your wash to start (25/75). My official Station Mouser is named Moy-Moy. She is a American Shorthair, also. Good Luck..Keep in touch.

Originally Posted by Adriatic:

For the roof, Maybe a weather vane, lighting rod, or P.A. systems horn(s) (speakers).

It looks great though.


Gutters? Copper? Fresh or with patina. 


I'd match all your brick work at ground level to the tower unless you want it to seem like a later addition. 


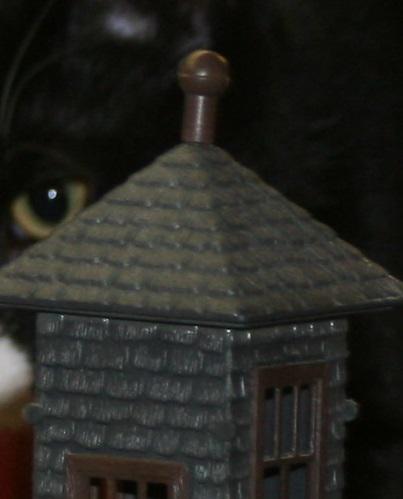
There was a rod and ball on the tower, but I think Super. Tux nixed it   I have looked all over for it and can not find it.  This too shall pass.


A weather vane isn't a bad idea, may I'll find something a York that will work!


The shingles on the roof appear to be emulating shakers, and the tower is covered with the same pattern.  I'm not too sure how I want to handle that.  I'm still simmering on that. 


I also have inside plank flooring, using a Plastruct sheet, that will need something.  I'm not sure I want to simulate worn wood, or painted worn wood   Or...  maybe just plain painted, lol.


There are no gutters to speak of, just the roof valleys.  I'm not sure I want to pursue that sort of detail.  This is not an especially sophisticated kit.  I'm just trying to give it a little personality


Thanks for your input, yours and everyone's is greatly appreciated

Last edited by Charly

Charly said "There was a rod and ball on the tower, but I think Super. Tux nixed it   I have looked all over for it and can not find it."


So, how about using a sewing needle and a round bead for the lightning rod. EZ and cheap. 

Or a brass clock hand pin instead of the needle, which is what I did.   Dave G.

Originally Posted by Adriatic:

I think the stone would be dirtier than he walls even new. Washes

Me too.  I have purchased some Plastruct in a similar texture to experiment with.  I'll cut it into strips of similar size and try some different colors/techniques and see if something pops up that I like.  Figured this was better then continuing to throw more paint at the station.  I can bring the test strips up to the same point and then slosh away from there

Sorry, Cheryl I haven't gotten into painting much beyond some vehicles, so I have no tips to add to these great suggestions. But I did want to say that I really like your choice of colors for the walls and trim of the station.  They are well-balanced and really being out the architecture and its era.  


Will look forward to further updates. 


Tomlinson Run Railroad

Though a bit oversized, I think that looks like it may have been a lighting rod & ball representation at one time.

The glass balls shattered with a strike.

After a storm it was a way of telling the owner they should check the ground wire and rod connections.

A players piece from a "Sorry!" game might make a good copy till it shows again.

I had one floating around the layout last week, I can try finding it and mail it to the shop if you like?

Originally Posted by Adriatic:

Though a bit oversized, I think that looks like it may have been a lighting rod & ball representation at one time.

The glass balls shattered with a strike.

After a storm it was a way of telling the owner they should check the ground wire and rod connections.

A players piece from a "Sorry!" game might make a good copy till it shows again.

I had one floating around the layout last week, I can try finding it and mail it to the shop if you like?

Thanks Adriatic, I thought it might be the same thing.  It still hasn't appeared, but I've had other parts disappear and then reappear months later, lol.  A basement floor with lots of stuff in boxes has many hidey holes for something like that to escape into.  Thanks for the offer, if you find it, I'd be happy to take it

I haven't done a lot with the station to date, except putting down the gravel around the base.  I guess I'm just a bit intimidated by the roof as it is very large, or at lease it seems that way to me


Anyway, here are some shots of current progress...

IMG_2383

IMG_2384

IMG_2385


I plan to use the same gravel to blend it in to the base a little bit more, but I'm not sure how to fill the gap between the base and the track

Attachments

Images (3)
  • IMG_2383
  • IMG_2384
  • IMG_2385

Cheryl...


I'd dress the gap using strips of embossed plastic....brick, stone, vertical/horizontal boards, etc...something 'foundation/wall-like...simply painted/glued to the edge of the foam/plywood.  A small amount of ballast at the platform wall/track joint will complete the gap fill.


Looking good!!


Why does the roof size intimidate you?  We need to talk....do a demo!!! 


See you Wednesday.


KD

My thoughts exactly, a wall to keep the earth in place, not slipping into the ballast.

A versatile arrangement if the RR ever wants to move the building to a new location. 


I'll start looking for the piece again. I checked a sand pail of army figures, and the layout.

  I need to look in a few gondolas kept in a renters bedroom later before I dig into some boxes.

For a size variance, I likely have some chess pieces too.

Originally Posted by Adriatic:

My thoughts exactly, a wall to keep the earth in place, not slipping into the ballast.

A versatile arrangement if the RR ever wants to move the building to a new location. 

Sort of the idea.  My intent is to be able to swap out stations, and not necessarily the same ones, for the Holidays.  The store has a Lionel Haunted Depot, and I'm sure I could manage a Christmas/Winter themed station.  Have a universal footprint and just swap them out through the year, this one being the Spring/Summer edition.


As to the top, the weather vane is still on the table, but I'm also looking at a possible piece of tubing and a suitable bead.    But I'll will take yours for sure if you find it. 

Add Reply

Post

OGR Publishing, Inc., 1310 Eastside Centre Ct, Suite 6, Mountain Home, AR 72653
800-980-OGRR (6477)
www.ogaugerr.com

×
×
×
×
Link copied to your clipboard.
×
×