I missed this thread originally. Just finished reading the whole thing. Very interesting. This forum is just amazing with the amount of help that we get from the members.
Thanks guys,
"I really like the control panels! How do you find wiring up with CAT5 Cables and the same OR/GN/BL/BN wire pairs all the time? do you find it hard to keep track of?"
You need to create a wiring standardization document and wire each and every like component exactly the same. If you do that it is manageable. this way can always safely make assumptions like "OW is always pos power and O is always common."
Also CAT5e is 24GA solid wire. Once you nick it, it breaks easily. You don't get many do-overs. (Also frustrating)
This is the third time I wired these panels. Just to be clear that means I tore the whole thing out twice!. It became frustrating because I rushed in and got confused as the mass of wires approached haystack status.
I finally decided that each cable would accommodate the exact same wiring scheme and I would cut away and discard any wires that were not used for that component. If a toggle harness required 5 wires I would cut away 3. The same 3 on every like harness. If a toggle harness required 4 wires I could wire two toggles into a single harness/cable. Hence I would label them with subtypes like harness B1 which used OW/O/BLW/BL and harness B2 which used GW/G/BRW/BR.
Once I mapped out all the complete circuits I needed I could determine how many unique harnesses I would need. It turned out I would need 5 harness types labeled A thru E, but some of them needed 4 wires or less so I could put two on a single cable.
I had the following harness types and labels....
These were used for turnouts and blocks that were only controlled from the primary panel. From what I’ve seen on the forum, most people only use a single control panel and these would be the most likely used harnesses.
STS (Single toggle switch)
A1 (4 conductors)
A2 (4 conductors)
STB (Single toggle block)
B1 (3 conductors)
B2 (3 conductors)
These were used for turnouts and blocks that were controlled from both the primary panel AND a secondary panel.
DTS (Double toggle switch)
E (6 conductors)
DTB (Double toggle block)
C (5 conductors)
D1 (4 conductors)
D2 (4 conductors)
It might not be very clear but I went ahead an attached a pdf of the documents I made to help me keep everything clear. I annotated in a few places to help, specifically the signal paths and the way I standardized the designation of lugs on each type of toggle.
Also a note on voltages and amperages. I am not an electrician. I tried to research if the CAT5 was suitable for how I wanted to use it. As best I could determine, the 5VDC for the block relays is definitely within the limits of 24GA wire. The 12VDC for the tortoises might be marginal and some may have the opinion its not quite heavy enough. I would never disagree. It does work and it doesn't get warm and it really only draws during the act of moving the switch points. Generally I wouldn't "hope it works" but in this case I made a judgement call.
Tim
Attachments
First time I have come across this thread. What a fantastic job you are doing on layout. I love the initial track model/plan you built from which to evaluate your vision and the execution you have completed thus far. My favorite threads are those in which layouts are documented from cradle to grave along with the lessons learned along the way. Nice job.
Mike
I, too, want to thank you for documenting the journey. It's difficult enough to go from idea to layout without taking the time to document it with photographs and commentary.
It is truly helpful to all to view the experience! Thanks!
I appreciate the effort you have made in documenting planning and construction also, Tim. Everyone does some different things, different track, materials, construction methods, problems that need solved. I learn from all, and am being inspired to document my layout I hope to start in a year or two.
Thanks to all on the Forum!!
Thanks guys for your nice comments. It's takes time to comment on someone's thread and I appreciate the time you take to do so. I do think it's important to share and stimulate discussion. Moonman you were one of the first to reply to this thread. I still ponder using the "Y" view block on my center peninsula that you illustrated. Mike your layout is one of my favorites to watch. It's nice to get feedback from so many with great layouts and experience. Mark I see and appreciate the goodwill you've been spreading throughout the forum on so many threads including mine.
I'm very close to finishing the control panels (how many times have I said that already?) Six more power blocks to wire up and I should be done.
Next steps...
1. Buy 4 more Tortoises and 3 more Ross turnouts (2 LH O72 and a RH #4).
2. Build (preferred) or buy eight bumpers for the ends of sidings.
3. Design the bridge/lift up crossing the walkway near the room entrance
Tim,
Did you have previous CAD experience? I would like to design benchwork for layouts that I design as you did. I have tried Sketchup, but something isn't clicking. Any pointers to a primer?
Have you seen Tom Tee's method for a lift-out? very nice, with micro-switch safety power cut-offs. Here's the thread for reference.
Thanks for the link on the lift out. I don't remember seeing that before. I do not have any CAD experience other than a lifetime of curiosity. When the free version of Sketchup was released I was all over it. I remodeled a master bath/walk-in closet and a basement in my house. I also tiled over a brick freplace and built a new mantle for it. I spent weeks drawing these out in Sketchup prior to the actual work. One reason is I personally geek out on drawing it and being able to rotate it around and view it. The other reason is it's a great way to force yourself to learn sketchup and ways to represent what you want in the drawing. I just used the Sketchup online help and some Youtube series called Sketchup school when I got stuck. Spend the most time thoroughly learning how to lock inferences and snapping to different points in the drawing. I nice size monitor and a mouse with a scroll wheel are very helpful using Sketchup. And of course perseverance is the most important skill :-).
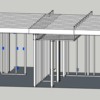
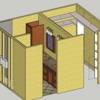
Here are some drawings I've done for home projects.
Attachments
Tim,
Thanks for the encouragement about SketchUp. As a former paper and pencil draftsman, (I know, I am really advertising my age here) I have had an interest in CAD, but have very limited need for it at work. As a result, I am still on the beginning edge of the learning curve.
I downloaded SketchUp probably 6 months ago, but over the summer have never used it. The YouTube SketchUp school is a great tip. Your attachments look great!
Many thanks!!
Control Panels are done! First time running trains!
The only problem I discovered was I accidentally used a 500 mA 5VDC power supply instead of the intended 2000mA PS. All of my LEDs kept getting dimmer the more I got wired in. Finally I decided to look and sure enough. After swapping them all the LEDs are nice and bright.
Here are some pics.
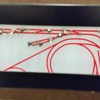
The other secondary panel controlling the industrial area from the other side of the room. You can see the white tipped toggle on the far right that opens the entrance into the area. I plan to have many fronts along the wall and a freight warehouse on the two siding right above the bridge.
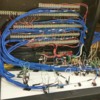
This is the inside of the previously shown panel. The top right labeled term strip leasds to the relay block. All others lead to the primary panel or the tortoise switch machines in the industrial area.
The primary panel fully populated and illuminated. The two sidings and their turnouts in the center peninsula are not actually wired since I have yet to buy those turnouts and I'm not settled on the final plan in this area.
The inside of the primary panel. I'm super happy with it. Itr was an exercise in frustration, but several times I would have problems with things not turning on or operating correctly and the modularity of each harness made it very simple to track down.
Some side shots...
Thanks for looking. Hope you enjoy.
PS, I am running trains now! I have a ride a long video uploading to you tube right now. (Did you know a Galaxy S5 will nest snugly on the front porch of an MTH premier GP38-2?)
Attachments
First time running trains. Here is a ride-along video
could not view - set on private
Sorry. Fixed.


