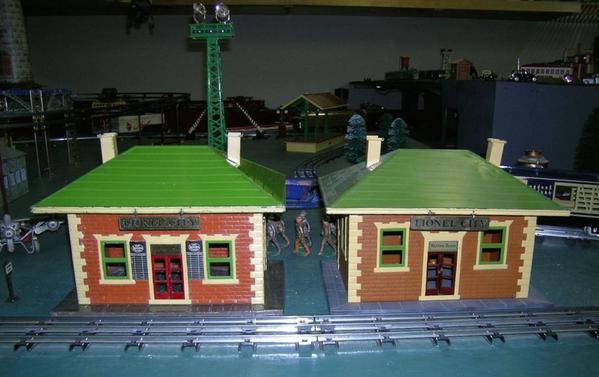
I finally finished the quasi-restoration project I've been working on for weeks, on and off. When I got it, it was a semi-restored 124(?) station with a TCA Restored sticker on the bottom and a few problems. Anyway I detest Lionel's pea green color, which JLC must have loved because it's on so much prewar tinplate, so I decided to change the colors and fix what needed fixing. This is the result. The walls and corners are done with two different colors of Rustoleum brand texture paint. The roof and window inserts are Krylon and the chimneys, roof trim, and window/door frames are Collector Color (600 Cream) from Henning. The maroon doors and spatter gray base are original. 


I learned some things from the project. The Collector Color as it comes from the can is very thick. I thinned it with about one part thinner to five or six of paint to get a good consistency for brushing. If I were going to airbrush it I would thin it a lot more. The Collector Color should be baked; my homemade bake box with a heat lamp worked fine. I also baked the Krylon roof but did not find it necessary to bake the texture paint. 


The most annoying and time consuming part of the job was replacing broken off tabs on the window and door frames and on the base plate. Each one of these had to be fabricated from brass flat stock and soldered in place. Not terribly difficult, but aggravating and time consuming. Soldering is not, unfortunately, one of my best skills although I've gotten better at it. 


When I was editing the photos of the station I noticed that the roof seems to be sitting a bit crooked. I'll have to go back and bend the roof mounts - shouldn't be any problem. 


There were some curious aspects to the station itself. It had an interior light but no hole in the floor for wires, so I'm guessing the light was added by whoever did the restoration and he just planned to run the wires out the back door. I went ahead and drilled a hole. The oddest part is the positioning of the front windows relative to the door. In the second picture you can see my station as I got it next to another, more normal Lionel station. The typical 124 station has the tops of the windows almost in line with the door frame. On my station, the windows are noticeably above the door frame. I don't know if this is an early version or what. I had to notch the blackboards to fit them in place; obviously the station did not originally come with them. Any light that anybody can shed on this difference will be more than welcome. I don't know if this was originally a 121, 124, or what.


What do you call a project like this? It's not really a restoration, since I intentionally didn't paint it in original colors, but it's more than just a repaint. Rebuilt? Refurbished? Redone?


STD Station 2

2x STD Stations

Attachments

Images (2)
  • STD Station 2
  • 2x STD Stations
Original Post

Replies sorted oldest to newest

Very nicely done, and the colors are certainly an improvement.  Which is actually hard to do!  Whatever we may think of pea green, Lionel had a combination of colors that worked, and they stuck to it.  We've all seen repaints that are garish and just don't work.  You have found a combination that is subdued, the colors go very well with each other, and are quite realistic too.  


So you are saying you made new tabs out of brass and soldered them on?  Wow, there's a labor of love.  With the solder, how were you able to get the tabs through the slots, and bend the tabs without them breaking again?


david

Last edited by Former Member
Thanks for the comments. My objective with the color selection was precisely as you say - to come up with something that would be in good taste and believable on a railroad station. I have strong opinions on colors, and some professional training in that area of graphic design. I think the texture paint worked quite well - it's hard to see on the picture, but it shows up better if you click on it for the bigger version.
 
Making the tabs was a pain. There were about eight of them broken off, six on window and door frames and two on the base. I used 1/64" strip brass that was about as wide as the original tabs. I clamped the strip in a vise with wooden jaw inserts, rounded off the end with a Dremel tool, then cut the piece in a miter box with a mini-hacksaw so it wouldn't curl as it would if you cut it with a tin snip. Soldering the tabs in place was a matter of getting the positioning perfect, then using enough heat and just enough solder to finish the joint. I had to spread the window frames a bit so that the tabs would match up to the slots. I used a Weller 100/140 soldering gun for a heat source and liquid rosin flux. I tried using CA glue but it wouldn't hold.
 
Making the tabs was a matter of necessity. I'd have happily spent the money for new window and door frames, but I was unable to find anyone selling repros. I tried MTH but after a couple of weeks of waiting for Midge to answer my e-mails (long list of MTH parts), I gave up and did the repairs.
 
Do you know anything about the difference in the window location between my station and the more common version? I'm assuming it's an early version but I've never seen a photo of a station with that window placement.
 
Originally Posted by hojack:

Very nicely done, and the colors are certainly an improvement.  Which is actually hard to do!  Whatever we may think of pea green, Lionel had a combination of colors that worked, and they stuck to it.  We've all seen repaints that are garish and just don't work.  You have found a combination that is subdued, the colors go very well with each other, and are quite realistic too.  


So you are saying you made new tabs out of brass and soldered them on?  Wow, there's a labor of love.  With the solder, how were you able to get the tabs through the slots, and bend the tabs without them breaking again?


david


Last edited by Southwest Hiawatha
Originally Posted by Southwest Hiawatha:
Do you know anything about the difference in the window location between my station and the more common version? I'm assuming it's an early version but I've never seen a photo of a station with that window placement.

I do not, and I find it very intruguing.  I notice the windows on the side of the building are high also.  Have seen my share of Lionel stations, but must admit, it never occurred to me to look for variations in window height.


The same station was sold as numbers 121, 122, 123, 124, and 134, depending on trim and lighting options, but I have not seen any reference book (Greenberg, McComas, Doyle, Fraley, etc...) refer to window height as a variation.  Wonder if you have a factory error there?  Too soon to tell, maybe it's just something nobody has paid attention to before.


david

Here's another shot of the station, now moved to its place in one corner of the layout. Not sure if this is the permanent location, but it will be there for a while. I still need to do some work on the location - wire the station and the lampposts, lay down some asphalt, etc. My layout consists of one loop of Standard Gauge around the outside of an otherwise 0 gauge layout, so any Standard Gauge structures have to go in the corners.


Station in Corner 2

Attachments

Images (1)
  • Station in Corner 2
Last edited by Southwest Hiawatha

From your description of having no lights either inside (you say it was added) or outside, it sounds like a 121 made between 1920-1926. A clue to the windows, I knew I saw that somewhere else. In the DVD Tinplate Legends in Action 2 Chuck Brasher has one like yours on his layout and he talks about the differences between it and a 124 station. He says it was the first version of this station.  If you have the video, take a look and tell us what you think. 


John

John


Thanks. I don't have that video but it will probably show up on the RFD Channel sooner or later. In the meantime, everything you say is consistent with my initial guess that it was an early version.  None of my reference books shows a station with that window alignment. I believe the interior lights were added since there was no place for the wires to go. Also the ends of the wires looked like they had never been connected to anything. 

Looks great and the color is much better.

I have a 630 observation car that has two tabs that are broken off. Planning to sue brass and to make the tabs with a off-set in the middle to allow for material thickness so the structure will fit without bowing? Bending this in will be a trick and may have to make fixture to achieve this.

Brass/copper is good, when hot, quench in cold water to anneal it (makes it softer and not brittle).


I kind of doubt it. I'm not sure, but I don't think the tabs are symmetrical. I seem to remember that I accidentally tried to put in one of the end pieces upside down and the tabs didn't line up with the slots. You would likely have to cut new tab slots, which isn't easy. And there are no tab slots on top of the wall pieces, so you wouldn't have slots to match the tabs on the base. It might be possible, but far more work than it would be worth. 

It may be a manufacturing hiccup.  My guess is there were two punch dies: one for the windows and one for the doors. The sheet metal blank was placed in one fixture to punch out the windows. The blank was then moved to a second fixture to punch out the door opening.  The part was accidentally rotated between the two fixtures.
What a find!  It could very well be unique.
I'm a retired manufacturing engineer.   "You can make a process fool proof, but you can't make it idiot proof."

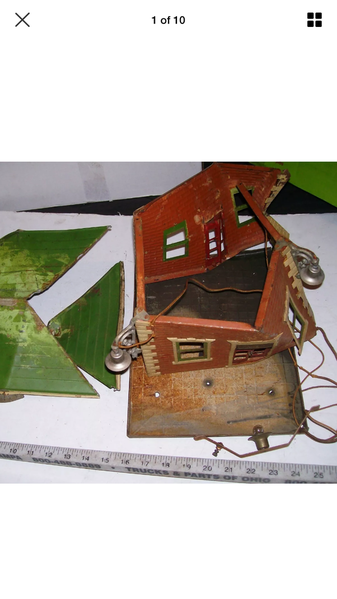
Hi Jim, Go ahead and purchase the Lionel 124 station. It’s fun putting them back together and putting them on a layout. You can find the chimneys from most suppliers as they’ve been reproduced.                           My 124 station was a total wreck when I purchased it. It was enjoyable taking it all apart, stripping it, cleaning it up and painting it. Most of the little metal tabs survived the destruction the disassembly and reassembly.  Only one of the base plate tabs was broken off.  So go ahead, purchase it, it’ll be a fun winter project.


Add Reply

Post

OGR Publishing, Inc., 1310 Eastside Centre Ct, Suite 6, Mountain Home, AR 72653
800-980-OGRR (6477)
www.ogaugerr.com

×
×
×
×
Link copied to your clipboard.
×
×