On this frame from the Ready Made Toys Budd car, that I am extending, there are support L-shaped rails down the sides.  I drilled new holes and put in screws to solidify

the frame last night, and then taped the top wiring that had two inch extension connections soldered in.  On the bottom, with another four wires to the truck in a very tight space, for insulation, I covered all the wiring solder joints in two part expoxy before next attempting to tape those exposed connections.  That looks like a tweezer

job.

Having soldered the wiring on the extended RMT Budd car frame, I tested it, and...

it still works!  I do like these kinds of surprises. Then began the wooden sides of the

LaBelle D&RGW gas electric kit that will be mounted on this chassis.  That is tedious,

with many small wooden window parts such as mullins and other details.  This kit

includes NO metal parts, such as headlight, bell, or even wire handrails, so those

will have to be scrounged.   Maybe some from Wiseman, I have a few in my parts box,

but not enough...the instructions list what are needed, but no sources, and I am sure,

some, like the underbody motor carriers, do not exist as castings and will have to be

scratched.  Definitely a kit for the creative modeler.

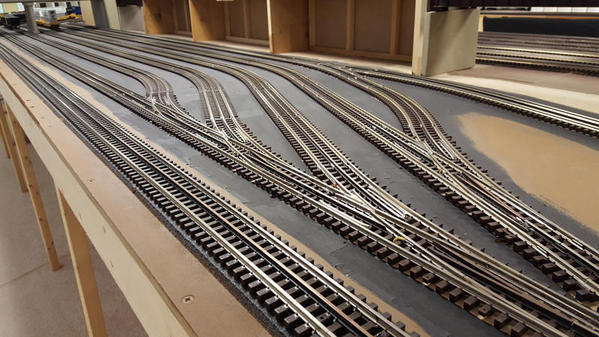
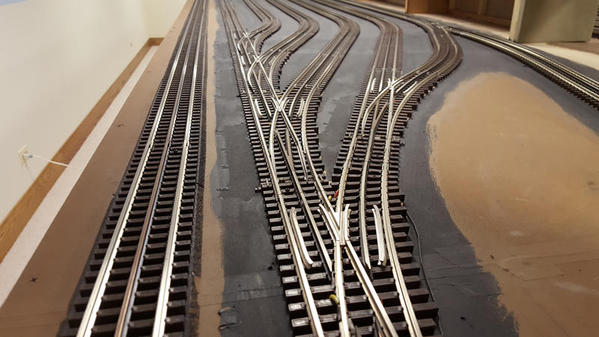
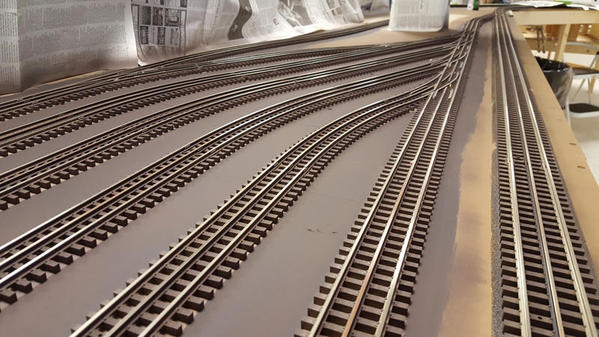
I haven't been downstairs yet today because Matt had to cancel. Yesterday, I got all the new fascia filled, sanded and painted, under the assumption that he would be here. Oh well, it's done and ready for when he does show up.


IMG_5865

IMG_5866

IMG_5867


Now that it's painted, I can see there are a few small spots that need a little more filling.


Time to polish off that last bit of ballast so I'm ready for Patrick's next visit (whenever that is). Then I can get back to the "A" Yard ladder and a lot of vacuuming.


I'll be off for a couple days this week, going to visit my son. Beside, my right shoulder could use a break. Right now, it looks like Friday with Joe.

Attachments

Images (3)
  • IMG_5865
  • IMG_5866
  • IMG_5867

Max and I continued wiring....we ran about 70' of 18 gauge stranded for our 14 volt accessory circuit.  

We decided to put push buttons around the periphery of the layout for easy access and visitor participation....


Here's Max....we were about 2/3's through the wire run at the time.....I think he's anticipating a treat for a job well-done!


IMG_3350


The 1st accessory we hooked up was a Lionel #30 Water Tower.


Peter

Attachments

Images (1)
  • IMG_3350
Last edited by Putnam Division

What did I UNDO today?  Well, following the HO sized instructions, I glued the sides

of this D&RGW gas electric to the front, and it didn't look right.  So I fished out one

of the Keilty books, "Interurbans Without Wires", which has a section on the two companies that sold or installed these kits in railroads' old coaches.  A good front

photo on this car,#592, shows the front fascia board extending the width of the car....

not with the sides covering the ends of the board.  A little Xacto surgery, some modifications to ends and sides, and glue is now again drying.  The Grande apparently

installed this kit in their 1898 combine in 1927 but only ran it until 1930, when it

apparently sat until turned into a trailer in 1938.  Their kit was from Railway Motors Corp, of De Bere, Wisc. just south of Green Bay where the other kit builder for these,

Oneida Mfg., was located. Oneida did some conversions in their own shops, but only

did six, while RMC provided ten kits to several railroads.  The railroads provided

old, heavy coaches which the two 100HP engines had trouble moving, and the

location of engines under the car made maintenance difficult, so most had short

service lives.  An exception was two narrow gauge RMC ones on Oahu which had long lives.

As for pooches, I have a dachshund. Charlie is a great little pooch but he'll never get anywhere near anything on the layout other than the legs, unless someone picks up the 13-year old pup and shows him...


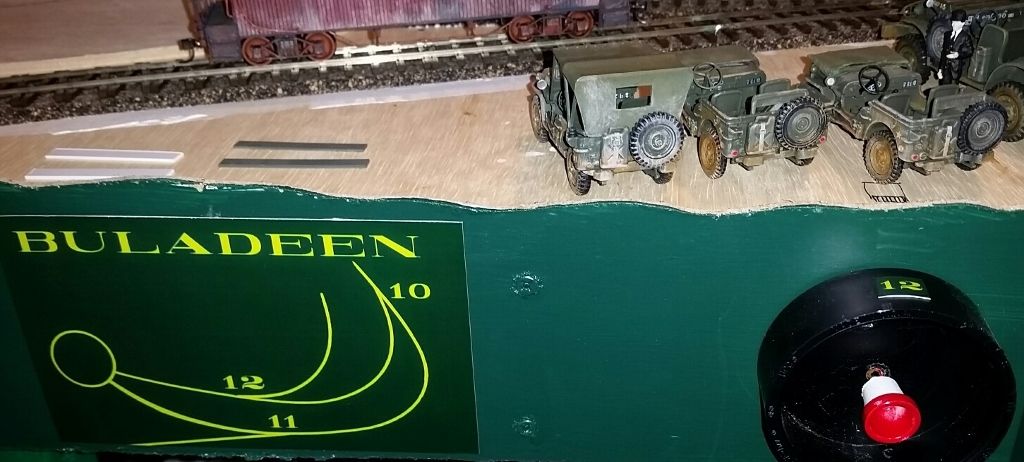
As for what I've done today, I drew freehand outlines of the track and spurs with turnouts in the three places where there would be the most confusion over which turnout pull is for which turnout. I put the scans through photoshop, changed the colors, put in lettering for the station names and turnout numbers, then printed out numbers to place over the caps where the pulls are. This afternoon I printed then on photo paper and mounted then with good double sided tape. I think they worked well. I originally was going to mount plexiglass sheets over the diagrams, but as nobody's gonna brush against them where they are, I cut the plexi but won't mount them unless I have to.

Yes, I have a depot name Buladeen. It's a real place. My parents grew up within sight of it: http://roadsidethoughts.com/tn...x-carter-profile.htm

Attention turned to the new work bench.   Leaving the nearly flawless vintage desk top exposed to my brutal bashing would be a shame so I started with an 1/8" plywood covering.  Another necessity was increased work area lighting which required extra framework attached to the shelving assembly.  Here I used 2 smaller versions of the same LED's that light the room


The shelving is of cedar decking.  After it was screwed to the plywood base I glued some foam core board to the bottom for added protection against scratching the old desk.  I will finish the front edge with extruded aluminum "L".


Roughed in one wall using the same engineered plywood.  Comes already colored in a mahogany like tone.  Now the speakers have a permanent home and those switched outlets will power additional lighting. 

So endeth the long weekend.


Bruce

This is my first ever entry into this long running show.  So here goes


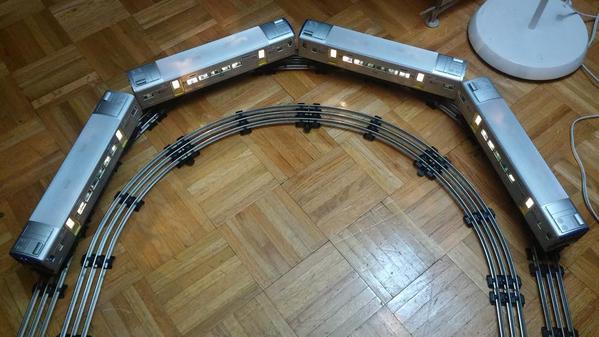
Just completed some track radius testing with tubular track on the Living Room floor seeing how my Lionel M7 looks on curves of O31 (lights off), an O31-42 Blend (lights on), and O42 (lights on, doors open).  The O31-42 blend consisted of 42-31-42-31-42.


M7 on O42

M7 on O31-42 Blend

M7 on O31


Naturally the O42 looked the best, but that wasn't my goal, it was just to see the difference. 


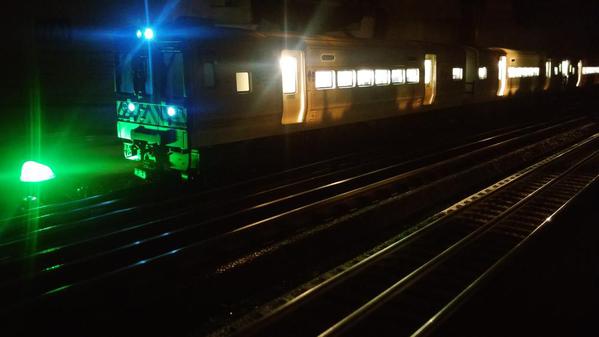
Then the best part was turning off the lights in the living room and watch my passenger train roar through the night sky on a 42x122 loop for over half hour straight, non-stop which I just completed.


Very hypnotic, very monotonous  , very relaxing, and I enjoyed every minute of it. 


M7 Night Shot


I might have to look into painting the interior ceiling black to prevent the bleeding of the cabin lighting through the roof of the cars.


Yes, to pay homage to another thread that I started (https://ogrforum.ogaugerr.com/t...26#43524901912281226), those are Realtrax and FasTrack tracks running alongside my tubular rails.  The Atlas O is not shown in the photo.


Good night!


Attachments

Images (4)
  • M7 on O42
  • M7 on O31-42 Blend
  • M7 on O31
  • M7 Night Shot
Last edited by Amfleet25124

This past weekend, the Razorback Traction Co./Gi-raffe Express made an appearance at GlitchCon, a local SF/anime con here in Springdale.  I was doing a bit of outreach to a slightly different fandom, with great success!  The dealers were charmed with the trains; a couple of 'em loved the gentle roar of the Lionels going down the tracks, comparing it to surf or a white noise machine...


DealersRoom

GEDC1583

GEDC1584

GEDC1585

Naturally, since this was an anime con, an anime presence made its way onto the line:


GEDC1586

GEDC1587

GEDC1588

A quick vid of the line in action:


This was also a rather stressful test of the vintage RTC equipment.  Most train shows around here are Saturday only affairs, with operation from 9 to, say, 3 or 4 in the afternoon.  Glitchcon operations ran Friday from 1-7, Saturday from 10-7 and Sunday from 10-3! 


Casualties included the gear train from the Polar Gi-raffe Express Berkshire (leave us face it, Lionel simply ISN'T building 'em like they used to; when I tore it down, the ten year old loco's worm gear was nearly worn smooth and the axle gear was cupped!  Fortunately, Lionel's crack parts department is on the job; I ordered a replacement motor and axle on Sunday night and got a shipment notification by 10 AM Monday morning!), the electronics from the Gi-raffe-G-1 (no horn all weekend, and a short circuit may have effected the bridge rectifier and capacitor rig), the ZW getting warm and declining to reset the breaker and various minor things like the GX caboose losing its third rail pickup (causing the aforementioned short)...


All in all, a successful excursion and we have been invited back next year!   I'm actually considering a purpose built anime train, with various cute girl figurines lounging on flatcars...  ;-)


Mitch

Attachments

Images (7)
  • DealersRoom
  • GEDC1583
  • GEDC1584
  • GEDC1585
  • GEDC1586
  • GEDC1587
  • GEDC1588
Videos (1)
GEDC1589

A quick additional post to my one last night above for the reasoning of my "radius testing".


I should mention that in all of my various temporary layouts, I have always only used O31 (RealTrax + Tubular) and O36 (FasTrack + Atlas) track due to space considerations.  Space was never an issue on the floor, but I wanted to to have track that I could use both on a table and the floor.  So this was my first foray in O42 world and the blending of track radiuses.  I went to one of my LHS's at lunch time and bought a circle of O42 track.


Originally Posted by Amfleet25124:

A quick additional post to my one last night above for the reasoning of my "radius testing".


I should mention that in all of my various temporary layouts, I have always only used O31 (RealTrax + Tubular) and O36 (FasTrack + Atlas) track due to space considerations.  Space was never an issue on the floor, but I wanted to to have track that I could use both on a table and the floor.  So this was my first foray in O42 world and the blending of track radiuses.  I went to one of my LHS's at lunch time and bought a circle of O42 track.


It is almost essential in discovering the many configurations of radii during planning to have a good stock of all the different curves on hand.  Spend an afternoon familiarizing yourself with different combinations so that you can envision the end results even before you start connecting.  Try using wider radius curves as easements...not only more realistic but the smooth transition gives you better throttle control.  This practice in 3D pre-planning is especially handy when dealing with small layout dimensions.  Half the learning curve is finding out what can't be done practically as well.


Bruce

Just got back to the layout. Took the weekend off to go up to Buffalo and take the 765 excursion on Saturday. It was yard work before I left and catch up yard work when I got back. But today I drilled holes and ran wire to under the table for the station. Also got out some peel and stick road way to place by the station. The road is not tacked down. It is just sitting there. The two uncoupling tracks I put in will have to be moved to allow the cars I want on the sidings. I changed my mind about putting a uncoupler on the track in front of the station Here are a few pics...............Paul

DSCN1971

DSCN1973

Attachments

Images (2)
  • DSCN1971
  • DSCN1973
Originally Posted by paul 2:

Just got back to the layout. Took the weekend off to go up to Buffalo and take the 765 excursion on Saturday. It was yard work before I left and catch up yard work when I got back. But today I drilled holes and ran wire to under the table for the station. Also got out some peel and stick road way to place by the station. The road is not tacked down. It is just sitting there. The two uncoupling tracks I put in will have to be moved to allow the cars I want on the sidings. I changed my mind about putting a uncoupler on the track in front of the station Here are a few pics...............Paul

DSCN1971

DSCN1973

Looking good. Love that Minneapolis, Northfield & Southern boxcar on the far track. Many moons ago I lived about two blocks from their line.

I am still painting my track in places where I have already installed it.  I am painting it with Rustoleum Camo Earth Brown in rattle cans.  Here are a couple before and after shots of the right hand end of my Proviso freight yard.


First two before pictures.  Hopefully you can see how shiny the sides of the rails are.


Provisobefore1

Provisobefore2


Here are two after pictures of basically the same area.  I like how the rail tops are still shiny, but the sides are not.  I think that it also helps tie the rails and ties together more like real track that gets oil, dirt, and weather on it on a daily basis.


Provisoafter1

Provisoafter2

I can't wait to get started ballasting it to finish the look.


Art

Attachments

Images (4)
  • Provisobefore1
  • Provisobefore2
  • Provisoafter1
  • Provisoafter2

Hello Everyone  I am painting the floor in the breezeway now. or at least I will finish it after I pick some  Rust-Oleum  Concrete Etch. on Thursday when I have an appointment with the Pump DR.  So I figure why make 2 trips. Its taken me some time but at least I still have my plans.  

DSC_0080

DSC_0081

DSC_0085

DSC_0082

Attachments

Images (4)
  • DSC_0080
  • DSC_0081
  • DSC_0085
  • DSC_0082
Originally Posted by Randy Harrison:

... inspection by Chaz Harrison, the great Northeastern Railway's Chairman of the Bored. Following are Chaz's official portrait and photos of his inspection tour.


HPIM0843

I love how cats seem to feel obliged to inspect our layouts. I'll bet there isn't a cat anywhere who hasn't inspected his owner's layout. I could always detect when our Noel visited our layout by the tufts of fur stuck to the utility poles and roadside trees, which I removed easily (almost happily, not minding the visits at all) with a little swatch of Gorilla tape. And they always seem ready for their close-ups.

Took a break from the baseball field and went to work on my first River Leaf Model kits.  Added a few extra parts to it including the lamp above the Scuttlebutts sign and a white LED behind the dancer silhouette .  Added a feature dancer poster and upcoming dancer marquee to the side of the building.  Also using photo shop was able to put in a club interior.


sb1

sb2

sb3

sb4

sb5

Attachments

Images (5)
  • sb1
  • sb2
  • sb3
  • sb4
  • sb5
Send me an email when your ready for that sign!

Thanks

Originally Posted by Mike welkie:

       
Hey forty rod. For the Woolworth awning, I found some red striped scrapbook paper at Michaels. I am going to do a Woolworths store as well and found some suitable paper there. Now I need to get some of those nifty
laser cut signs !
Mike

Add Reply

Post

OGR Publishing, Inc., 1310 Eastside Centre Ct, Suite 6, Mountain Home, AR 72653
800-980-OGRR (6477)
www.ogaugerr.com

×
×
×
×
Link copied to your clipboard.
×
×