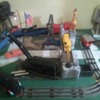
Here are some pics, now I just need to finish the other reversing loop
It's looking mighty good Thaddeus!!
Went to the depot today to get paint for the cork roadbed. Took the ballast with me to match it up. Also found some colors in the small jars that will possible work on some buildings I am going to be doing and they were only .50 a jar. So tonight after dinner and while the wife is watching her Cavs I am going to lay down some cork on the basement layout. Finally a bit of track work started.......................Paul
Paul,
Yay!! Better than watching basketball! ;-)
Got the last bar stool put together and started laying down cork roadbed on the basement layout, Was a good evening....Paul
What/whose roadbed are you using?? Do you like your results??
GG1 2340 posted:
Funny thing is that this is the cleanest it has been for some time! Glad To hear that I'm not the only one.
Thaddeus posted:GG1 2340 posted:Layout top looks like mine with all the tools and supplies spread around. Papers, wire, boxes, tools etc.
Funny thing is that this is the cleanest it has been for some time! Glad To hear that I'm not the only one.
I think all "Plywood Pacific" layouts look like that before the scenery goes in.
My own layout was essentially a odd-shaped workbench with track on it for the better part of a year.
Woodson, I am using Midwest cork. Been using that forever. I don't know if it the lazy mans approach the way I do it. But I start out gluing it down with Elmer's carpenter wood glue using finishing nails to hold it in place till it dries. Once dry I paint the roadbed with a color made up at the depot to blend in with the ballast. Right from the start I never ballasted the whole track. I just ballast the sides of the cork. Couple of pics of what I mean.......Paul
Attachments
paul 2 posted:Woodson, I am using Midwest cork. Been using that forever. I don't know if it the lazy mans approach the way I do it. But I start out gluing it down with Elmer's carpenter wood glue using finishing nails to hold it in place till it dries. Once dry I paint the roadbed with a color made up at the depot to blend in with the ballast. Right from the start I never ballasted the whole track. I just ballast the sides of the cork. Couple of pics of what I mean.......Paul
Nice technique!
I so badly wish I'd at least painted the cork under my turnouts grey, as my Micro Engineering On30 turnouts are very fragile and picky, and I'm worried about gluing down ballast anywhere near the points or moving sections.
Paul,
I like your technique. I have used cork before, but always ballasted between the ties. No matter how much I tried, some always got where I didn't want it. I have considered not balasting at all on the new layout, but your technique will make it very less noticeable that no ballast is between the rails.
Hi Paul, I have to agree with everyone else, Looks great and a lot easier!
Mark Boyce posted:I like your technique. I have used cork before, but always ballasted between the ties. No matter how much I tried, some always got where I didn't want it. I have considered not balasting at all on the new layout, but your technique will make it very less noticeable that no ballast is between the rails.
I don't want to ballast at all, but especially between the ties, and this looks like a great compromise.
paul 2 posted:Woodson, I am using Midwest cork. Been using that forever. I don't know if it the lazy mans approach the way I do it. But I start out gluing it down with Elmer's carpenter wood glue using finishing nails to hold it in place till it dries. Once dry I paint the roadbed with a color made up at the depot to blend in with the ballast. Right from the start I never ballasted the whole track. I just ballast the sides of the cork. Couple of pics of what I mean.......Paul
Thanks for answering my question.. I've used Midwest before and I was pleased with the results.. Plus, you gave me and others a brilliant blasting technique!! I learn so much from you guys everyday!! Thanks for sharing!!
I got my first section down. It is the only section I was sure of where I wanted it. As the track sits it is going to be part of the mainline. It will also be hidden to a point. being at the back of the tables it will go down between buildings on the front side and on the wall side Flats of buildings. Later tonight I hope to paint the cork. Pics show the section runs straight then starts into an 0-80 curve.......................Paul
Attachments
If you sponge roller paint black before the grey and stay somewhat light on grey you could increase the effect too.
Nice trick.
Paul,
Those two photos look so familiar! I hope to be doing the same thing again a bit before winter is over!
Adriatic,
Good point!
The two pics I showed were of my attic layout that I took a little while ago. I thought they showed how I did the bsllast. On the basement layout I am going with a bit darker ballast but I am going to mix in some of the older ballast. And it looks like I Won't be able to take pics. My camera just messed up tonight........Paul
As usual a lot of great work.
Elliot love seeing the progress on your layout. Only issue when you show all the details of the wiring I get a headache and my eyes become sore just looking at it. ![]() Made another video with my 3rd Rail CB&Q/C&S SD9s.
Made another video with my 3rd Rail CB&Q/C&S SD9s.
suzukovich posted:As usual a lot of great work.
Elliot love seeing the progress on your layout. Only issue when you show all the details of the wiring I get a headache and my eyes become sore just looking at it.
Made another video with my 3rd Rail CB&Q/C&S SD9s.
I agree with you about the wiring! LOL. Another great video and music, but your killing me! Being from the west Washington I need some green! LOL
Sorry, no pics today, but something of a milestone was reached on a trip to Menards. Today I bought what I believe will be the last dimensional lumber the layout will ever need, some 1x4's and 2x4's. There could still be some sheet goods, but I have some stockpiled in the garage. It's going to be very close.
While we were there my wife discovered the toy aisle, and dragged me over to see the trains. Yes Dear, I know all about them. ![]() I have my Red Owl store, that's all I want (for now).
I have my Red Owl store, that's all I want (for now).![]()
I fell asleep mid post waiting on the attachment tool to show up yesterday.
I had played the shell game with scenery, trying for an "uplifting" scene.
Ended up wanting to sing "One of these things is not like the others" to Mitch.
Can you guess which of these.5 things is not like the others?, lol.
Six , six ,six , six, let's sing the song of six! How many is six?
Six lifting devices.
(It could have been seven if I had only thought of the helicopter too..darn)
Ah hah, I made you count! ![]()
(Too old? Too "soft"? https://youtu.be/Qn_Lu6hcLqw link is broken and won't respond to edits. See next post.
Attachments
Hi Folks: I've been working on the river on the right side of the round the wall layout. I finally added some color to the river bed, and tomorrow I'll start adding the first coat of gloss acrylic medium. There is a stream section under the truss bridge at the entrance to our train shed, and I have experimented with that small area first. That's the first picture.
Attachments
It really looks excellent, John!!
https://youtu.be/Qn_Lu6hcLqw. Link Experiment (same as above)
Result: same address, but this works...?????
I bought some dirty Lionel Pullmans cheap this past week - put some elbow grease on the observation and it looks brand new. They all had a thin layer of cooked on mud on one side of the exterior and the opposing interior. They must've been on their sides. I got the combination cat and a Pullman done, just 2 more Pullmans to go. And order new diaphragms for all of them too.
Attachments
Adriatic posted:https://youtu.be/Qn_Lu6hcLqw. Link Experiment (same as above)
Result: same address, but this works...?????
I can only count to four
Mark Boyce posted:It really looks excellent, John!!
Thank you Mark!
It's a small thing, but I filled every depression and hole on the layout and lined every path with real dirt from the place the layout takes place. I also placed a few small pebbles in certain spots to represent large rocks on the surface. Those also came from where the layout takes place.
Before I started the layout, my Mom actually collected a jar or dirt and a bag of small rocks from the area, just so I could do this once the layout was built.
It means a great deal to me to have several small actual pieces of Stoney Creek on the layout today.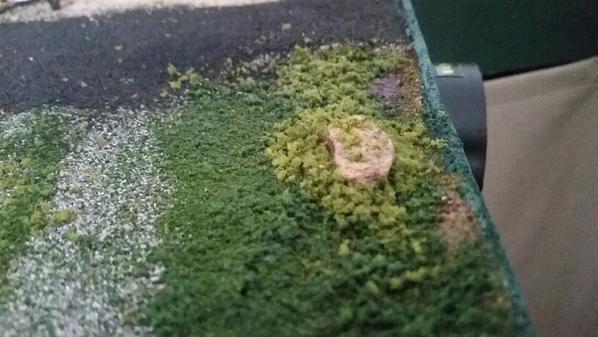

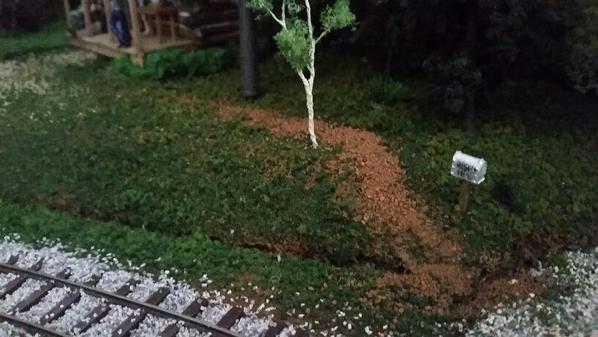
Attachments
Yesterday after painting the cork an it had dried I added ballast to the side. Today I'll mix up some glue to apply to the ballast. The only thing bad about working on the basement layout is I can't run trains while working on it. A couple of pics............Paul
Attachments
I had my guy come in and finish the last of the Sheetrock in the dispatcher's corner.
Before...
and after.
Really makes a difference. Time to get the mud out!![]()
Attachments
Kyrian and I have been working on the bench-work for the "Milwaukee Sub" on the Cabin Lake and Western .. seemingly forever ... but it is getting there. Have to move the car out into the snow to make room for the sawing boards work. Making about 3-6 feet of progress a day. Hoping to have all the track and wiring done by May .... it just seems like it takes FOREVER!! Risers -> sub-roadbed -> roadbed -> paint roadbed -> paint track -> install track -> wire it up -> play ... if still on this Earth by then ... :-)
Somewhere along the line this hobby turned into a job.
That wasn't the plan :-)
Finally had some time to begin a project that will improve visibility of the switch position LED's. Using Ross switches with DZ1000's and DZ1002 push button controllers. The controllers did not give an adequate position of the switch relative to the individual track. So, I incorporated a SPDT-mom toggle switch just prior to the switch and LED's to indicate the switch position. This arrangement is easier to see. See attached photo showing "Green" position.
Attachments
WP posted:Hi Folks: I've been working on the river on the right side of the round the wall layout. I finally added some color to the river bed, and tomorrow I'll start adding the first coat of gloss acrylic medium. There is a stream section under the truss bridge at the entrance to our train shed, and I have experimented with that small area first. That's the first picture.
Nice job!
paul 2 posted:
Paul,
Yes, this is one of the greatest techniques I have seen in 50 years of trains!! I hate ballasting; too tedious and painful. Even though I will be building in only a 12 x 12 room, this could take a year off construction!! ![]() Thank you!!
Thank you!! ![]()
Mark, it still takes a bit of time to place the ballast along the side. When I first started ballasting more years back then I want to remember I used crushed stone and did the whole track. Worked okay till I needed to move and it was a pain to pull up. So the next layout I did I went to the rubber ballast which I first saw at a Right of Way open house in Akron Ohio. Since that day I have used the rubber ballast and have been quite happy with it. The plus side is by chance if it got into the train gears it would not be as harmful to the gears as stone ballast would by. So today I found my glue and glued down the ballast. Tomorrow morning at trip to the Massillon train show and then a trip to Menards first. Lay down some track on the section I just did giving me a section of track to no where......Paul
mike g. posted:suzukovich posted:As usual a lot of great work.
Elliot love seeing the progress on your layout. Only issue when you show all the details of the wiring I get a headache and my eyes become sore just looking at it.
Made another video with my 3rd Rail CB&Q/C&S SD9s.
I agree with you about the wiring! LOL. Another great video and music, but your killing me! Being from the west Washington I need some green! LOL
But there is green in the beginning, Burlington Northern Green. Or do you mean this kind of green ![]()
Of course I wouldn't want you seeing red either. ![]()
So how about a compromise. Orange and green. ![]()
But after all you do have a new Mercedes Benz to drive. ![]()
Attachments
paul 2 posted:Mark, it still takes a bit of time to place the ballast along the side. When I first started ballasting more years back then I want to remember I used crushed stone and did the whole track. Worked okay till I needed to move and it was a pain to pull up. So the next layout I did I went to the rubber ballast which I first saw at a Right of Way open house in Akron Ohio. Since that day I have used the rubber ballast and have been quite happy with it. The plus side is by chance if it got into the train gears it would not be as harmful to the gears as stone ballast would by. So today I found my glue and glued down the ballast. Tomorrow morning at trip to the Massillon train show and then a trip to Menards first. Lay down some track on the section I just did giving me a section of track to no where......Paul
Paul,
Yes I know what it is like pulling up track that was ballasted a few years earlier. Maybe I glued it to well. The plastic ballast sounds like a great idea. Yes it is some work getting it to sti
Yes it is 2018 at the Detroit Model Railroad Club
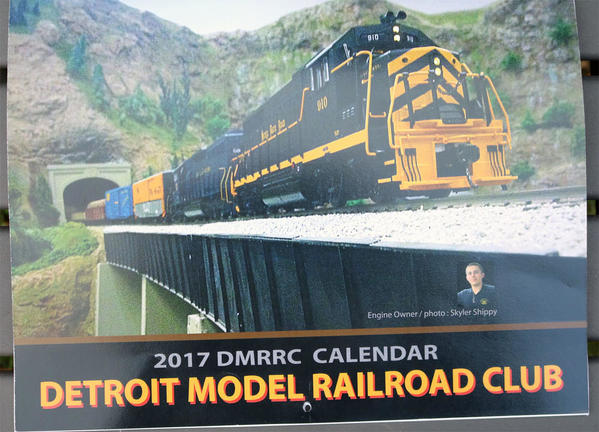
Today we started on one of the club's fund raising activities, the 2018 Calendar. The 2017 calendar is on sale at the DMRRC's Open Houses. We use a local printing company to print this calendar, on a high speed digital press. A long with a folding and binding machine.
Below you will see the results of today's brain stormy at our Saturday's Open House and a photo of the 2016 Calendar.
Founded on January 19, 1935 / Michigan's Largest 2-Rail O Scale Club
Gary


