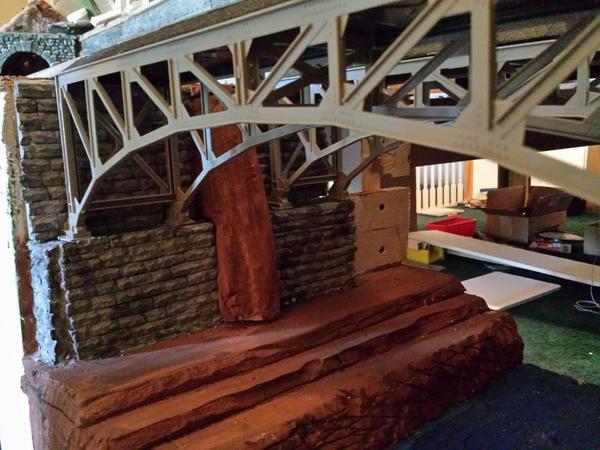
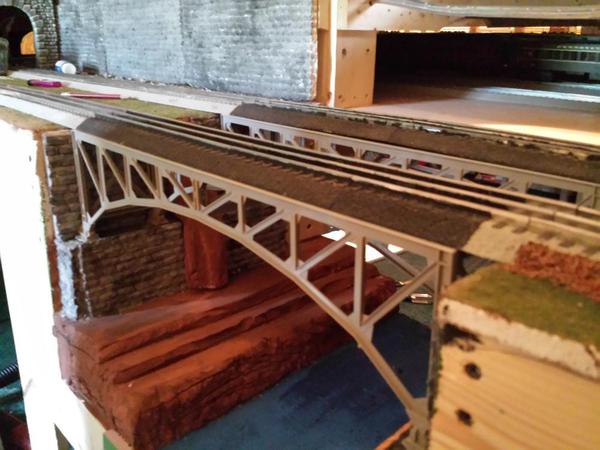
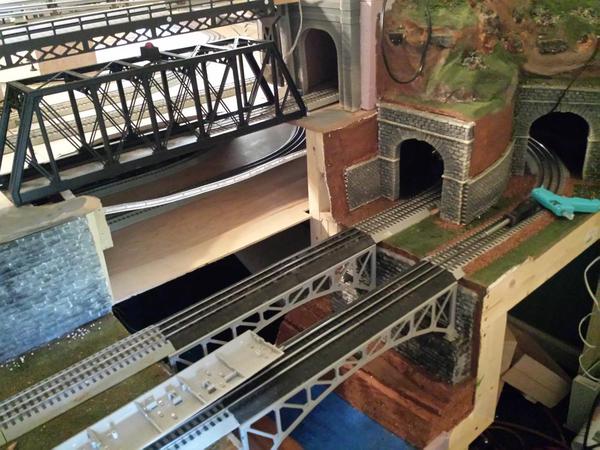
Got two more sections of plaster colored. Taking a short break and back to color the last section of plaster........Paul
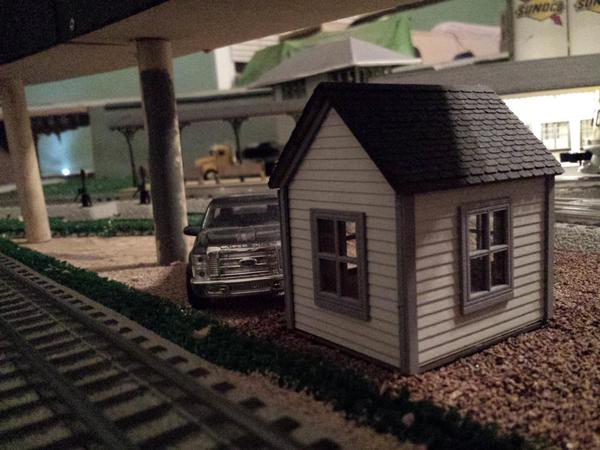
I recently got one of these shacks, they really do a great job on them!
Nothing yet. Paying bills right now.
Big day to retool the inventory on the layout. Over the past few months, I have moved the majority of my passenger train inventory to K-Line 21" cars. So today was dedicated to making these adjustments on the layout.
The set that really impresses me is now serving track # 1, the B&O Columbian. It is made up of a Lionel F3 combo of ABBAs (with 2 powered) and a 10 car 21" K-Line passenger car set. Aside form it being a very long train, it is one of the nicest looking passenger trains on the layout.
Please post some pictures of this train.
Got the portable Razorback Traction Co. set up for Frisco Fest in Rogers, AR tomorrow! (Sat 8/23)
Mitch
Attachments
Brian - I am dying to see pictures of your new B & O passenger train. That is one of the prettiest and classiest paint jobs that ever existed in my opinion.
Art
and it looks like realtrax too I really like it explain how you did it.
Yes, it's MTH Realtrax. As to the how is really a testimonial to all that share their ideas on this forum. I pre-painted the ties with Floquil brown and the rails with Floquil rust. Hot glued blue board on to the plywood and shaved it to level of track. Using an old sponge brush, I dry brushed Realtrax's with Floquil grimy black. Course ballast was next followed by fine ballast washed in ink. The picture is the main line in process.
That RealTrax looks awesome!
I placed several orders for paint and weathering supplies and hope to do as good as a job as you.
Thanks for posting this!
What did you do on your layout today?
I turned a Pennsylvania into a Detroit & Mackinac Railway Locomotive. No company that I know of manufactures an O Scale D&M Locomotive. So I made my own. This is my 3rd try.
Click to enlarge.
Attachments
What did you do on your layout today?
I turned a Pennsylvania into a Detroit & Mackinac Railway Locomotive. No company that I know of manufactures an O Scale D&M Locomotive. So I made my own. This is my 3rd try.
Click to enlarge.
Looks like you did a great job of it, Gary!
No, I'm not dead, but for the last few weeks, I've had to help my wife who has been having some health issues. I think we're over the hump on this thing. She's getting better every day, and I'll be getting back to construction soon.
That said, I did manage to spend a rare Sunday afternoon with Patrick last week, but haven't been downstairs since.
We finally got the backdrop up. I've been waiting on this for over 6 weeks, but we're still not quite done.
The elusive Patrick hard at work.
We were on a roll, and decided to move around the corner and down the other side for a total of 47'.
Next time sanding and painting, then I have to get busy laying track again.
Jon will be over on Tuesday, and we'll do some more lighting.
Attachments
Yup, the space is now totally defined.
I've managed to chase all that junk down to just a few piles. Next to go is the stuff against the wall. After that, Hiawatha and the Ford plant.
Hope your wife feels better.
BTW, that position Patrick is in is how I pulled my groin really bad.
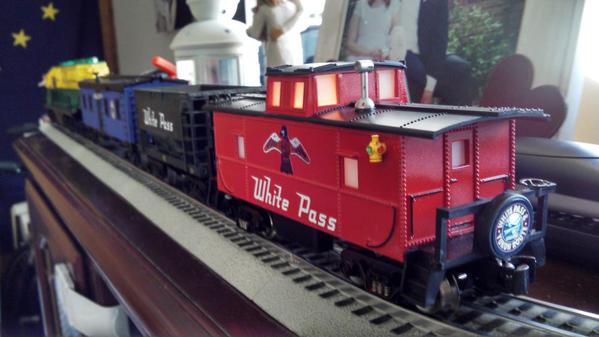
My wife decided that I needed more room to display my White Pass collection, so she came up with this idea.
Tom,
That is very nice your wife came up with display idea.
I like "There's a right way, a wrong way, and the Skagway"
I used to be a tour guide in Skagway. I've got a million of 'em.
I started the year out with one piece of White Pass rolling stock, a tank car. I now have ten pieces of White Pass rolling stock with one on the way. Four of these pieces I created myself, and hopefully more will come in the future. Unfortunately I am entering a very intensive Paramedic program at school and I don't know how much time I will have for trains with school and work and a wife and a one year-old. Here's hoping I'll find time for trains this school year.
Here are the four pieces of rolling stock I customized myself.
Attachments
I cut a piece of fiberglass screen and tried to use it to make a slope on one side of my curved riser. The struckolite didn't seem to stick to the screen as easy as I thought it would. The flat part covered OK, but the inclined slope will need additional coats of a thinner mix.
Finished placing the new equipment on the layout. No small task, as we made several changes in our inventory. The layout is back in good shape.
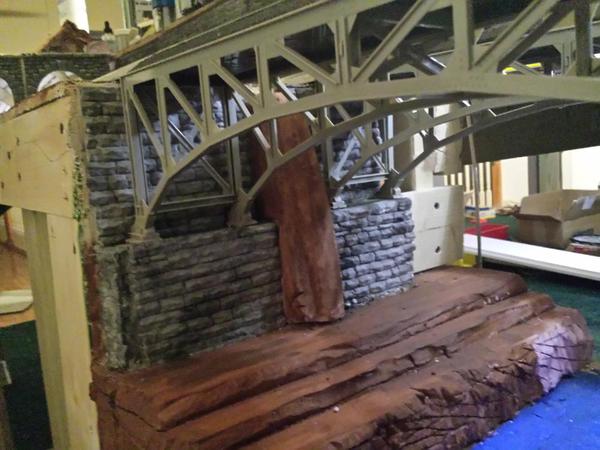
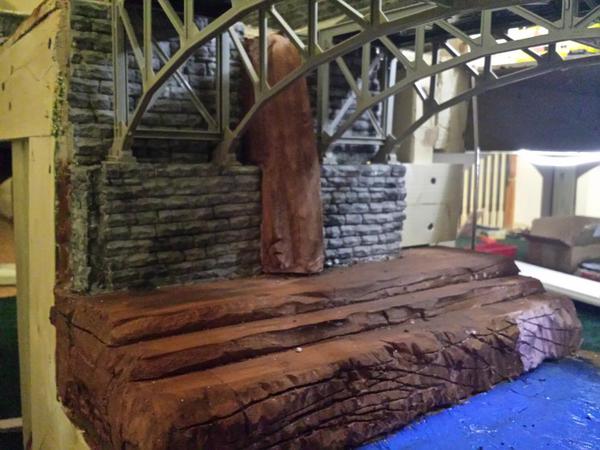
worked on bridge supports and retaining wall for around the bridge
JHanier, Thats a very sharp idea and execution, combining those Lionel arch-under bridges with those particular retaining walls. I like it very much.
A question, which is one we all seem to face from time to time - to weather or not to weather; that is, whether to weather . Do you plan on weathering the stone walls further and/or the bridge structure? I'm not sure what I would do, there, having used such structures both weathered and unweathered. FrankM.
Just for conversation-sake, as you can see in this cropped photo, I weathered the bridge but not the stone supports (which I am not entirely happy about.)
Attachments
and it looks like realtrax too I really like it explain how you did it.
Yes, it's MTH Realtrax. As to the how is really a testimonial to all that share their ideas on this forum. I pre-painted the ties with Floquil brown and the rails with Floquil rust. Hot glued blue board on to the plywood and shaved it to level of track. Using an old sponge brush, I dry brushed Realtrax's with Floquil grimy black. Course ballast was next followed by fine ballast washed in ink. The picture is the main line in process.
That RealTrax looks awesome!
I placed several orders for paint and weathering supplies and hope to do as good as a job as you.
Thanks for posting this!
Chipset,
I've attached another picture that shows the MTH RealTrax without ballast. Since you would like to achieve the same results, paint the ties first with the Floquil Railroad Tie Brown. Don't worry about getting it on the gray portion because you can cover it up with ballast. Paint the outer rails with the Floquil rust. I use a very soft bristled brush which is actually one of my wife's make up brushes. For the mainline, I chose not to use any Grimmy Black. Someday I may get brave and use an airbrush. After the painting is done, I fill in between the ties with ballast. I prefer the gray blend coarse ballast. This can be very time-consuming because I don't just pour it on the track. I take a pinch at a time and lay it in between the ties. I also have a dental instrument which I use to move the ballast around. Next, use an eyedropper to dampen the ballast with alcohol before gluing. The last step is putting the glue between the ties and around the edges. That's it! Good luck and please post photos when you're done.
Attachments
Great work, everyone!
Peter
I went up to play a little and made a video. at about 2:30 theres even an opps my son was leaving and I was paying attention to him and opps on to a sideing and into the back of another engine. ![]() no damage but caught on video
no damage but caught on video![]()
Finally got to display the Yard Tower with the custom decals made by AMCDave! Unfortunately, we were not afforded the space to actually use the yard, so this year we just made-do.
Thanks Dave! I'm sorry it took so long to get these pictures actually made on the layout.
Gilly
Attachments
Got the portable Razorback Traction Co. set up for Frisco Fest in Rogers, AR tomorrow! (Sat 8/23)
Mitch
Alas, the normal Gi-raffe Train locomotive (yon blue GG-1) doesn't like the prewar mini (Heck) Gate bridge even with shimming (wheelbase just a tad long for the downhill drop, so the front truck dangles and derails), so I hadda come up with a quicky solution between 8 pm Friday night and 8:30 am Saturday...
Fortunately, I keep spare 44 tonners and cabeese around for just such emergencies. ;-)
Total time to go to Lowes for paint, stripping lettering, painting the two shells, coming up with a logo, scaling it down, printing onto sticker paper, reinstalling hardware and adding a pantograph (not including overnight semi-drying of the Valspar spray paint/primer combo): About two hours flat. Dang, I'm good.
And the kiddies loved the gi-raffe train!
Note: That 6520 searchlight car has been shopped, the hardware removed and the flat bed resprayed Royal Blue to match the loco and caboose as of last night after Frisco Fest was over... ;-)
Mitch
Attachments
I think I grew the hobby...![]()
Sunday I designed (in my head) a display case/shelf for my growing collection. I wanted to try to use molding from Lowes since I don't have a table saw. I took a hopper car with me to Lowes and shopped. Found nothing but got some other needed items for around the house. At the checkout, the woman asked how I was and I said "ok, I guess." She said "well, you have a cool train there, how bad could it be?" She told me about her father's trains that are in the attic. She doesn't want to sell them, but hates that they are in the attic. I asked if she had kids. She does, and they never knew grandpa (he died before she had them). I told her "what better way to know grandpa than to play with his trains?" The oldest is 10. I told her that was the perfect age. I told her to head down to Henning's Trains a mere 5 blocks away and they'd help her get started. Here's hoping...![]()
We welcomed Forum guest from Pennsylvania to the layout. Lots of fun, and since it was a beautiful day, we took them out on a boat ride.
We welcomed Forum guest from Pennsylvania to the layout. Lots of fun, and since it was a beautiful day, we took them out on a boat ride.
Sounds like you had a great day with a Keystone State Forumite! I hear Maine is a beautiful state!
I think I grew the hobby...![]()
Sunday I designed (in my head) a display case/shelf for my growing collection. I wanted to try to use molding from Lowes since I don't have a table saw. I took a hopper car with me to Lowes and shopped. Found nothing but got some other needed items for around the house. At the checkout, the woman asked how I was and I said "ok, I guess." She said "well, you have a cool train there, how bad could it be?" She told me about her father's trains that are in the attic. She doesn't want to sell them, but hates that they are in the attic. I asked if she had kids. She does, and they never knew grandpa (he died before she had them). I told her "what better way to know grandpa than to play with his trains?" The oldest is 10. I told her that was the perfect age. I told her to head down to Henning's Trains a mere 5 blocks away and they'd help her get started. Here's hoping...![]()
John,
That is a great idea telling her the kid's grandpa's trains would help them get to know him. Both my grandfathers passed away before I was born, but there were things my parents shared with me that let me get to know them. One was that my maternal grandfather had been a fireman for the B&O before he was disabled in World War I. I was told of some railroad stories and now I have a photo of him and the engineer he worked with posing in front of a Pacific. Also, I have his FIREMAN tag and my grandmother's lifetime pass for the B&O.
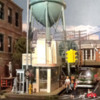
Decided to see what I could do with a Plasticville Signal Tower for a 2R O scale layout... added this and a neat all-brass water tank to East Newark. I got the tank on eBay for the opening bid! To the Plasticville tower I added more flared hip roofs and shingled them. Replace the one-piece stairway with a true-scale see-thru stairway, and a few small details... will try adding an interior when I can find details. I may try this with more Plasticville kits as they are somewhere between O and S scales... almost right for Lionel O-27. You may have seen the Plasticville diner I 'bashed into “Betty’s Flying Saucer Diner” ... if not you can see it on the layout website at:
http://trainutz.com/ironbound.shtml
~Andy
Attachments
Decided to see what I could do with a Plasticville Signal Tower for a 2R O scale layout... added this and a neat all-brass water tank to East Newark. I got the tank on eBay for the opening bid! To the Plasticville tower I added more flared hip roofs and shingled them. Replace the one-piece stairway with a true-scale see-thru stairway, and a few small details... will try adding an interior when I can find details. I may try this with more Plasticville kits as they are somewhere between O and S scales... almost right for Lionel O-27. You may have seen the Plasticville diner I 'bashed into “Betty’s Flying Saucer Diner” ... if not you can see it on the layout website at:
http://trainutz.com/ironbound.shtml
~Andy
Nicework! They look great!
Ironbound; checked out your layout. Absolutely beautiful.
Decided to see what I could do with a Plasticville Signal Tower for a 2R O scale layout... added this and a neat all-brass water tank to East Newark. I got the tank on eBay for the opening bid! To the Plasticville tower I added more flared hip roofs and shingled them. Replace the one-piece stairway with a true-scale see-thru stairway, and a few small details... will try adding an interior when I can find details. I may try this with more Plasticville kits as they are somewhere between O and S scales... almost right for Lionel O-27. You may have seen the Plasticville diner I 'bashed into “Betty’s Flying Saucer Diner” ... if not you can see it on the layout website at:
http://trainutz.com/ironbound.shtml
~Andy
Andy,
The Plasticville tower sure turned out nice. Your website shows off you really nice layout very well.
Just had my wife's Bible study group visit my layout. It was a lot of fun showing it to them. And for once the Gremlins didn't show up either. ![]()
Art
Just had my wife's Bible study group visit my layout. It was a lot of fun showing it to them. And for once the Gremlins didn't show up either. ![]()
Art
art,
That is nice the Bible study group wanted to see it. Also, it is always nice when everything works for visitors.
Art: You see, when the Bible Study Group came over, there just could have been some "divine interference" that took over for the Gremlins!
Paul Fischer
Art: You see, when the Bible Study Group came over, there just could have been some "divine interference" that took over for the Gremlins!
God loves trains, here's your proof! ![]()


