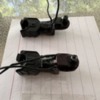
I haven't started work on mine yet - still awaiting couplers to arrive as i want to start from the ground up, so to speak.

Yes those railings are very fragile, and i have already started making a set out of brass. They aren't that hard to do, once i get the jigs made. It would seem that our Forum member Andre who has been offering some nice brass products might want to look into offering a complete set of replacement railings in brass (both painted and unpainted). It looks like there might just be a market for these.


jackson

I think the gun black will do a very nice job and it'll also be very easy to apply, what's not to like.   I have several types in the closet, I'll try a couple on some brass rod and see which one looks best.


I wait with eager anticipation to see how your railings come out.  I was thinking of soldering the cross pieces, I'm can't see trying to emulate the little stanchion pieces with the fittings.

I'm not sure Pete, I'll have to try some of the ones I have and see.  Piano wire won't solder all that well, and as you way, is a PITA to work with.  I have seen brass done with blackening, but I'm not sure which product.  Brownells has a product that should work, Brass Black


The fallback position is to simply paint the railings if the gun black won't work.


On the replacement railings, Williams says they don't have any parts for these, so I'm stuck with replacement railings.


John,

It appears that you and Lee were among the first here to disassemble this engine so i'll direct my question to you. After i removed the four screws holding the cover to the speaker off, i noticed there were four holes in the speaker frame and four matching threaded holes in the fuel tank BUT no screws! Were these missing on yours as well? The parts list that comes with the engine makes no mention of these screws.
Thanks for your help.


jackson

 
Originally Posted by Lee Willis:

Fantastic job, John.  Definitely a tight squeeze but you did it quite neatly.  


Aren't you glad WBB put just that little bit more width into that hood than is prototypically correct?

I am very happy that WBB didn't make it truly prototypical dimensions, because it would have possibly precluded me having cruise control.  The little guy has great low speed control with the CC-Lite, I'm very happy with the performance.


I was inspired by GRJ's thread to try this upgrade.


Apart from lower craftsmanship, my upgrade only differs from GRJ's because I fixed the slightly shorter trackmobile couplers to the stock coupler stub. This allowed me to re-use the original coupler mounts and centering springs.


The sound quality and slow speed running is much better than I expected and my little chap negotiates switches better than many larger engines.

I'd like to thank to GRJ, Williams, ERR and OGR for all this.

Originally Posted by gunrunnerjohn:
John, as I mentioned yesterday, the rep at Bachmann's York booth was telling folks the railings are unbreakable (yeah) and how easy it was to remove the shell from the loco body. When asked, if replacement rails would be made available, he responded, "probably sometime but they might only be available with the body shell." If that becomes the case, what a money making racket by Bachmann!

I'm not sure Pete, I'll have to try some of the ones I have and see.  Piano wire won't solder all that well, and as you way, is a PITA to work with.  I have seen brass done with blackening, but I'm not sure which product.  Brownells has a product that should work, Brass Black


The fallback position is to simply paint the railings if the gun black won't work.


On the replacement railings, Williams says they don't have any parts for these, so I'm stuck with replacement railings.


I just finished wiring up my version of electrocouplers for the Williams Scale 44 Tonner. I used a Blunami 2200 for control and built KarlDL’s own for controlling the couplers (see my post on the build). I tried to replicate the Williams design while using the Lionel Trackmobile coil coupler. I was able to match the existing coupler length. Here is a pic of a completed coupler. If anyone is interested I can post a step by step build with pics. It took approximately 6 man hours to modify and build both couplers (less curing time). I agree the stock centering springs are weak, like your solution. What type and what diameter wire did you use?

IMG_4743

Gunrunner, thanks for the help with the electronics build, your help is greatly appreciated.

Attachments

Images (1)
  • IMG_4743

Add Reply

Post

OGR Publishing, Inc., 1310 Eastside Centre Ct, Suite 6, Mountain Home, AR 72653
800-980-OGRR (6477)
www.ogaugerr.com

×
×
×
×
Link copied to your clipboard.
×
×