


Some more progress photos on my slinky dog.
Here is a picture after the wheel have been removed and before the JB Weld was applied to fill the voids and to make a nice solid piece to drill and tap for the mounting holes.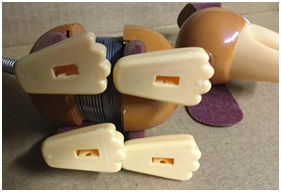
Below is a picture after the holes were filled. The way I did this was to mix a lot of the JB Weld up and put it into a zip lock Plastic storage bag in one corner.
Zipped the bag close with the least amount of air in it and used a battery to roll the JB Weld into one corner.
Once this was done I cut a small piece of bag off at the corner tip and used it like a bakery frosting bag to squeeze the JB Weld precisely into the dogs wheel openings without making a mess
I then used a single edge razor to wipe the extra off and to make it flat as possible

Next will be the marking of where to drill, then drilling the holes using a No.50 drill and a 2-56 tap.
Good idea: Mark the drill with a piece of tap on how far down you need to drill without going through the other side![]()


