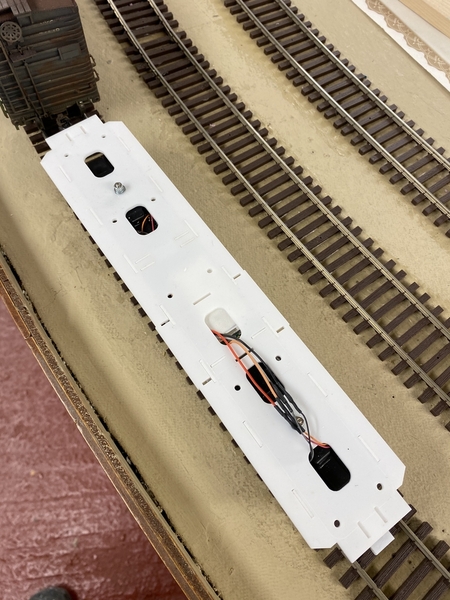
The C415 project got a little break while I worked on other 60s and 70s era freight car projects. I will get into some of the other project at future dates on the forum, but I have managed to get back to the locomotive build. The long hood cab work is underway. Thankfully, the difficult part, the front of the hood, is just a copy of the short hood front, all that is left is to get off my butt and put in the many boring door details and I can print it. I am slightly worried about the print, since it will be pushing the limits of size on my printer, and will have to be positioned almost completely vertical. Originally I was going to make the cab from laser cut components, but then decided to 3d print, but since then I’m back on laser cutting, which I have done. I might have to sacrifice some very minor details using the laser, however, I’m going this route as I want the cab wall thickness as close to prototype as possible so I can have a fully detailed cab interior. With a resin printed part, I would have to leave a thicker wall, and probably some bracing, to prevent warpage. As I said, the cab is laser cut and assembled. The roof is a sub roof using 1.5mm acrylic, with the real roof a much thinner piece of sheet steel that I will replicate with either brass or styrene. The chassis of this locomotive is a combination of 1.5mm and 3mm acrylic (1/8 and 1/16). The prototype had some sort of longitudinal beams or stringers. I am doing the same thing with acrylic in the hopes it will strengthen the whole assembly and keep things dead flat. So far so good. The fuel tank is also roughed out in acrylic. The first version I am modeling, the Rock Island unit, had an extended fuel tank, which put both air tanks on the opposite side. The SP and MonCon versions have standard fuel tanks with one air tank on each side.
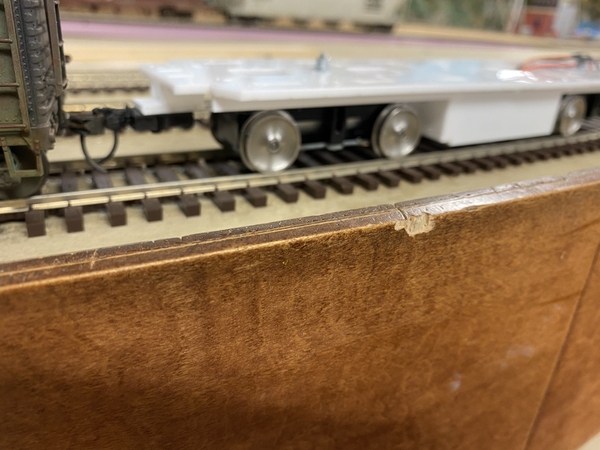
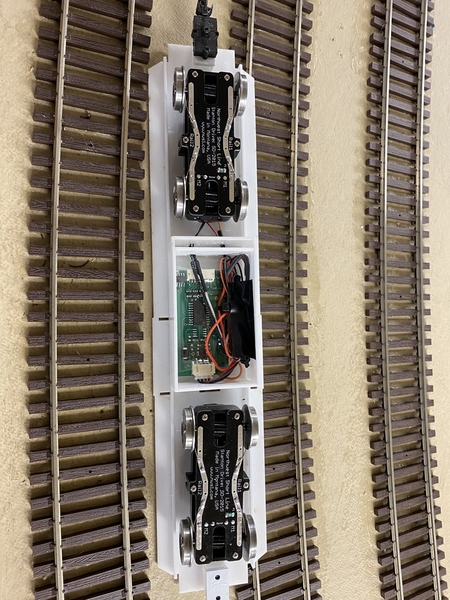
Drives - I didn’t really get any feedback on the Stanton Drive idea. I guess no one uses these things? I was having some space issues trying to arrange a motor with the short center cab, and thicker walled hoods, not to mention gear boxes and drive shafts, so I took a chance and ordered two Stanton units from NWSL. They came fairly quickly, within two weeks of order, maybe less. They are nicely built and wired, but almost immediately I realized that they are fairly tall, I guess to jam the motor and gears all into the truck. I had thought I would need to build some sort of bolster for these to sit on, and the original frame was 1/4” acrylic. Forget the bolster, and to achieve prototype deck-rail height, I would need to go to 1/8” (3mm) deck material. The screws were a little tricky to work with that attached the trucks to the frame. I wired in a decoder, located in the fuel tank, and brought it over last night to the Cherry Valley Club for a test run.
Video of test -
It ran great. Wonderful low speed performance and smooth. Solo, the locomotive frame managed the steep grades we have at the club, however, with a half dozen cars, the wheels spun on the grades. NWSL suggests a fair amount of weight for good traction. Temporarily adding some weight, the loco handled the grades no problem. The weight is something I will have to work out. Also, don’t let the wiring fool you, I bought two powered trucks.


