Base on suggestions from Moonman, Tom Tee and others in multiple threads, I decided to try something different with an “open” horseshoe for the layout in my 10x12 space enclosed by 3 walls. Again, my goal is a tri-level “display” layout for our Bedford Collection of buildings (not concerned about scale) with the ability to run 3 trains unattended and a 4th “hidden” train. The 3 levels consist of pretty simple dog bones using Atlas track. Level 1 uses O-45 curves and has a hidden siding with O-72 turnouts. Level 2 and 3 use O-36 curves and Level 2 has an over/under with a 3.8% grade. All my engines and rolling stock will be MTH RailKing rated for O-31 curves and trains will consist of an engine with 5 or so cars. As you can tell, I’m not concerned with the appearance of engine overhang other than track spacing and I run my trains fairly slow, much slower than I see in a lot of You Tube videos.The design currently has Level 1 at 34”, Level 2 rising to 41” and Level 3 at 49”. It’s all a rough design pending feedback. I can already guess that many/most won’t like the 3rd level because it hides a lot of track against the 3 walls. My idea there is to build the first 2 levels and see how they operate before adding level 3. If I run into a lot of trouble with the back tracks, I’ll either scrap Level 3 or simply raise it higher.
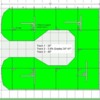
Photo 1 shows a rough benchwork design using L-girder 1x3’s or 2x4’s along the walls with a series of 32” square L-girder frames held up by 9 legs. The legs will be either more L-girders or 2x4’s. Levels 2 and 3 will also be supported along the walls and then there will be 2 “riser” assemblies comprised of a leg and some cantilevered wings for each level. When I was talking with Tom Tee, I considered using variations of the cantilevers he’s used to avoid legs, but 2 of the walls are Integra block construction and don’t really want to anchor into that, so the whole benchwork framing might end up being supported by legs as I had originally planned and only anchored to the 2x4 studs on the bottom inside wall. Based on the experience with 1x3’s and 1” thick foam boards for my 8x8 Christmas layouts the past 2 years, I’m still considering 1x3’s with 1/2” plywood covered by sound-deadening board.
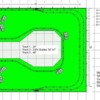
Photo 2 shows Level 1. As you can see, it’s a standard tabletop and is pretty self-explanatory.
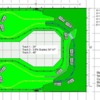
Photo 3 adds the over/under rise to Level 2. The tabletop here is just to support a few of the buildings and the section behind the buildings will probably be cutout for access to the tracks below. The tabletop will be supported by L-girders along the sides and then a pair of cantilevered brackets as shown in Photo 1. Right now the support for the brackets extend to the floor through Level 1, but if I use 3/4” plywood on Level 1, they might just sit on top of Level 1 instead of going through to the floor. Using 3/4” for Level 1 would minimize the number of “legs” beneath the layouts, so I will probably use 3/4” for Level 1 and 1/2” for Levels 2 and 3.
Photo 4 adds Level 3. It hides the 2 turnouts, but they’re right where the curves on Level 3 end and the platform for Level 2 begins, so I should be able to access them if I need to. I might make that section of Level 3 a removable module. In fact, Levels 2 and 3 might be comprised entirely of removable modules. In that regard, I’m not a landscape modeler, etc., so my idea for landscaping is just a series of cloth drapes simulating a sheer cliff between the levels, kind of like the landscaping around the city of Kanab UT and what I do with the white batting to simulate snow-covered landscape on my Christmas layout. The other alternative is a completely open layout kind of like that in the video of the 6x12 layout that was recently posted in the “O and S gauge layout together” thread. No matter how things work out, the main thing here is that whatever I end up with will have to fit the space defined by the Level 1 benchwork.
Photo 5 shows RR-Track’s idea of a 3D view, pretty lame compared to SCARM.
Ok, that’s it. I look forward to getting some feedback. This exercise was mostly to see what I could do with the open horseshoe vs the closed horseshoe I originally posted.
NOTE: Sorry about the notes in the photos, I forgot to crop those out.


