Mark,
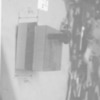
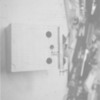
Sorry that it has been a while before I got back to this. The first thing I did with the Jig was to cut three pieces of the hard maple, two pieecs the same length and the third piece 1/4" shorter. I laminated the two of the longer pieces and when cured I milled the step to the size shown, 1/8" high x 3/16" wide. At this time I drilled the hole in the laminated pieces for clearance of the plunger. I than put a piece of .030" styrene against the step on the laminated piece and fastened the third piece to it with double sided tape. I then drilled thru the clearance hole in the laminates, as a guide, and thru the short piece. I then drilled two holes thru all of the pieces for some 3/8" capscrews, drill these just large enough for the bolts to fit thru them, than on the back side of the laminated piece I opened the two holes just large enough to accept T-nuts. I needed to put wax on the capscrews to make it easier to turn them in, after doing a few of the actuators the screws tuned rather freely but were not at all sloppy.
I should mention that after doing each bend I did follow it up by finishing the bend on my arbor press to make it tight as possible..
Ray


