


In the Arduino world, some of the nomenclature is a bit odd for those of us who used to make a living as programmers. Their idea of a library seems different than the way I had to deal with them. But in the sense that a library is a source for reusable code, I can't disagree with their thinking.
When you write a program with the Arduino IDE (Integrated Development Environment), and you want to print something to the serial monitor, you use the Serial library. This library is used so often that you don't even have to declare it as an included file; it's built in.
If you browse through the Arduinolibraries, you will see a bunch of them. They can handle I2C communication, servo motor control, Wifi, SD cards, stepper motors, and a lot of specialized ones to support a particular type of hardware (shields). These libraries are all "open source" meaning you can look at how they work, change them if you like, and they all come free of charge when you download the Arduino IDE.
In this post, I will be showing you how to create a library from within the Arduino IDE. It's not difficult but I didn't know how it was done until I learned it from someone else. I hope I can pass that information along to you as well.
What we will be doing is creating what C++ calls a class. This is an essential part of object oriented programming. It allows us to create objects that have attributes not unlike real-world objects. Later, we will examine class hierarchy; the idea that a class can inherit the attributes and behaviours from a parent class.
The details about what we will be doing will come once we understand the mechanics of how to do it. For now, I will use an LED (light emitting diode) as the basis for our examples.
An Arduino board has a number of Digital Input/Output pins that can be wired to an LED so that it can be turned on and off from a program (sketch). Some of these pins can output what's called pulse width modulation (PWM) signals that can be used to affect the brightness of an LED.
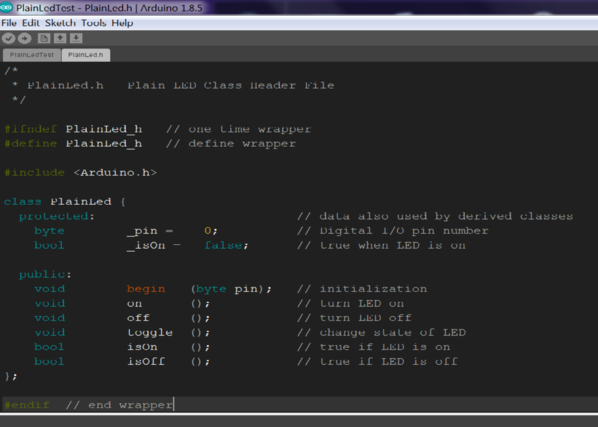
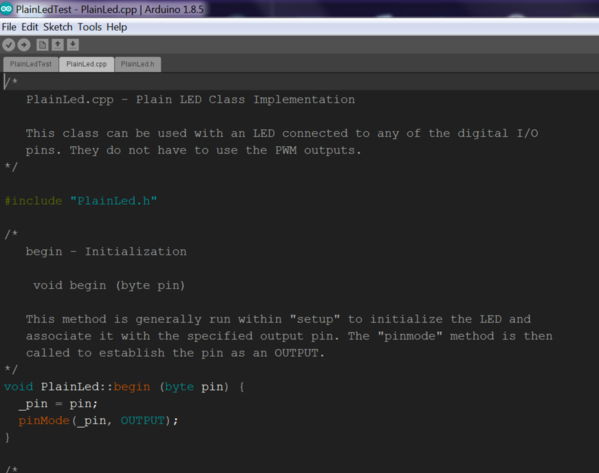
We will start with the simplest form of an LED and it's functioning. One that can be turned on and off without using pulse width modulation. Let's name our class "PlainLed". To create our class we will develop 2 files. A header file called "PlainLed.h" (all header files end with the ".h") and an implementation file called "PlainLed.cpp" (cpp stands for C plus plus).
To create these files from within the Arduino IDE, you will find a small drop down icon in the top right corner of the screen.
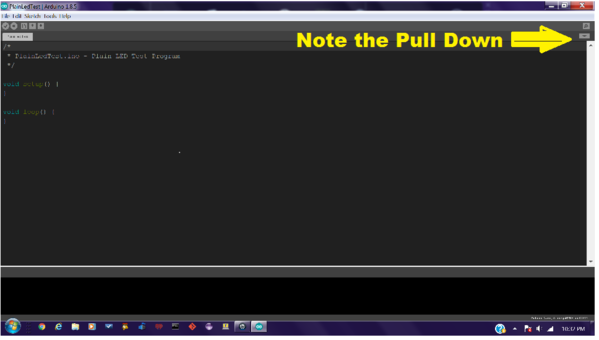
I use a dark theme for my Arduino IDE. Click on this pull down icon to reveal a dialog box that includes the "New Tab" item as the first entry in the list.
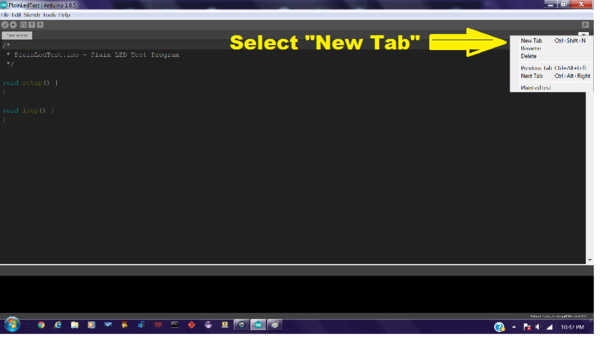
Click on "New Tab" to open a dialog that appears in the lower right corner of the screen. This is where we will enter the name of the header file that we want to create.
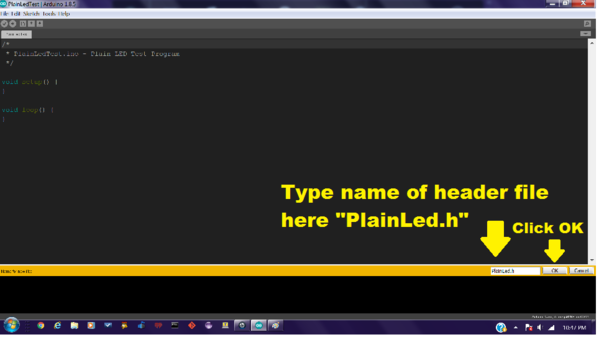
After you enter the name, click on "OK" to create the file. When this is done, you will see the new file in the tabs at the top of the page.
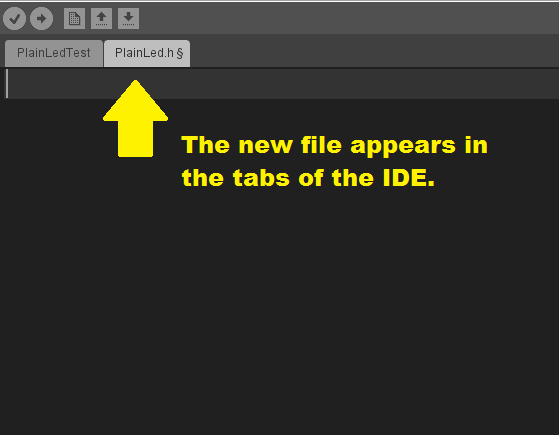
The new file is open and you can enter your header file text.
Next we want to create the C++ implementation file "PlainLed.cpp". The process is basically the same. Click on the icon in the upper right corner, click on "New Tab" and enter the name of the file to be created.
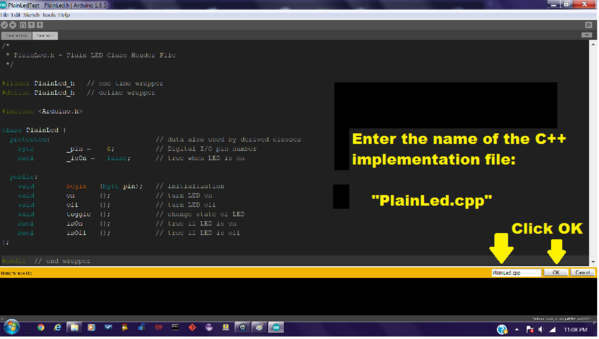
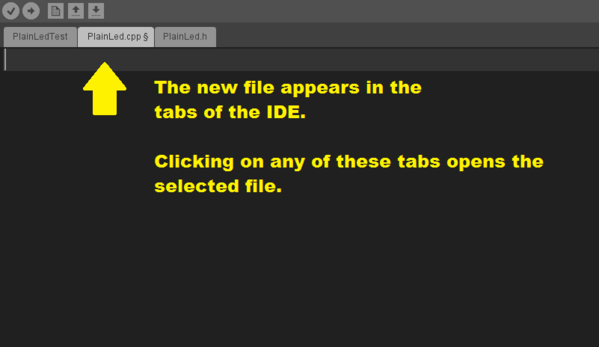
Click OK and the new file will be shown in the tabs at the top of the IDE.
Then enter the implementation file text.
That's the procedure for creating our library. Next time we'll get into the details of the "PlainLed" class and write a test program to see how to use it. Questions and comments are welcome.
-- Leo


