For those who are interested, I'm going to keep all my BR and battery mod stuff in this thread. I'll be posting lots of photos when I get around to it, but for now I figured I'd start with my overall wiring diagram. At the advice of some who know better than me, I'm going to run some questions by the guys at BR.
What I started with:
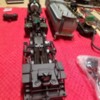
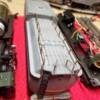
A really gorgeous MTH Premier R-2 2-8-8-2 with articulated chassis. Like my S1 project , It came from the MTH warehouse auction unfinished and mostly unassembled. Unlike the S1, this one did NOT include any of the electrical guts save for a couple harnesses and beat up speaker. However, this one DID come with a complete mechanical drivetrain, including a strong Pittman motor, so I thought this would be the perfect chance to fill it up with the electronics that @Ron045 and @gunrunnerjohn have posted about recently. Ron's AEM-7 and John's Camelback with battery conversions are my go-to threads to try to fill in my blanks as I go along.
What I'm stuffing in there:
- Tsunami 4400 4amp Decoder from Soundtraxx
- Bluerail 5amp board w/external antenna (everything in my loco and tender is cast, no plastic. So I needed the antenna)
- MTH PS1 smoke unit...still figuring out the plan for chuffing but it's coming along
- LED Headlight
- Front LED Marker lights (these were the only lights that came preinstalled)
- Switch to allow running on AC track power or DC battery power
- Cab Light
- Firebox Flicker Light
- Rear Backup Light
- Visaton 4-Watt SC4.6FL-8 1-1/2" x 2-1/2" Low Profile Full-Range Driver 8 Ohm Speaker
- Rear backup LED
- Rear automatic coupler
I'm building my own wiring harnesses, some of them are Molex SPX connector and some are Hirose connectors. Finally bit the bullet and bought a proper heat torch to heat shrink everything when making connections as well.
I've already spoken with George at Soundtraxx a couple times about the Tsunami and some things I need to look for, I might wait a bit to close everything up because there may be a problem with the current limiting circuit. They are looking into it as we speak.
Here's the overall wiring diagram for starters. I don't show the resistors in line with the LED's yet, but they'll be in there. The decoder puts out 10.5 volts from the outputs and a max of 400ma. I could run incandescent lights, but I'm worried about my max draw since I measured the Pittman at 3.08 amps and someday I need to run a relay for smoke as well, so I figured LED's are going to be a good pre-emptive strike against maxing out the Tsunami in the future.
I've also created a couple of 3D Printed parts to replicate some small detail parts that were missing on the loco. They turned out really good, shocking how detailed some of these technologies are now! The smallest feature on one of the valves was 0.2mm diameter (yes two-tenths of a millimeter) and they resolved quite well! Photos attached.
Some photos of the overall chassis and tender are shown, as delivered and in the box. I don't know why I didn't take any pictures with the boiler on, but I do have it.


