Update Feb 23rd
@bob2 here’s the shell to nose front connection you requested. It’s not great. The 1/8” square on the engineer’s side slipped down at some point during the clamping/soldering process. The empty space at the top of the 1/8” square does not bother me but I will file the bottom of the 1/8” square smooth so it matches the bottom line of the nose castings.
@Hancock52 the Union Pacific Historical Society Volume 8, Issue #4 arrived. I thought it was going to cover the UP’s E9 passenger diesels that were delivered in mid 1950's. Instead it was an article about the rebuilding of the 949 and 951 in spring 1993. It was 6 pages long and had lots of photos.
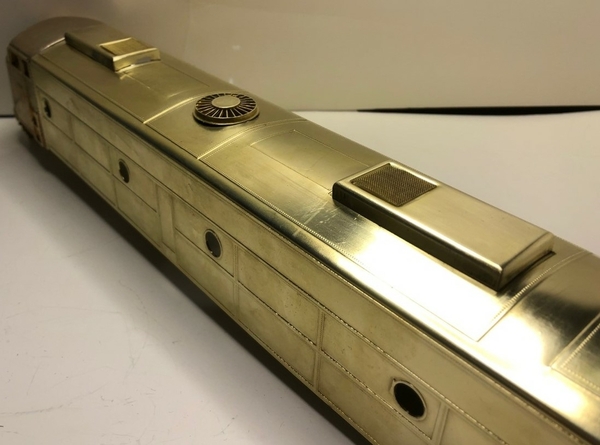
@Johnbeere you had mentioned I might finish this E9 project before your Pacific gets done. You may be correct because I made lots of easy progress on the shell since my last update. With the JB weld dried, I could finally make those four porthole opening on each side of the shell. Since I don’t have raked drill bits I started with a small standard drill to make a hole in the center and then enlarge the opening to 3/8” using a Dremel tool. During this process I placed 1” wood supports inside the shell (cut to the shape of the shell) to prevent any stress on my precious solder joints.
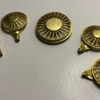
Looking at the rest of the instruction sheet I believe the hard work is behind me as I arrived at the 3rd and 4th suggestions on the Locomotive Workshop's sheet of paper. 3. Dynamic brakes (E9 only) – mounts on central hatch and may be deleted in most cases. I read in the old OSR magazines that Locomotive Workshop sometimes used Kemtron brass castings in their kits. I believe this information is true because this kit came with some very nice 48” and 36” lost wax fan grill castings.
Next, a single 1” opening was made in the roofs center section for the 48” dynamic brake fan grill. Using the micro torch the 48” grill was then soldered in place and 0000 steel wool was lightly used to clean oxidation from the outside of the shell.
4th suggestion on the Locomotive Workshop's sheet of paper. 4. Winterizing Hatch - Fit a screen in the depressed portion of each pressing. Problem. Locomotive Workshop did not provide enough screen material with this kit to fill the depressed portions of both the winterizing hatches. It’s kind of funny LWS provided two end caps for this E9 “A” locomotive but only included one screen.
I saw this part was missing early in the build so I preordered a new brass screen (part# 48117) from Precision Scale Co. New 4” x 6”, 60 mesh brass screens were cut with tin snips to fit the winterization hatches. The next sentence under #4 read: The bottom of the hatch can be formed to fit the roof, and then soldered to it. Screen portions of the hatches fit the center portion of the car body.
The bottom of the winterizing hatches were sanded to match the roof’s curvature and then soldered in place. 0000 steel wool was used again to clean the oxidation marks from the outside of the shell. Two brass screens were cut and then secured into the depressed portion of each winterizing hatch.
The build is moving along much smoother now. I have made it past the hard part! Stay tuned for the next update…


