Thanks PRR Horseshoe Curve for the references. I have had the Mainline article but hadn’t seen the other two, although I did find the same plan in Rails Northeast online. As a benefit to posting on here, George Losse had drawn some most excellent plans of the G-39 from measurements he took of an actual car, and contacted the President of the Cherry Valley club, John Dunn, who forwarded me his email. Within a day I had super accurate and detailed O-Scale drawings to work on. They did confirm what I suspected about the test body I had built - it was too narrow, by almost a scale foot. I altered my CAD drawings to reflect this, along with additional under frame parts. This bag has all the Laser cut parts for the majority of the car body and under frame, except for some strip styrene.
There still are a number of details to drawn and cut before I’d say I have a complete set of parts.
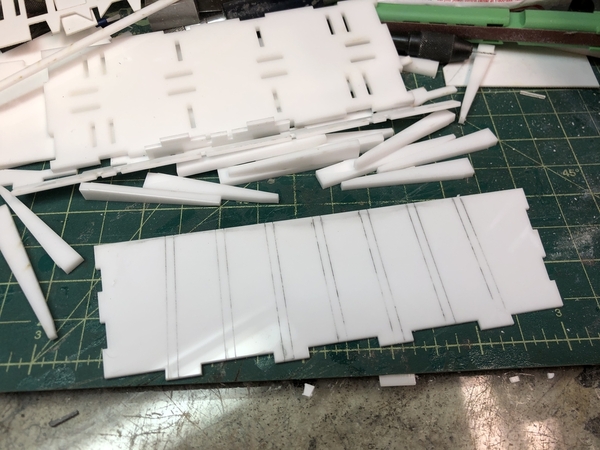
I rubbed some pencil lead on the side of the car to show the laser cut location marks for the ribs. Also note the car bottom in background is now slotted for tabs from the under frame parts. Again, the location marks and tabs are to make assembly fast, easy, and take out any measuring or guesswork.
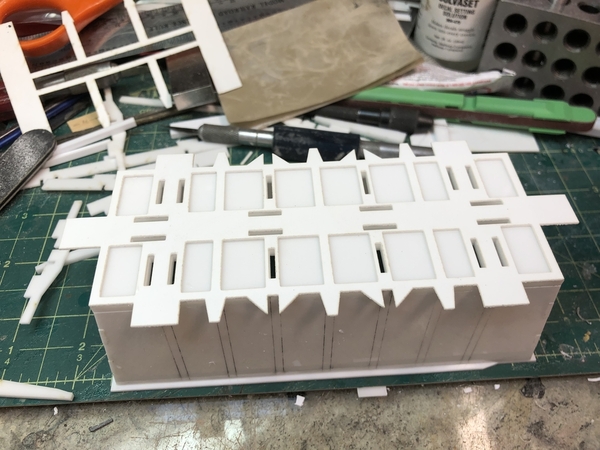
Gondola assembled to bottom and .020 laser cut styrene plate added.
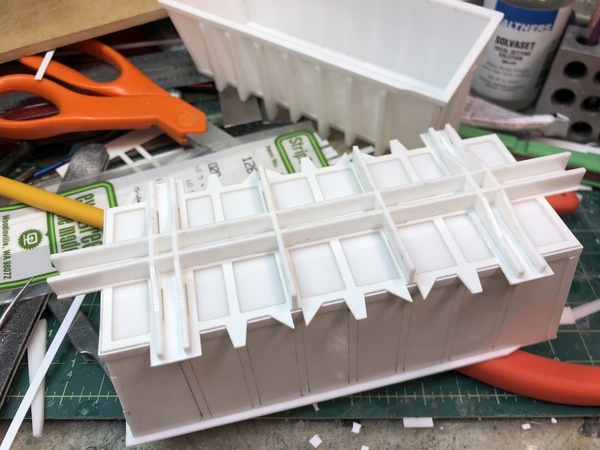
Center beam, bolster, and main I-beam webs installed. These are .060 acrylic and have tabs to insert into car bottom, and slots to mesh with each other. Perfect alignment without hassle. Slots are slightly too big and will tighten up a bit on final product.
Second .020 styrene web added. Forgot to continue across at center beam/main crossbeam intersections. Also the bottom .020 web is slightly too small - matches car bottom, but not the .020 strip around the car side. Will adjust this out slightly.
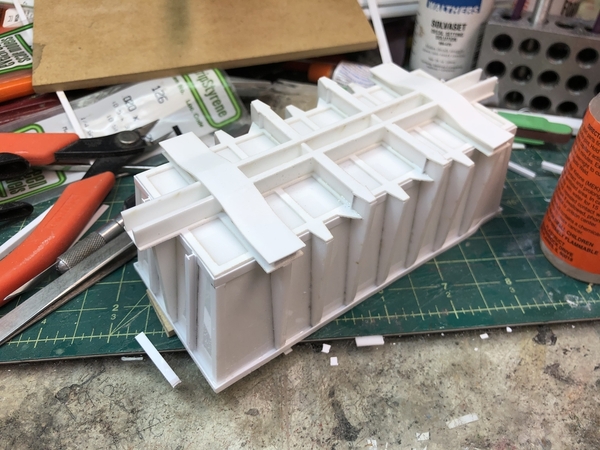
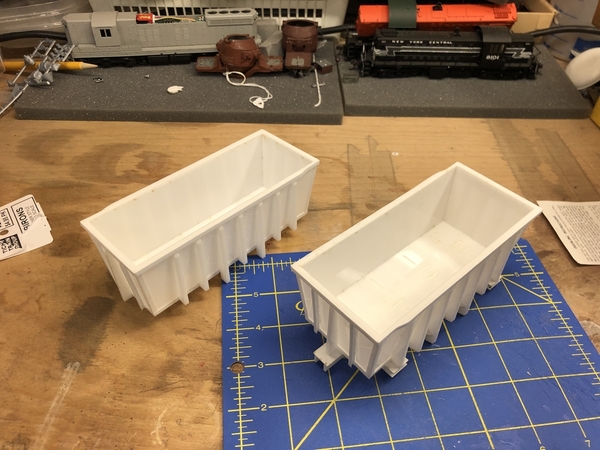
You can see the difference in width between version 1.0 and version 2.0. As I was taking this photo I realized I installed the gondola top plate reversed. The indents should be on the opposite ends - when looking at car from side, indented top (space for grab rail/ladder) is always on the right. It’s a one piece .060 laser cut acrylic. I would hope not to do it again, but I might have to add some writing on the bottom to warn me. You can also see the underframe tabs, which are cut through on the bottom. I may add a laser cut .020 styrene piece to glue in to hide, although, I plan on modeling loaded cars so not totally necessary. I also still have to work out the coupler mounting. I may not use Kadee boxes, and instead just mount the coupler only. These cars are short, so shouldn’t need much swing, and they will be mostly coupled as one unit train. Test version 2 took 80 minutes to assemble to what is shown. I imagine I should be able to get this down to an hour in future. Ladders, brake rigging and other details will probably take another few hours. I’d like to be around 3hrs per car sans painting.


