Thank you. Yes! The amount of adhesives available to us today is mind boggling. I put together an index of the adhesives I'm currently using for our modeling club, but the list is already out of date since it doesn't have the adhesive transfer tape. But here it is for your review. Remember, I am using every one of these at one time or the other. It's a PDF attached below.
Work continues apace on the upper works of the House. I got the main roof completed with the additon of membrane roofing. My membrane consists of some pre-used printer paper cut into 1" (4 scale feet) strips on my paper cutter. I coated the bare roof with PSA and also applied a line of PSA on the top edges of the previously laid strips. I did the roof in sections corresponding to the roof contours. I masked the flat areas so no PSA got onto the paint there.
For the hip roof peaks I used some more of the laser-cut starting strips. I was first attempting to use smaller strips of the plain paper, but it wasn't working well enough so I switched.
It wasn't until I painted it all NATO black that it really started looking like a roof. After pulling the previous masking, I re-masked the very edges so they remained trim blue and then painted the rest of the flat areas with NATO black so it looked like it was weather-proofed. It looks pretty "roofy" to me...
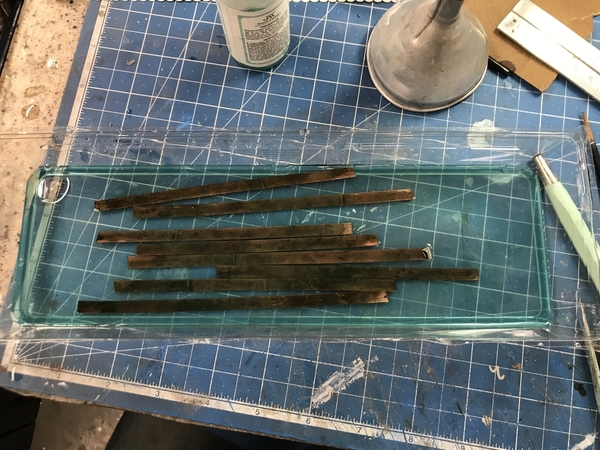
Finally I got to work on the Mansard itself. The Testors' canopy glue worked perfectly and locked all the windows in place. The first step was preparing more chemically-aged copper tape for the flashing. In this case, I chose to use the "stairstep" method of putting counter flashing. It made it easier to keep it uniform. Around the top curve I resorted to using longer strips with the part that was on the flat surface with relief cuts so it would bend around a curve.
It takes about 15 minutes to put the flashing on each window, so it's a time consuming process. I think it's worth doing since it adds a terrific note of realism. Again I used the JAX darkening solution first and then the patina solution. The patina didn't make much different. My chemical treatment vat is the top of a plastic egg carton.
It took a little practice to get the flashing to be uniform and I'm sure by the time I get around to window #8 I'll be perfect. I did two windows and then started shingling to break the monotony and to see how cool it's going to look.
The flashing really helps close the gaps around the windows... kind of like it does in the 1:1 world.
With the shingles on the window looks like it was grown in that spot, not glued there.
Here's a view with the roof plopped on.
It will take probably until Friday to finish this aspect. The upper works of this model really are the focal point and they're coming out as I envisioned them. I know you guys get a kick out of watching this process, but I've got tell you, I get a kick out of it too. I sometimes have to step back and admire that every aspect of this building… everything was created in SketchUp first. There are no aftermarket parts. No Grandt Line or Tichy windows. It's also notable that I didn't build my first scratch-build project until about 2005 when I was 60. I was strictly a kit-builder and follower of other people's instructions and creation. I really didn't think that I had the design skills to go "native." I still like to build plastic kits and follow other's instructions, but I know that I don't have to.
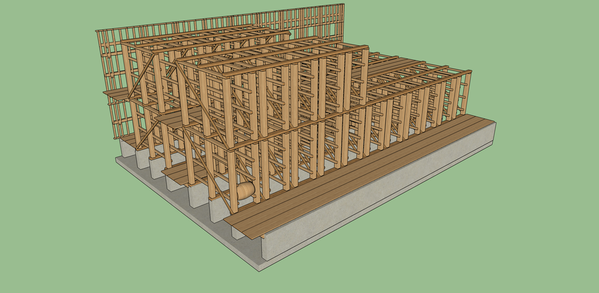
I've been refining the Rick House plans. In closer inspection I saw that the individual ricks had two frames facing each other and then another set separated by about 8" to a foot. I only had one frame. This doubles the number of vertical columns I would need, but I think I'll still have enough. Since this is to be a building under construction, I'll simply use what I have and end it when I run out. I also looked up the specs on a bourbon barrel and found that it's 36" tall. This enabled me to accurately space the rick frames so the barrel would fit. Since this is an unfinished building, I doubt there would be any barrels in it. Notice too there is some diagonal bracing on the rick frames. Each section would hold nine barrels equalling about 4500 pounds so bracing would be useful.


