Foam is a great idea! I've got foam. I have a large chunk 1" thick that worked! I sliced off 2 foot by 5/16" pieces. It took a couple of trials to get pieces that were consistent. It took 2 full lengths plus a small filler piece to cover the distance. The foam bent around the curve and irregularities with ease. It won't be had to glue it on. I'll use a little STM at the lower edge to blend the terrain up to the wall and redo the ballasting and probably use Liquid Nails to secure it.
I used CA to join the pieces, then put on some spackle to clean up the pieces. I have to sand that today. I will pre-paint before installing. Meanwhile, I did get the parking bumpers cut, painted and installed too.
The rest of the day was spent installing street lights. They mount with a 3/32" hole. In most cases, I didn't glue them in. Only if they were too loose and drooping did I use some Henkel Pattex All-surface glue that I still have from Germany. It's a clear urethane glue that works for installing things into the layout including chain link fencing. I put six lights in town and three more around the engine house: one on each end of the parking lot and one in the storage yard. To do the install and the following wiring I spent hours on top and underneath the layout. The fact that I can actually move today is a miracle. As I made each connection I had to scoot out from underneath, pull myself up to a standing position to see if the light(s) in question actually lit. In about 1/2 the time, they didn't and I had to go back underneath to fix it.
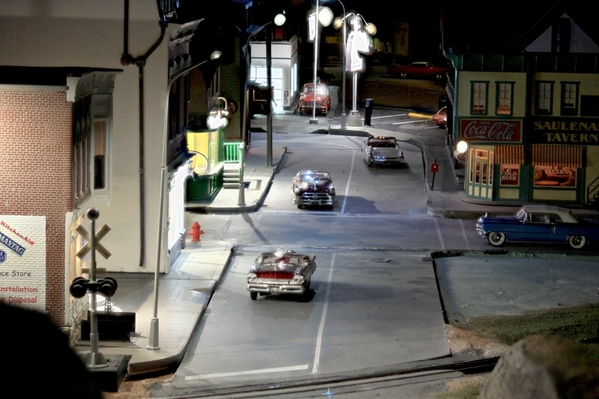
I had two problems. The first was when I reversed the polarity on my first little driver board. The board ceased to function so I had to replace it. I may have damaged the driver chip. If I did I'll replace it. The second was fixing the very fine gauge solid-strand leads from the street lights. They too small to attach a ferrule, so I had to clamp each wire under the Euro-style connector screw. In at least two cases, one of the leads wasn't actually making contact and the light didn't work. I was able to get all of them working. The result of the today's session: two LEDs on the parking sign and three street lights working. I'll do the rest in the next day or so. I will have to make a couple more driver boards. They worked out well especially have servo tape to mount them to the layout. Here are some shots of the town with more lights on. Oh… I also got Saulena's and Idaho back under lights.
The fuzzy lights are an artifact from the focus-compression software I'm using (Zerene Stacker). This picture was taken with 15 exposures at different focal points with the Canon EOS.
WIth most of the town's real estate accounted for, I decided to do an audit of the space left on the layout that can be improved with buildings and structures. There's a lot of space, but it's all narrow. The widest is 11". Here's a photo-study of all this space and I'm opening it up for discussion re: what kind of things should go there. It seems to be precluding modeling the two homes I have plans for: our current and previous houses. Our current house is 45 on a side and that's over 11" just for the structure not including any land around it. I was getting worried that I was going to run out of things to build.
This is the space across "Serpent Gulch".
This is the inner-track space along the layout back. It's also 11" It's the only raw OSB surface on the entire layout. It's not wide enough for the Korber grain elevator which I originally was going to put there. I will have to scratch-build something. The other problem is getting vehicle access. In the above picture you see the beginnings of the road getting there. It's a lot of grade crossings. It's a very long space so more can go there, but it's a challenge.
Next up is the space between the back yard tracks and the inner aisle. Not shown in this image and further towards the camera direction is the engine service area with water, coal and sand, so stuff can fit there. I think some yard admin buildings make sense here. There's already road frontage here.
There's another long narrowish space between the yard and mainline tracks. This to could have yard-related structures.
At the tail end of this tract is a wider area that's adjacent to the engine house.
Finally, there's a little mound next to the train station. Maybe nothing should go there. If could just be a natural area. I wouldn't want anything tall there so you don't block that splendid view of the House.


