Thanks Mark.
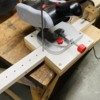
Only did one little thing today. I wanted to come up with a better method of securing the add-on depth stop that I built for the mini-chop saw instead of using a rather insubstantial Quickie clamp. I measured and drilled a series of stop holes at 1 inch spacing to capture a piece of 0.140 drill rod. I also drilled and aligned hole of the same size in the saw's base. Next session I will turn a brass knob to hold a shortened piece of the same drill rod so I can quickly reposition the stop to accommodate different cutoff lengths.
The picture shows the un-cut drill rod. It holds the slide securely. I'm going to shorten the piece of threaded rod to make so it's less wobbly. With the slide having all the 1 inch stops, I only need the threaded rod to adjust for the final inch.
I'm going to need this depth stop to cut 1/4" off 432 of those railroad ties for the rick house columns. Right now they're a scale 9 feet and have to be 8 feet. Even with the power saw doing all the work, it will still take some time to do this. Having a secure and immovable stop will help. I'm also going to add a flat something to the end of the threaded rod to broaden its contact surface. I may want to cut three at a time and will need a wider contact surface.


