I had to stop writing last night and posted to keep from losing the picture. I have one more to add from yesterday's session.
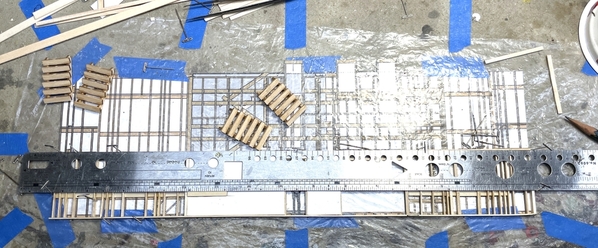
I almost finished the first row of blocking for the wall and built the stairs which you can see lying above the wall. I used the drawing to determine the stair lengths and then used the stairs themselves to determine where the landing joist ledges had to go. Hopefully, it will all align properly when I start erecting the four sides. The stairs are a laser-cut set from Rail Scale Models (nee Rusty Stumps). They also include a fixture to align the stringers. Even with that, it's a bit finicky to use. After gluing in the treads with Aleen's and giving it a few moments to stability, I liberally applied thin CA to the underside to really lock the steps into position.
When looking at the this image you have to realize that part of this wall will be exposed to the outside, and the middle section is the back wall of the entry hall. I had to keep visualizing this as I was laying in the studs, since the exterior wall stud pattern is different than the entry hall walls. And, since it's really a building under construction, doors and windows are not there… just their studded rough openings. Using the straightedge as a guide really helped getting the blocking nice and straight. Should have done this on the long wall… oh well… there's always the next one. ![]()


