


The stairs are complete ready for finishing. The battle raged on all afternoon, but I emerged victorious. Some of it disassembled while handling, but turned out to be a blessing in disguise. It enabled me to get better control of assembling the handrails. Strangely, during the re-assembly process, the lower landing and lower stair flight got turned around so the flight tucked under the 3rd floor flight. This was another blessing since the stair now takes up less real estate. I orginally built the stair with the lower flight outboard of the rest since it was the way the prototype's was. That said, the prototype lower stair was a pull-down, metal fire escape stair so it needed clearance to raise and lower. Since I'm now modeling a fixed stair, having it turn on itself makes design sense.t
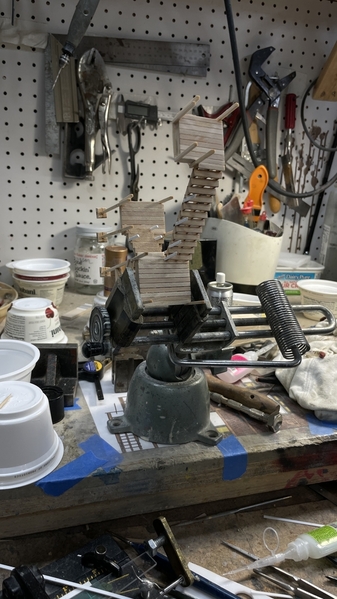
I attempted to hold the whole assembly in the Panavise. It worked for a little bit, but didn't really do the job. I ended up hand holding it or resting it on the bench. Keeping it still while attaching delicate parts was an on-going challenge. I had to be very careful with the tightening since it could easily crush the model.
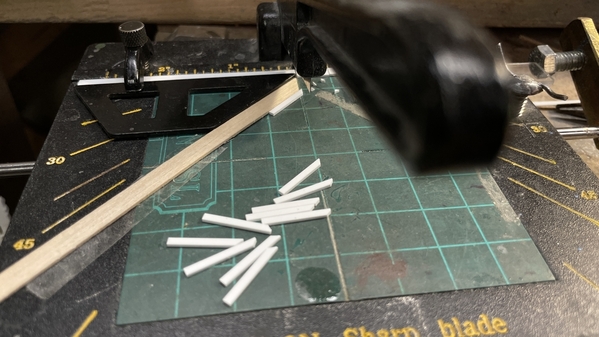
The spindles needed a 45° angle on top. I make a custom fixture on my Chopper to give accurate and clean cuts. Their metal angle guide can't go right up to the blade so it's hard to clip the ends of parts. By pushing it to the left a bit and then adding a cuttable fence, I can cut right to a point.
Here's the upper flight that disconnected with the first railing assembly. I decided to use styrene for all the rails except the corner post. This enabled me to use solvent cement to hold the rail to the spndles. I still had use CA to hold the styrene to the wood. I used 0.030" X 0.080" for the spindles and 0.030" X 0.100" for the railing. Then I ran out of the railing stock and had to substitute 0.020" X 0.100" for one flight. You can see it, but it's not offensive. Actually, the 0.020" stock is more prototypical since it's about 1 scale inch thick. I was very liberal with the CA on this build and it's not a clean build… another reason to paint it.

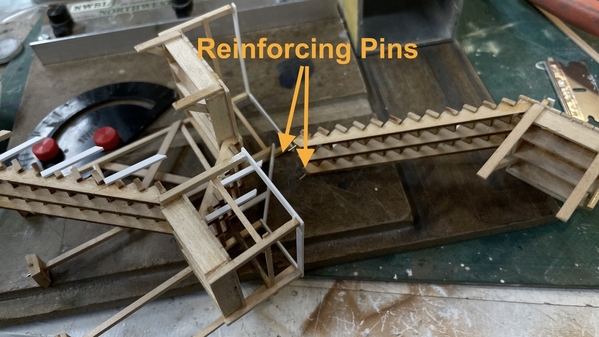
To re-attach this stair to the rest I pinned it. When in doubt, pin it! Broke a couple of 0.032" carbide bits in the process. This last order of drills I got a 50 drill pack since I really go through them much too quickly.
After installing all the rails, I did a final test on the model before permanently mounting the assembly to the ply base.
Here you can see the mysterious stair reversal which, as I said, I like better. The stair couldn't directly drop from the 2nd floor landing since it would block the door.
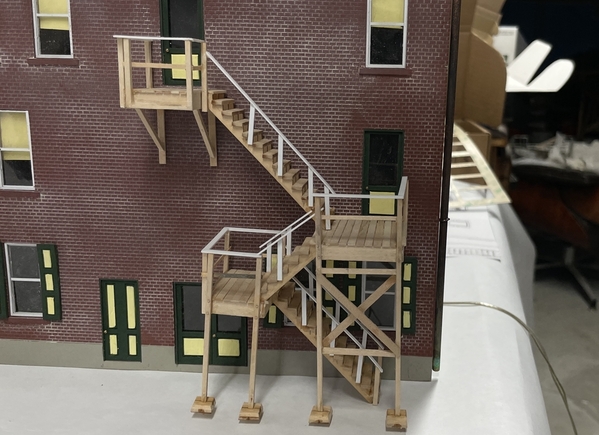
I put pins under all the foot pads, drilled the base and installed it. With the pads down tight, the platforms are all parallel to each other and with the gound. I then glued down the bottom flight to the base, thereby securing the entire deal. It is able to free stand.


When I'm back in the shop on Tuesday, I'll start the painting process. With the stairs complete I can place the model on the layout, while still waiting for the interior stuff to final finish it.
Have a nice weekend. We're on the road again tomorrow.


