Glad to help!
As I noted in the last post, when you airbrush after ballasting, you'll quickly find which is glued and which ain't. I had my youngest grandson go around and test areas to see if there were any loose stones and then fix them. Both boys left for a month of sleepover camp so I'm on my own until sometime in July.
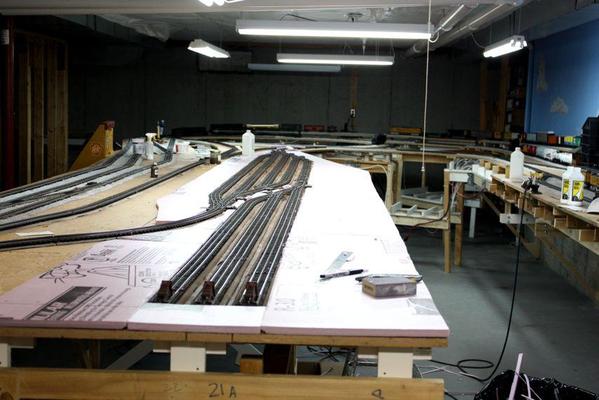
On Saturday, young grandson and I started laying down the foam to build up the areas around the yard tracks. This went sort of okay. I was using low-temp Woodland Scenics (hereon being noted as WS since I'm tired of typing out the full name) foam hot glue. It works except on the big sheets it was already setting before I got the foam in position and it didn't stick. We resorted to putting the glue on one end, getting it fit and then lifting the remainder and stuffing glue under it and moving towards the other end. Then I'd go back and lift the panels in any loose spots and shoot some glue underneath. It's all adhered now.
Before setting in the sheets I beveled the edges so they'd nestle down into the bevel on the Flexibed rubber roadbed.
The foam is a bit higher than the ties, so it's going to be a bit strange as I start laying down ground cover.
Then we found out that cutting thin strips to lay down between the 3.5" spaced yard tracks was next to impossible. Grandson suggested filling the space with melted plastic like the hot glue gun. I explained that it would be difficult to do, but I could use plaster. So I located a distributor in Louisville who sells Hydrocal or Hydrostone in large quantities (Jefferson Lumber). I was going to get plaster soon anyway so it just pushed up the schedule a bit. I bought a mixing head at Harbor Freight Tools and an inexpensive kitchen scale so I can accurately measure the water/plastic proportions. I'm buying the plaster tomorrow. The water to plaster ratio is pretty specific based on USG's spec sheet. For Hydrostone, it's 32 parts water to 100 parts plaster by weight, ergo the scale. You're also required to soak the plaster in the water for a few minutes before actually mixing. This lets the water remove the air that naturally surrounds the plaster particles when shipped.
So the plaster won't leak out thought the wire holes and various other joints I filled them with hot glue melt. Hydrostone is self-leveling and should be good stuff to fill the area between the tracks so I don't have to bury them with ground cover. Plasters is much cheaper than ground cover. I'll probably tint the plaster for whatever I'm making so it's less obvious and doesn't show "white" when it's chipped.
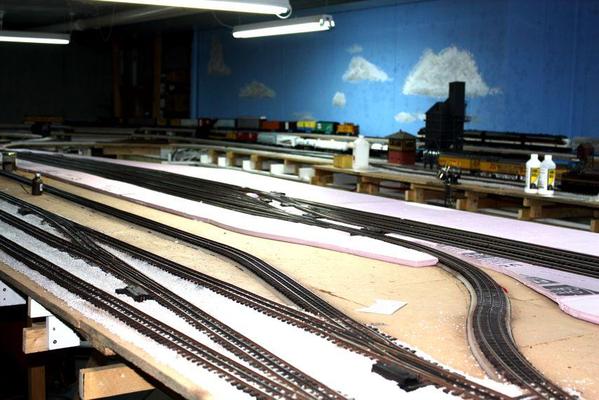
Here's the foam laid down to build up the yard topography.


I'm going to taper the transitions between higher ground and table level so you won't set that 1/2" ledge. I'm thinking about elevating the ground a bit between the mainline tracks and the yard to give a visual break, but I'm concerned about obscuring the switch position indicating lights. I don't have the control panel marked yet regarding which light position on the switch controller corresponds to track position on the actual switch so I'm still doing it visually.
Today, I'll finish the normal ballasting of the last mainline track shown by the track branching off from the mainline track in the above picture. I'm also going to buy the plaster. That should be fun!
I used scraps of foam and the glue gun to close up any remaining gaps in subroadbed panels.


