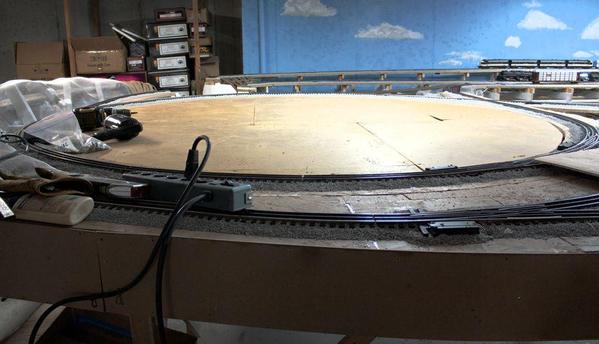
I completed final fitting and screwing down the Masonite city foundation. It was the hardest thing I've had to do on this layout in a long time. It involved scooting below and climbing above multiple times. While the Masonite's not strong enough to walk on, I was able to lean on it when I was directly over the underlying framework. I did find some particularly spongy areas that I will go back and reinforce.

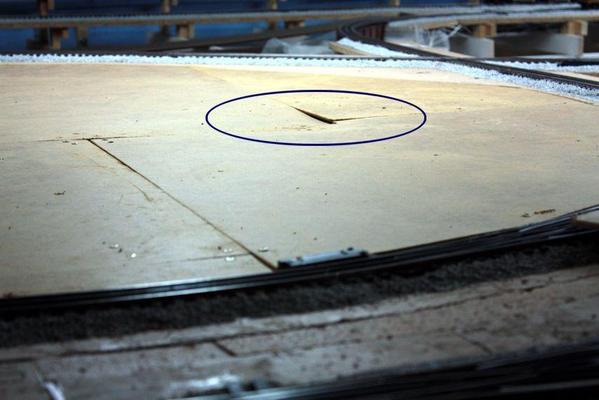
There's a couple of areas needing some more attention, one which is circled in this next shot. There seems to be a depression in that area that I'm going to see if I can level it. I'm also going to firm up the spongy areas so if you do need to lean on it, it won't break through.
I shot these pictures with the Canon Rebel. The last few days I was using the iPhone 4. I'm getting a 5s on Monday which has a superior camera. I may be able to get away using the phone for all these shots. The above picture also used the photo stitch software to make a deep depth of field. My problem with the iPhone is holding it steady. My hands aren't too steady and after handling the DeWalt XRP, they're even shakier. The Canon has image stabilization and for the depth of field shots, I use a tripod with a 2 second time delay so no shake.
I also need to fasten a splice plate beneath this are since I spliced next to it, but missed all the corners.
Next session I'll start cutting and fitting the foam. I'm thinking about creating a fixed perimeter of foam around the curves, with the inner pieces removable. This is necessary since the perimeter's going to need not only fixed, but landscaped pretty significantly. The weekend's here and my deal with my major supporter is "no trains on the weekend".


