


Yes... I'm sure you'll find them now. The one thing I've done right in the shop was obtaining that many drawered office cabinet that I use for lots of small parts and supplies. I'm generally a mess in other areas. It's amazing though that I can remember where I put a specific tool within the pile as I'm working.
Really made some shingling progress today despite having to stop working to take my daughter and family to the airport for Spring Break. The clerestory roof is finished and I used wine bottle foil to make a metallic roof cap. I'll probably do some aging and maybe just make it patina green to look like old copper. Slate roofs often have metallic ridge caps. MicroMark PVA was used as a cement to hold it.

For the main roof I got about halfway up the slope and remembered that I didn't put in any flashing. I used the pinking shears to make the slope flashing, and just plain black construction paper for the flashing under the clerestory.

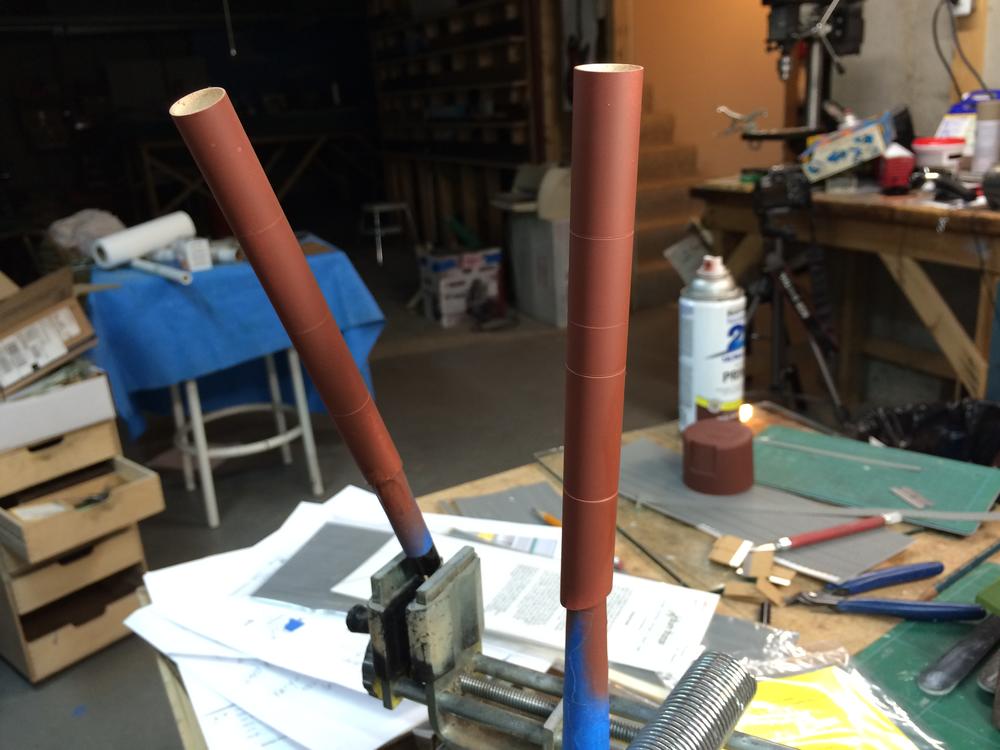
Before getting into this I wanted to finish preparing the stacks. In the lathe (again) I measured off six scale feet increments and used the sharp corner of a parting tool to make grooves representing joints. I then used a v-block to stop the chuck in 1/3 increments so I could drill holes for the eyebolts. If I had a four-jaw chuck, I could use the same method to divide by four.

I then primer painted the stacks. Next I will paint them some metallic shade or another and then lightly sand off the top coat revealing the "rust" underneath. I bought some Tamiya burnt iron color which would be a perfect stack color. The interior will be air brushed flat black along with some staining around the top.
As I was shingling the roof, I started to sense that my lines were becoming divergent. I made some guidelines using a combination square aligned with the edges. Then I gradually adjusted the rows to bring it all back in line. The adjustments are imperceptible.

I also saw that the end alignments were a bit off leaving me with a sliver of shingle on the right edge. I adjusted the side-to-side alignment so the shingles were evenly divided on each side. This too was done gradually so the misalignment was not noticeable.

I finished this side in record time. I'm getting much better at handling the Rusty Stumps shingles. I remember how long it took when I first started using it to separate the backing sheet from the adhesive shingles. I've now developed a technique where I (using a very sharp single-edged blade) slice through the shingle, but not the backing sheet. This lets me bend the shingle up and makes the separation quick and easy. Here's one roof completed without the capping strips which will be installed when the other side is completed. Note: the shingles are removed where the stack will go. I'm going to flash that area with foil.

Man! That's a lot of shingles! I'm finding that I'm ending up with more straight shingles than fish scale. On my next Victorian project I may start using 3 straight rows and 2 fish scale so I won't get too big a surplus. They aren't cheap, but I can't think of a better way to make a fantastic roof.


