I couldn't agree more! We have a really nice train store here and a terrific full-line hobby shop (Scale Reproductions Inc.) and I really do my best to keep them here.
Today's production was very good. The arm is working better each day and often I forget that it was even injured. Sitting and kneeling/leaning over the mountain probably did more to pull my back out of shape than hurt the arm. I got all the cardboard in place and even got most of the first coat of plaster soaked paper towels onto the mountain.
I brought the strips down below the land line so the terrain leading up to the mountain will merge nicely with that front lip.
The contours work pretty well and make the effort to pre-install all those curves worthwhile. For the remaining terrain, I'm going to go back to window screen since it relatively flat with gentle curves to which the screen will conform decently. I chose not to use screen for the mountain for two reasons: 1) it doesn't form compound curves well without buckling, and 2) you need solid support to which to staple it. That would have necessitated using lots of lumber to build the skeleton. Cardboard did the job much better.
I mix my Gypsolite to be about the consistency of thick Pea Soup. It's a sloppy, messy job, and I put a drop cloth under the layout to catch most of the drips (even though the floor's a complete wreck from the previous work). I used nitrile gloves to keep most of it off my hands. BTW: I use heavy leather work gloves when using hot glue. It's really easy to get that stuff on your hands and it will burn you! I find that as I use the plaster, the consistency changes since the paper towels suck out some of the water. I have to spend more time working the plaster into the towels as this consistency changes. It's also where the skimpy plaster towels seem to come from.
Before doing any plastering, I put some masking tape on the tunnel portals. I should have done this with the right side since it made mess of the portals which took a lot of cleaning up.
I added a couple of extraneous rock casting to that small vertical surface on the left. I just scooped some plaster to the back and stuck it to the wet paper towels. I never did it this way before and we'll see how well it works.
It was dinner time and I finished up my second tank of plaster so it was time to stop until Monday. I did lay out the last of the my paper towels on the remaining areas and cut another 6 pieces to fill out the space. (I just realized that I can enlarge the pics on this forum.... doh!) The areas covered by the towels are it for the mountain.
I'll have this remaining plastering done in about an hour on Monday. After a couple of days of drying I'll add the second coat. Coloring and rock work will start the end of next week. After that's finished I'll remove the track masking, and re-ballast all the disturbed areas.
When the mountain's done, I get into action and do the terrain work on the remaining open areas on the right side. As I noted above, with screen wire substrate, the plastering work will go quickly. Trains could be running during this work.
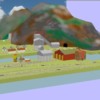
It's fun to note how this "real" mountain compares with my artist rendering that I did five years ago. When I drew this I was thinking about buying the B.T.S. Cabin Creek Coal Mine. I've lowered my sights on this and will build a much smaller operation. The bigger models all require multiple tracks under the tipple. Since I only have a single track passing that point, a smaller mine was in order.


