Thank you for that fine comment!
Building came out of the clamps within about 2mm of perfectly square. The first floor plate fits a bit tight at the front, but works. I'm going to have to modify the big front windows. Based on my test fitting of the two front doors, the center window is about 1/8" wide. I may end up scratch-building a new window. I made a new little right hand front piece since the lower wall on right side was still protruding out past the building line. I cut it back (with a miter to complicate things a bit) made a new piece that mates with the miter and bends 90° back towards the doorway. The floor plate extends past the door to form a small step so the return piece needed to be 1 floor-plate-thickness shorter than the front wall.
I attempted to fill the broken brick work at the mitered corner and when dry, used a micro razor saw to re-scribe the mortar lines. I then shot it again with the Tamiya Red Oxide Primer.
I sanded and filled all the flush joints formed between the left side and back walls. I then filled these with Squadron and then Tamiya solvent-based model fillers. When dried I sanded them flush. Those joints will be very hard to see.
The slant portion of the blank walls has a step that should line up with the tops of the bricked walls. In the front left corner, the step was a bit high so I took a diamond file and leveled it. The one at the back right corner was a little bit low so I filled it with UV-cured (Bondic) resin and filed it level also.
It's easiest to do the mortar application when the walls are as bare as possible, so it was time to do it NOW. I use drywall joint compound and have described this in several buildings before on this thread, but each time I do it I refine my process. I just smear a little pile on various parts of the wall, section at a time, and squeegee it off with, in this case, I piece of light ply that has a nice straight edge. I then go back and use a single-edged razor blade to scrape off the rest of the excess.
I force dry it with the hot air gun and then take a damp paper towel to wipe off the film that remains behind. I will probably do this again tomorrow after it dries some more. Instead of using an alcohol or other wash on the bricks, this time I'm going to seal it will matte lacquer. I don't want this building's brick aged too much. I want it to look like it was recently restored.
I started the mortaring with the little bit of exposed bricks that I had etched into the back wall. I wanted to test using the ply and razor combo to scrape it clean. I'm going to paint the blank walls an antique white.
I then did the big side wall and finally the front wall. I do need to retouch the broken bricks that didn't get fully repaired.
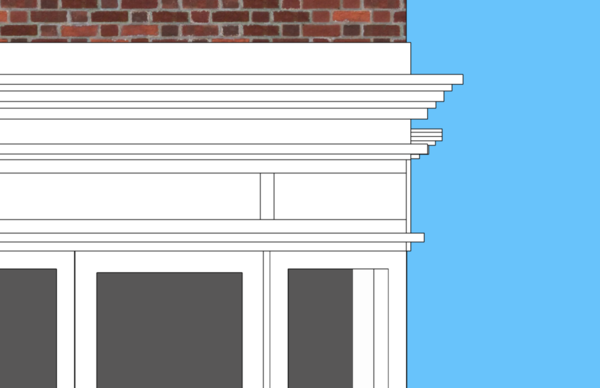
I couldn't help but put that eyebrow over the window to again see how cool it looks. All that patch lumber over the window area gets completely covered up with some complex trim. These two pics show that pesky little extension that sticks out of the lower corner of the right side wall. It was that piece that needed to be cut back. Again, I'm not sure why I thought that had to protrude past the building line.
I wish I had the patience or steady hands to paint the inward facing bricks a dark purple color to make them stand out. I've seen this brick pattern when they use contrasting colors. It would be a pain-staking job and I should have done it before mortaring.
Here's a detail shot of what that cornice work is going to look like.


