Happy Monday!
Hobby shop visit so late start. And Mark, I simply can't believe how much I drew wrong on this laser cut. I just went back in CorelDraw and corrected them. I also found that on the Mansard errors, part of the problem was I was position the parts in a different place than I had originally designed. I may never cut another one of these again, but one of you folks might so now the drawings are corrected (or at least I think so at this moment).
One of the craziest errors was the faces of the single gables. Their width was correct, but the height was way off (too short), the curve was wrong and didn't match that of the Mansard opening and the window hole was no where near what the window sizes were. They were useless, so I had to scratch-build the four faces! At first I thought to make them out of thin aircraft ply and after creating one, I went "DOH", "why the heck am I struggling with cutting plywood that needs to be sealed and filled afterwards?" So immediately, I switched to 0.040" styrene and it went much faster. When I made one good one, I used that as a template for the other three. One came out with a funky window opening so I made a fifth one as a replacement.
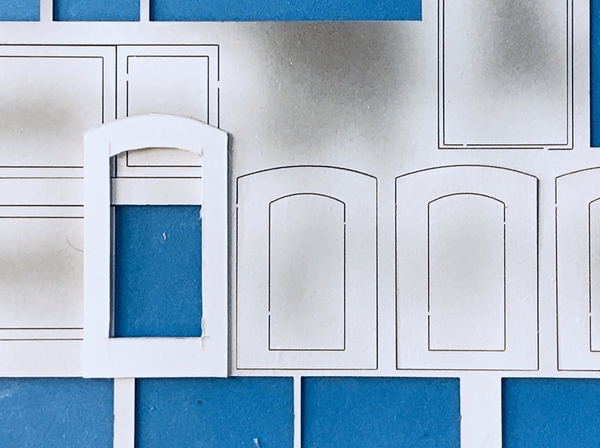
Here was my 2nd attempt with the line work already drawn on the 2nd piece of ply and the styrene piece that ultimately replaced it. Besides, styrene is some much easier to join with solvent cement. Ply is hard to cut AND you can't snap it like you can with styrene; you have to cut it clean through and it's tough. But notice how nice I got the window fit...
Here's the window fit in the styrene cut part. Nice and tight. It can't be too tight since it will deform the window frame. In all cases, I individually fit the windows into the spaces, and filed the holes so they fit perfectly.
The side walls on the first gable was the last thing I got to today. I need to adjust their height (too tall) since the curved roof piece won't fit right. I'm putting some 0.060 square stock inside the window edges to provide more gluing surface for the windows since they are a 5-layer affair, and not just one layer of laser board which measures about 0.023". You can see that the side walls are just a tad too high. The curved roof has to slip straight under the curved opening in the Mansard. I also want to add a small window sill under the window openings. The rectangular opening to the right of the gable is the chimney slot. The laser cut bricks on the chimney are going to look very spiffy.
Gable windows should be built tomorrow, and then I'll be back to the interior. I need to add the visual breaks in the second floor so you can't look through a completely empty space. The windows are big enough that I could (if I want to) install some sort of interior detailing and lighting, but frankly, am not sure what to include. I'm planning on shingling the Mansards straight across all the opening and then just slicing out the window spaces. This way I don't have to mess with cutting little pieces to fit in all the in-between spaces.


