Thanks Pat and Mark!
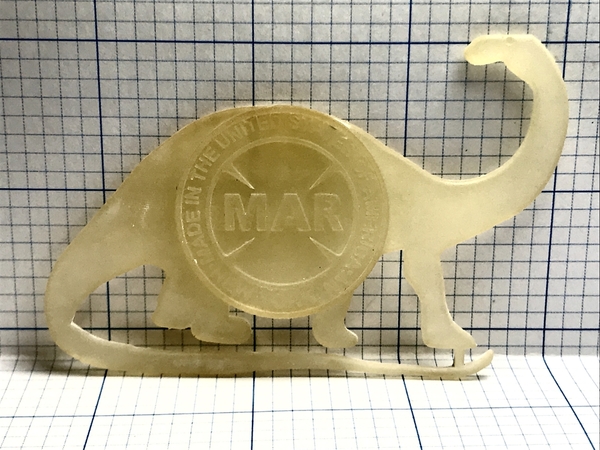
I printed this Marx patch for Marty Schwendau, who's the plastics dept manager at my favorite hobby shop. He had a picture of this 1950s Marx Toys patch and asked me if I could make it on the printer. Of course I said yes. I had to download another couple of extensions to handle wrapping the 3D text inside the medallion, and I used Fredo6's "Round Edges" extension to round the edges around the dino without wasting hours doing it by hand.
I cleaned up. It's up to Marty to paint it.
I assembled the ac unit, primed it and sprayed in Tamiya Bare Metal rattle can. It came out pretty well. The next one will be better since I've added some internal bracing to prevent some of the warpage I found. To mount the fan, I drilled a .162" hole for the stub on fan. In the next round, I'm going to modify the drawing and have the printer build that hole in it.
Up next will be to work on the fan and housing a bit more. I want to paint the area behind the fan flat black so it looks like it's open below and then paint the fan a different silver than the body. I may paint the doors a different shade of silver to show some contrast. Notice, that I broke off those tiny free-standing door handles. Like I've said, the printer can reproduce ridiculous level of detail, but will it stand up in the real world.
I primed the hoist and put it next to the huge pieces I had done at Shapeways. I don't know what I was thinking getting it done so big. I think the size I've made it now is just about right. When you see the Shapeways parts next to the main, those motors are way oversized. I had reduced the details on the parts I sent to them thinking that they couldn't be reproduced. For example: I didn't flute the motors or detail their tail housings. But I did do this on my printer's version and it replicated all of it. On the original drawing, the end bells were hollow and had cooling fans inside them. I'll bet that the printer would have tried to reproduce that too, but it would have been very fragile.
I then went on errands and bought some wood strips to reinforce the roof truss system and provide a place for the lighting system. I also bought some new epoxy. Marty and I problem-solved the roof stiffness problem. Instead of adding more layers to the roof deck, I'm going to added longhorns to the base of the trusses. That will stiffen it like crazy and will provide a perfect place for all the lighting.
When I got back I airbrushed the yellow coat on the hoist, and proceeded to wreck my Badger 200 fine line brush by not cleaning it thoroughly after I used it last time. The needle froze in the assembly and I bent it overpowering it to remove it. I've ordered a new needle and front nozzle assembly directly from Badger.
I also need a cheaper source of high-concentration alcohol to wash resin off the printed parts. Using 190 proof grain alcohol is not the cheap way at $30 per large bottle. It's liquor and must be purchased at a liquor store and has a hefty alcohol tax. I found 16 oz bottles of 99% isopropyl alcohol for $10 at Amazon. I bought two bottles.
I'm going to paint the rest as it was on my original drawings with the hoist engine being medium blue, and the traction drive below the platform bright red. I'll pick out other details like the bumpers in black. There's a trolley system on these machines that carries the power feed cables to the moving hoist body from a cable system hanging over the edge. Chose not to print this… yet… because I don't know how much clearance I'll need over top of the gantry walkway railing.


