Thanks Jean Pat! Mark, the phone now locks on the connectors like crazy.
Happy Monday!
Worked on drawing and growing machines all weekend. I'm having a particular probable with hand wheels. They're often supported all around and sometimes buried in a forrest of other supports. The act of using the flush cutters creates enough shock that the wheel separates from the model. I'm solving the problem by eliminating them from the machine and growing them as a separate item to be installed as a 2nd operation. I did a different lathe, a bigger one, and while I added size to the levers (130% enlarged), I forgot to thicken the very thin chip pan. The support ends were thicker than the pan and when they were cut the pan fell apart. I rebuilt it using styrene. This happened on the bench grinder and the horizontal band saw. Some I'll use as is, but others I'll do over.
This was shot through the window. It's the first machine on the floor. The light coming in makes it look almost real.
Those levers are 130% bigger than the original drawing. Imagine how thin they would be. You can see the damaged chip pan. The front looks like it was metal and actually dented.
After detail painting it comes to life. There's no longitudinal feed hand wheel, but I'll reinstall one. That's a real piece of 1/16" drill rod in the chuck. The hollow spindle was in fact, hollow. It was slightly undersize so I opened it up and put the rod through. Next time, I'm going to put bare metal foil on the ways and other sliding surfaces instead of the Molotow Chrome pen.
The band saw too had a sheet metal pan that fell apart and the blade, even though I thickened it, needed more work.
I'm including workpieces and cutters on later modifications. The tool bit broke (probably took too heavy of a cut). You can see in this image how the hand wheel is buried in the forrest of supports and why they get broken when cutting the supports away.
The lathe too has a work piece. Unfortunately, the drawing I used was the wrong version and had the bed not connected to the headstock. I scrapped this print and will grow another. I had thickened the tailstock locking lever and it did survive. If you look closely you can see the gap. The idea of having a workpiece worked!
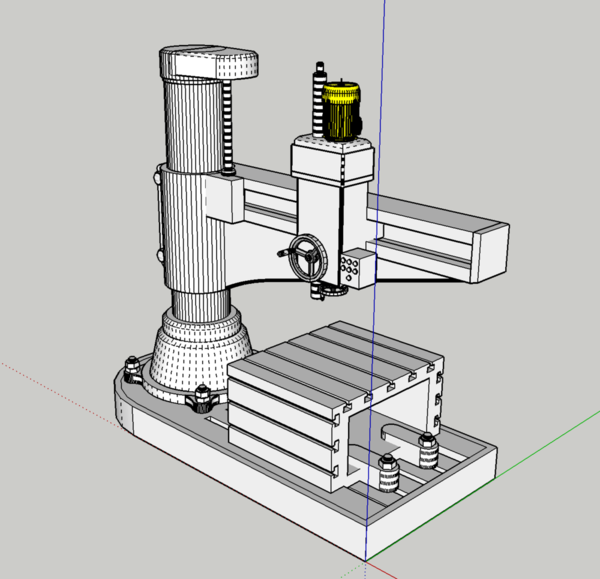
I drew my own larger radial drill press and as I started writing my post it's now on the Machine. I used a picture and one dimension to get the proportions close. The only 3D Warehouse item I used is the motor. I stopped writing the post for a while and all the earlier images disappeared from the inventory list so I just had to reload them. This site times out...
First, here's the original.
And my drawing, The only part I downloaded was the motor. I left off some minor details, but the flavor is there.
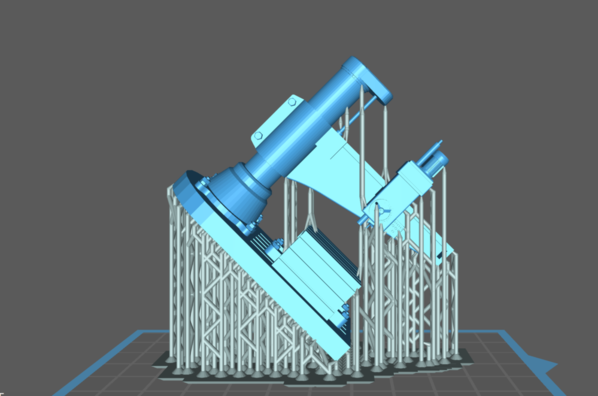
The Slicing setup: It was a bear to cut this out of the support network, but it really works.
And lastly, the grown part which I just cleaned up a bit. The hand wheels were tentative, so I immediately added some Bondic behind each reinforcing the hubs and then cured them in the UV box. Results were gratifying. The T-slots in work table are terrific. I had hollowed out the vertical column to reduce resin use. The was a pretty good output and just a tad more cleaning and it will be ready for paint. I'm going to use foil for the column and the running rails. You can't see it well, but I used jamb nuts and hex nuts to hold down the column. The only print failures I'm having now are design issues with thin cross sections. I'm getting pretty good at getting everything printed.
The last thing I did this afternoon was start putting on the packing strips to the filler pieces that will go between the engine house rails. I needed 0.060" on one side of the piece to raise it so it was equal to the rail lower flange and the staples that Ross uses to hold their rails in place. With the packing, the fillers sit nice and flat. I finished three and have three more to do. I'll paint them the same gray as the floor color. I'm using 0.060" X .125" styrene strips for the packing held with thick CA. I spray the plastic part with accelerator and put the CA on the MDF strip. It cures fast enough so I don't need any clamping. I had to splice the strips together since Rail Scale's size limit is 24" and the engine house is just a tad over 40"
Here's the first set in place to check for fit. I probably didn't need so much space for a flange way, but with big O-gauge flanges you always need more clearance. When painted it will have the effect I want, especially after the grime and grease are added.
They have to sit low enough so the middle rail is fully accessible. If I were to build this project on a new railroad, I would have removed the center rail and added a taught copper wire to provide current. I would do this so I could add inspection pits underneath each. But these rails were solidly glued in and I didn't want to disturb anything.
Tomorrow I'll finish the strips, and start building the gantry, all the while growing more machines. I'm going to draw a wheel lathe, and maybe a vertical turret lathe, besides the more normal equipment. I have some welding units (gas and MIG), a welding table, and some work bench units. I have to add storage units and then draw up some hand tools, junk, metal supply racks and parts bins, etc. etc. This is a long-term project that can be done while I'm working on other things.


