Good Morning @Pingman I completely removed the K-Line end cap with vestibule doors from that side of the car then blanked off the side openings with cut outs from the 2.00mm sheet of Styrene. Once that side was finished and painted I used a regular type K-Line end cap (without doors) on that end of the car. To sand down the micro filler I used 600 ~ 800 grit sandpaper, just be careful to sand only the filler away and not the aluminum.
Here’s the second part of the posting from yesterday on how I cut in new windows for The Little Nugget. I my case I could not find an 18” shell with windows and doors in the correct location for this car. That’s why I choose to make my own openings. Modelers that own 21” passenger car shells do have more options then people with 18" cars. They can go to the UnionStationProducts website and ask them create an exact replica car sides with all the correct details, windows and doors. Also, I have heard if Union Station doesn’t already have the cars sides they are able to create the sides you want by if giving them the exact Pullman plan number. You are in luck if you are modeling a 21” car because they already have the correct sides for that Northern Pacific’s Travelers Rest lounge for about $40.99 plus freight, part#7511-R PS NP. But if you are working with only an 18” car like me… here’s the write up you asked for.
How-to cut in new windows on an aluminum shell.
This is the more difficult and risky part. Please read the disclaimer(s). Your results may vary depending on the sharpness of the drill/bits used and different experience levels. Each new window opening in the shell took me at least 1-hour to complete. Do not rush the steps below. Test your skills on a practice shell first and always wear protective eye glasses. If you don’t have a practice shell buy a 2mm sheet of aluminum flat stock at your local hobby store or online. For best results only cut in new windows openings on an unpainted aluminum shell that you were planning on fully painting anyways.
Using your existing windows as a reference for the top and bottom of the new window, draw horizontal lines across the shell with a ruler and ultra-fine 0.05 tip Staedtler pen. Remember the ink stays wet for a little while and will wipe away with alcohol if dried. Next, get the vertical support dimensions (the columns in between your window openings) with the micrometer and mark that on the shell at this time using the ruler. Then use your micrometer to double and triple check your lines for the new window. I have heard the saying measure twice and cut once. But I’m sure I measured way more times than that. The next part I call the point of no return.
Start with a brand new drill bit and make a ¼” pilot hole in the center of your soon-to-be window opening. Then enlarge the opening with a 3/8” drill bit as shown below. Your drill bits must be new and sharp or they will dance across the side of your aluminum shell. Wear protective eye glasses for the aluminum debris. Use a cloth towel for protection from scratches under your aluminum shell.
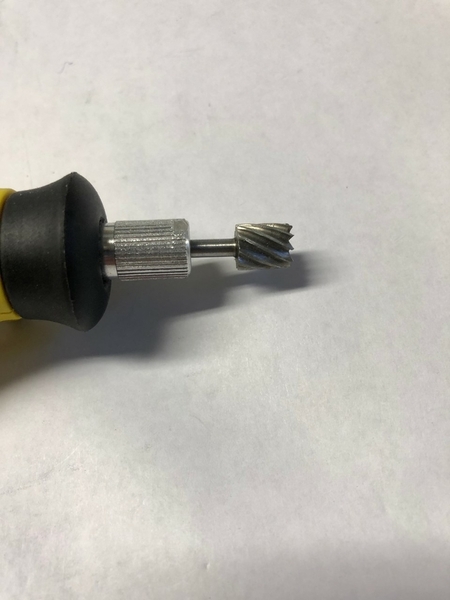
Once you have the opening in the shell. Use a Dremel with a sharp cutting bit too slowly enlarge the space. Use a small cutting bit on your Dremel at first. Then switch to a larger bit if needed. You will have the better results use the name brand “Dremel High Speed Cutter” cutting bits. You shouldn’t have to force the tool through the aluminum shell. A sharp blade will do all the work for you. Important: Do not go all the way to your drawing line. Just slowly remove aluminum inside your drawn window at this point. Take your time on this step, aluminum is soft and this is where a 10,000 RPM Dremel with a high speed cutter can really mess up your shell, mess up your new window opening and mess up your eyes.
After the Dremel step is finished the window opening in your shell should look like the photo below.
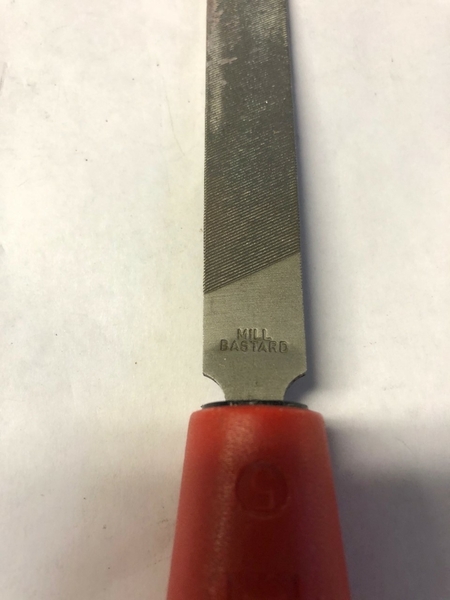
Put your shell on a work bench and place a cloth towel on the bottom to protect your shell. Next is the slow part. Continue on to the marked line with a flat file. Do not go past your marked line. Keep your file strokes horizontal to the shell so your window comes out square. I used a flat file with medium grove teeth/mill ******* cut.
Important: As you get closer to the marked line try not to file only in one spot. You will risk filing too much away in that single area. Once you are near the marked line go across your whole window opening with a long filing stroke. This will produce a straight window line. Going slow, continue using this method to file down to your drawn line. Keep re-measuring your opening with the micrometer so you don’t go too far.
You should end up with sharp crisp lines and square corners. Any extra ink from the pen will wipe away.
In closing, I do not recommend cutting in windows on a painted shell like shown in my photos above. Because if you did, you will now be on new quest to find matching paint to cover those shiny window openings. At this time I’m still working on a solution for making more rounded corners for those new windows. Remember the above write up is only suggestions based on the hand tools I currently have at my disposal. If I had a mill or small CNC machine inside my garage I would have used those tools instead.


