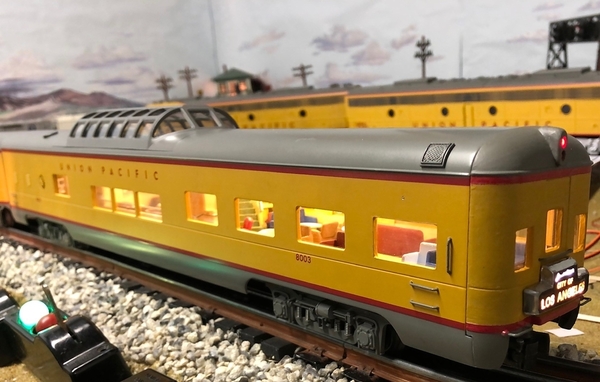
It's been a month and I wanted to give an update on the project. I started adding windows to the newly arrived 18” dome car. The first photo is the K-Line 8003 dome diner (with new observation end) and the second photo is the same car a month later with extra windows. The new windows help it look more like a real Union Pacific 9000 series observation dome lounge car.
I searched around this forum for recommendations on how to add windows into an extruded aluminum shell. There were different suggestions, but here’s the method I used for creating new windows.
Below are before and after shots. On left side of the car I added two windows. According to UP plans the bar area in the middle of the car should have three windows in a row. Also, another window was added at the rear of the lounge section. Since this is an 18” semi scale car, I only had room to add one extra window in the back lounge area of the car.
The right side of the car also needed more windows. But this time, it was for the card room in the front of the car that needed a window. I left the middle windows alone on this side because the UP plans showed the hallway going past the bar only had two windows. Again the back of the lounge area needed an extra window. Here is a before and after photo of what the new windows look on the right side of the shell.
I have not worked on aluminum before but is seems everything comes down to double checking your measurements. Once you are certain you have drawn the correct window sizes and locations you can begin.
Step 1. Start with a small pilot hole. Then use a larger bit to enlarge the opening.
Step 2. Remove the extra material. I used a Dremel tool with router bit for this part. But do not go all the way to your drawn line with the Dremel tool.
Step 3. Aluminum is soft. You can use a flat smooth tooth file to remove the rest of the material to your drawn line. Finishing the new openings with a flat file leaves you with crisp straight edges on your windows.
Step 4. Clean the area, paint with matching color and add clear plastic behind your new openings.
The plans also showed vertical grab bars behind the two rear lounge windows so I added those at this point. Next up for this project will be to add red teardrop marker lights to the sides of the car, add passengers inside, change the cars number from 8003 to 9003 and finish detailing the interior. I’ll do another write up on the interior when it's finished.
Thanks,


