DGJONES posted:You may consider moving relocating the switch at the back of the layout further around to the end of your isle.
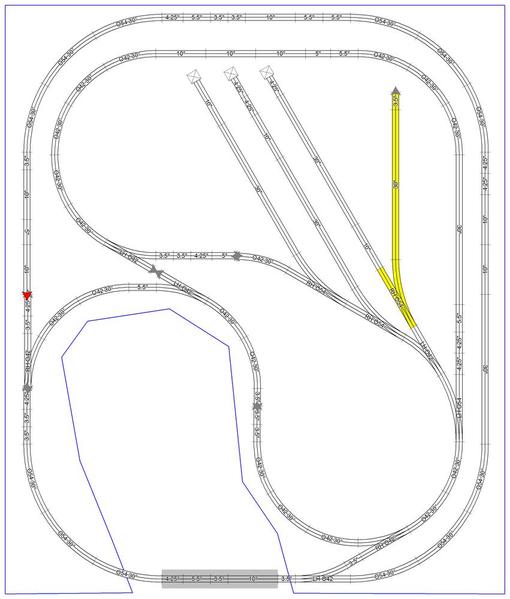
Don, see the attached update, I know some of the track doesn't line up, but I have a feeling I can make it work. This also gives me two reverse loops.
Moonman posted:100" wide may work, but it won't leave much clearance to the wall. length seems fine, although close.
I may be able to take out a 3.5" inch in a few places and change a couple of the other pieces.Soldering a jumper will work. That's what we did at the museum layout.(250' of RealTrax and 15 switches) Made a bunch of jumpers, tinned the stripped ends. Tinned a drop on the track terminals and then attached them. I find that it provides better running.
Do the ends need to be tinned? (Do you do that just with solder?)
Also, I went to HD at lunch and picked up a gallon of SW Tibetan Sky paint. They have the color codes right in their computer.
Here is an updated attempt. I like that it moves the second crossover to within reach as Don has stated. Also, I like that it provides a second reverse loop. The only issue is that it takes a little bit away from a viewing area and also the one siding.
The track I have highlighted in yellow was to be my engine shed/maintenance area, but I'm considering eliminating that and putting an access hole there instead, as Mark has suggested.


