Thanks Rich!
Clem, I'm looking for them, but so far haven't found the kind that you used. Give me a week and I'll take you up on the offer.
Yesterday, I threw (literally) all of the OSB onto the joists to get an idea of how it all fits. Some of the panels look very warped. While there is some warp, it's exaggerated by some of the legs sticking up beyond the joists. Once the risers are in place they pull the panels down nicely.
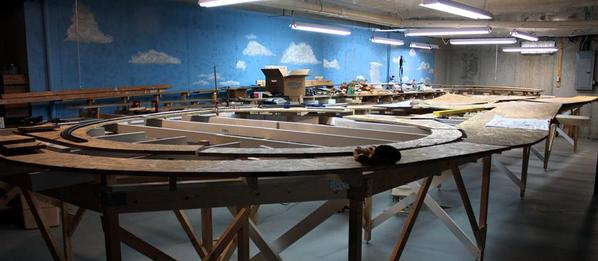
As I noted way back in the beginning, so of my layout changes caused some poor panel fits, but I now had a panel permanently fastened in place which set up the relationship of all the others. While most was predicted by the plans, there was one surprise... the last piece on the right extended about 10" further out than it should be. So much that the right hand curve (the swing-out door curve) overlapped this panel by a bunch. I don't know where this error comes from since all the panels leading to this one were tightly butted up to each other. If I pushed the end panel back, I would push all of them 10" and put them out of alignment. So what to do? I'm going to actually lay down the track to that point and see how close the actual track follows the build plan. Once I see that I'll be able to decide if the track plan needs adjustment or simply hack off some of the OSB. I am reluctant to cut that OSB until I understand the impact of that decision.
On the other hand, some of the more predicted poor fits were easy to identify and fix. Here's an example of one such adjustment.

The reason for these defects was a change I made in laying out the curved pieces. I changed the end cuts from a line that was parallel to the side of the layout to one that was radial to an imaginary center point of the circle of track it was inscribing. Unfortunately, this change wasn't made accurately and I missed changing both sides of the joint. So instead of a clean joint, I have some joints with some triangular spaces between them.
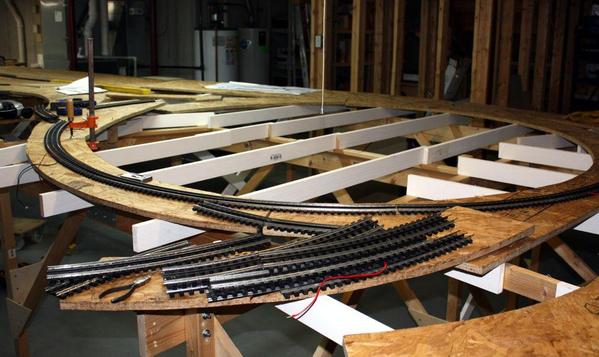
Here's the O-88 circle that involves the cross-over and the one of the reverse loops. I was concerned about making repairs to the joints that could change the diameter and cause a poor fit for the track. So I broke out the O-88 track and stuck them together to see if they fit. They did.
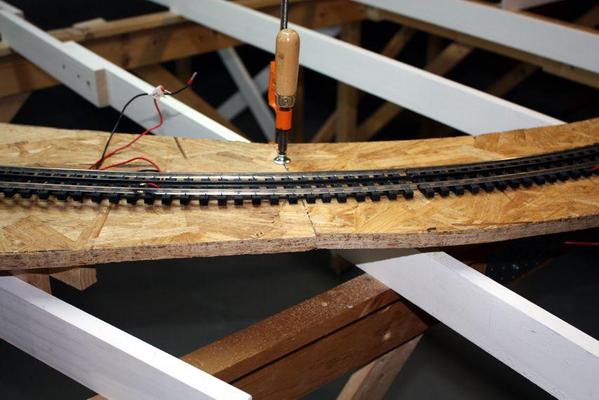
Here was one of those joints that I trimmed to get the fit right.
Next step will to elevate all those pieces and put risers under them. For the smaller panels I can put the risers directly under the panels, but on the bigger panels which are quick heavy, I'll move them out of the way and put the risers in, then flop them back on. I'm still waiting for the roadbed. Once that arrives I'll start laying track.


