Evening everyone!
Well..as I was pondering the layout on my way up after last nights visit I realized I’m getting the horse before the cart so to speak. I still have three ‘scenes’ that need quite a bit of work where I left off last spring. I actually would have painted myself in a corner on one of them. Guess I was just excited to get into the Downtown part.
So I’ve decided to finish the farm (Phase 2) first. It’s actually the grain farm and chicken coop part of bigger farm scene and the centerpiece of the layout. The other half is all animals and pretty much finished. I’ll feature it all on Scenery Sunday one once it’s finished. Anyway…better get started…probably take a few days. I’ll abridge as much as I can. I’m pretty windy tho!
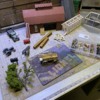
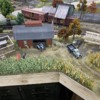
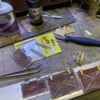
The first pic is of everything I still need to do. It’s mostly at the comfort of my desk here out. I feel like the ‘landscape’ is close enough for now. The second pick is just the layout of what we’re working on.
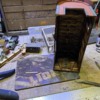
In image number three I’m just adding some cross bracing because the wall boards were a bit spongy. I mostly wanted to show how beautiful this model is inside and out. Well at least at that point. I’ll edit with information where I got it tomorrow. I’ll try to explain where I get things as I go. Don’t hesitate to ask if you see something your interested in tho.
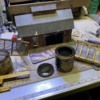
In the fourth I just want to show the wheel I used to age distress the barn wood.
Number 5…wood stain. I keep about 5 different tones for contrast. I use it A LOT! Mostly detail brush. The chiken coop is from Birkshire Vally Models. You’ll see them a lot on here. The corn crib is scratch.
The next I think is showing part of the tin roof process and most of the tools used. The other part can’t be shown because I don’t have that tool. It broke. But I will do a visual when I get a replacement. For now to explain there is an artist tool that you put paint tubes through and it squeezes out every last drop through two rollers that crinkle it. I just run sheets of tin or brass I get at the hobby store through it. Not super sturdy but they’re fairly cheap.
Lastly are the various hinges doors and hatches. I like for things to work so I’ve found the dollhouse hinges in various styles. I’ve used them in several other places. They work well! We’ll be adding bolt heads to these later but I didn’t have many left and just ordered today from Precision Scale. Please come back for color weathering and more details tomorrow night!
So that’s all I got in me for this round. Better hit the hay…them ol’ roosters’l be a crowin’ pretty soon!!!
Thanks for l👀kin folks!!!


