Sorry that this is a long post, but a lot to cover.
I have a Ross Doubleslip (DS) switch w/DZ2500s installed on my layout, but have no DZ1008s for roller gap reduction, nor any derail protection wired. So the following is my attempt to understand and draw wiring needed to add the DZ1008s and derail prevention. I will be wiring based on this and debug as I go along. It is correct based on how I have used the DS on my layout, experience with the DZ2500s on my layout, and research into docs from Ross Custom Switches and Z-Stuff for Trains.
First - understanding the DS. At first look, you may believe the DS is just two back to back switches with the area the switches are joined is compressed as much as possible.
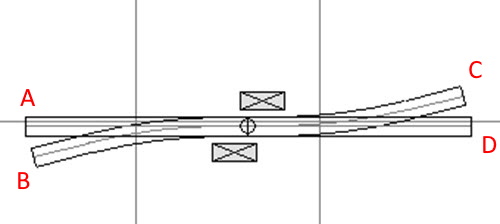
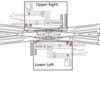
So if the switches are set for path A to D, then you want to change to path A to C, you would throw the switch machine associated with the right hand switch. However, the DS mechanics are completely different than two back to back switches. Below is a drawing from Ross that @gunrunnerjohn first, and I second, have added annotations to. This drawing will my reference for the remainder of my discussion, and refer to it as Overview.
For discussion purposes, the A, B, C, & D are used to define a path through the switch, like A to D (enter A, exit D). The Upper Right (UR) box contains the DZ2500/DZ1008 combination, the DZ25000 controlling the points of the Right half of the DS, the DZ1008 connected to the DZ2500. The Lower Left (LL) box contains the DZ2500/DZ1008 combination, the DZ2500 controlling the points of the Left half of the DS, the DZ1008 connected to the DZ2500. The Iso A, Iso B, Iso C, and Iso D are isolated outer rail sections for derail prevention use.
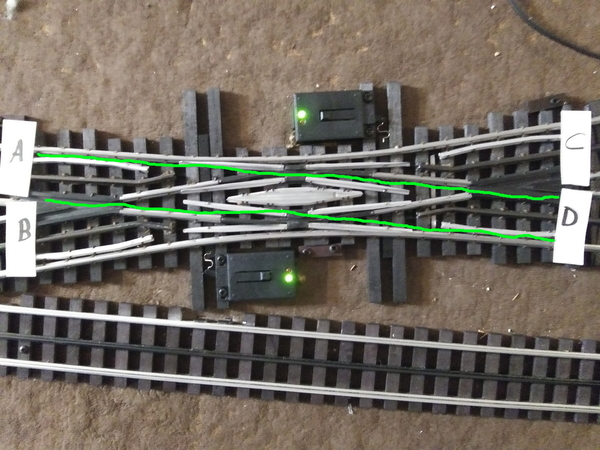
So, DS operation. There are four possible paths through the DS, and below are four pics, each pic shows one path, and I highlighted with green lines how the wheels will track through the points of the switch. Since the switch symmetrical, i.e. Path A to D is the same switch setting as Path D to A, I have written as entering from left, exiting to right.
Path A to D - this path I will use my main state, as it is the mainline on my layout
Path A to C
Path B to D
Path B to C
I pushed a car through for each path to verify operation. As you examine the pics for yourself, notice the DZ2000 LEDs indicating to you the DZ2500 position. Notice that the difference between Path A to D DS setting and Path A to C setting, only the LL DZ25000 changed. This is the critical operational characteristic you have to convince yourself about.
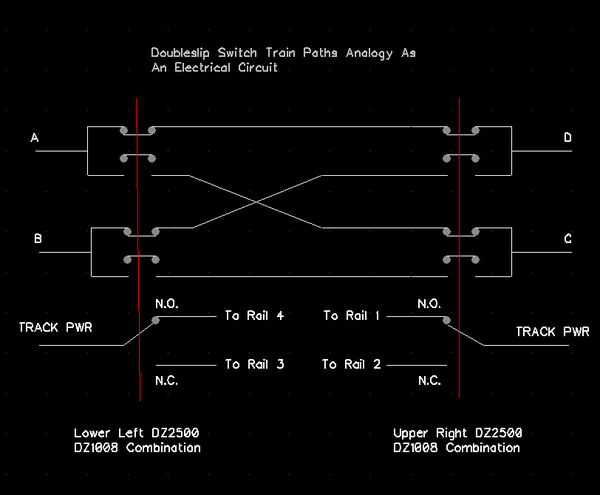
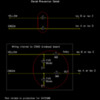
Further notice that UR is changed when you want to enter from B instead of A, and the LL again controls if B will exit D or C. I have an electrical engineering background, so I made the following electrical analogy, showing relay contacts in place of the points. I included the DZ1008 contacts, wired to match the Overview diagram. The red vertical lines are showing how the contacts are ganged, and controlled by its associated DZ2500. The Analogy shows Patch A to D being set in the DS.
To change from Path A to D shown above, you throw the Lower Left (LL) DZ2500, which makes all the contacts on the left move downward, connecting A to C, and the DZ1008 from N.O. to N.C. - the DZ1008 switching the hot rail from Rail 4 to Rail 3 (Overview drawing) for roller gap reduction.
Next, I have to replace the DZ1000/DZ1002 controller/DZ1008 with the DZ2500/DZ2502 controller/DZ1008. So I came up with this wiring diagram, which is straight forward save for one connection, circled in red, I will deal with a bit later. First, the Wiring diagram.
Whether you use the CSM2 breakout board or not, Red wires to Switch Machine power rail, Black wires to Ground rail (remember that for DZ2500 derail prevention to work correctly, the DZ2500 ground must be connected to track ground to create a Common Ground), white wire from DZ2502 controller to DZ2500 white wire, and the DZ1008 Common (C) to track power, Normally Open (N.O.) and Normally Closed (N.C.) to the DS rails in the Overview diagram.
So now we come down to the DZ1008 green wire that activates the relay in the DZ1008 when +5 is applied to the green wire. The DZ1008 was constructed to directly attached electrically when you mechanically connect the DZ1008 to the DZ1000 - which is what the Overview depicts, and is why you see no wires between the DZ1008 and DZ1000. From the Overview we see the DZ1008 white wire is connected to Rail 4, which we want to have track power for Path A to D. The DZ1008 white wire is the N.O. output, we need the DZ1008 relay activated for track power on white wire, thus we need +5 applied to DZ1008 green wire. So we need to determine which DZ2500 wire to connect to the DZ1008 green wire. The DZ2500 has two wires, a green wire and a yellow wire, that are used to implement derail prevention and indicate which way the DZ2500 is thrown. So refer back to the Path A to D pic and notice the position of the arm on the DZ2500, it is thrown to the right, when viewing as in my drawing below that I created as green/yellow wire cheat sheet.
The above drawing depicts what happens when you temporarily apply a ground - like isolated outer rail shorted to other outer rail by train. We need a ground on the DZ2500 green wire to get the switch with the arm to the right. Once the DZ2500 green wire ground is removed, the DZ2500 green wire remains at a low voltage level, about 1VDC on your meter. The DZ2500 yellow wire will be outputting +5VDC, what we need to get the relay to be activated - so DZ2500 yellow wire needs to be connected to the DZ1008 green wire to match operation in Overview. If you are using the CSM2 breakout board, connect the DZ1008 green wire to the yellow terminal of the 8 pin connector, not the Thru terminal. For completeness - as you would suspect, temporary ground on yellow wire forces arm to left, and yellow wire will be +1VDC and the green wire will be +5VDC. The +1VDC is really not DC, but is a pulse train - this characteristic is not important to our application. One last thing, which LED is lit on the DZ2500 has no fixed relation to the state of the yellow or green wires. This disassociation allows mounting the DZ2500 in different places but getting the LED state the way we want. The DZ2500 arm position is fixed to the yellow and green wires as I depicted in the above drawing.
So the last is derail prevention. From what we have learned, the UR controls which roller gap reduction rail is energized on the Left half of the DS. Also, regardless as to how the LL has the left DS points set, we will not derail as we enter A. What is of concern is, if we enter A, the UR has to be set correctly for A to D (or C) passage, otherwise we would short the energized roller gap rail in the A entry path, and derail when the train encounters the right half points if they are set to enter from B. This means we have to get the UR switch machine to be thrown "right", meaning the UR DZ2500 green wire must be connected to Iso A. Logically, this leaves the UR DZ2500 yellow wire to be connected to ISO B. Again, since the DS is symmetrical, Iso D goes to LL DZ2500 green wire, and Iso C goes to LL DZ2500 yellow wire. My wiring below


