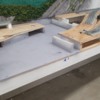
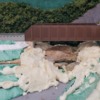
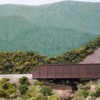
Since my first post several weeks ago, I have been working on the next major step in my Fastrack layout. To recap briefly, I use a wheelchair and have some major limitations regarding access and reach. The majority of my layout is only about 2 feet in depth—not a lot of room to work with!
There are few things more entertaining on a model train layout than watching trains as they cross bridges. My setup will feature a 48-inch lift-out bridge across the entry to the room (a future project), and I also wanted a creek or river somewhere along the layout. These features look more realistic using lowered benchwork, but because I need to roll my wheelchair (the front, at least) under the benchwork to reach everything, the river section could only be lowered a few inches. Furthermore, because of my limited reach, I knew that I would have to complete the entire area, including scenery, before putting the track and bridges down permanently.
The Bridges: Two would be required, one being a double-track. To save time and money, I chose to use relatively inexpensive bridges available from retailers: a 10-inch Lionel girder bridge, and a 24-inch Menards through-truss bridge. I was pleased with the quality of both, but unfortunately the truss bridge simply overwhelmed the scene with its size. It just looked too tall and boxy, especially on my narrow benchwork. Many of you will cringe, but I decided to whack the truss members off to create something that resembles a concrete bridge with steel railings. (I saved the truss members, which are nice renditions.) It’s not prototypical, but I can live with it.
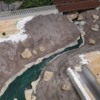
The Creek: Making a water feature look natural in a confined space is a bit of a challenge. I decided to use forced perspective to create a winding creek that has a hidden origin. The most fun aspect was incorporating some real rocks that my grandson collected when he was about four years old. They were locked into place using expanding foam. I also used Creek Bed Ready Rocks from Woodland Scenics.
As the photos show, I combined several proven scenery methods. Layers of foam board insulation were covered with Rigid Wrap plaster cloth and a thin layer of Hydrostone plaster mixed with brown pigment. Ground cover and clump foliage were built up in layers to achieve the desired effect. The creek bed was painted, then covered with five separate pours of clear resin, topped with wavelets made with Liquitex gloss gel.
Although much of the effort appears to be hidden by the bridges, I’ll have a little gimmick for visitors to get them to take a closer look: Find the troll!


