HI:
Something to share with you all today......
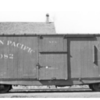
If you are aware of the operations of the NP (Northern Pacific) and the SP&S (Spokane, Portland and Seattle Railway) then you probably know about these "kit bashed" cabooses. Both railroads ran a number of 36' fish-belly style wood side box cars in the early 1900's. However, when a caboose shortage occurred the NP and SP&S shops converted many of those box cars into cabooses to be used for transfer and short haul consists.
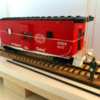
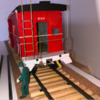
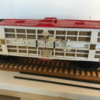
I have always been an SP&S fan as my grandfather was an engineer on that road. So, back in January of this year I began a scratch building project to re-create an SP&S converted caboose. Be aware that the shops "followed a general pattern" but virtually no two of these cars are identical. Some variances in the placement of the SP&S herald (left or right of the bay window), window size and location, roof contour, end details etc all varied in some form or another from car to car. All that said, below is the progress to date on my SP&S bay window conversion.
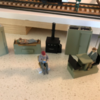
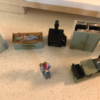
The main components of the car are scratch built from evergreen styrene. The brake system is a Shapeways 3-D printed set and the trucks and some various other details are Proto:48 items from Protocraft. Some Precision Scale parts are used as well. The interior is nearing completion with bunks, a stove, head, table and bay window seating..... I used some "modelers license" on the end railings and ladder structures. The prototype cars generally used flat stock for these items. I opted to build the ladders and some of the end components by soldering .032 wire into the correct forms. This provides for better strength overall. I will add some flat styrene stock to achieve the general "feel" of the original components. I built a simple soldering jig to help with the ladders. This speeds up construction significantly. The entire end ladder build was about five minutes per end. I trimmed the rungs as close as possible to the rails and then rounded them with an emery board. This gives a nice scale "welded" appearance.
One additional item for the interior is the addition of LED lighting fixtures powered by a Digikeijs light function only decoder. The small size is ideal (1/4 X 1/4 inch) and should allow the decoder to be hidden in one of the gear lockers in the interior. All of the other interior components have automobile tape weights hidden inside. This helps with the weight of the car. The styrene build is just too light for good operation hence the hidden weight trick.
This is still a work in progress and I am moving slowly but thought you might enjoy seeing the "up on wheels" mock-up.
Regards
Bill (AZBill)


