


Nothing says "commitment" like primer! (No, not even a wedding ring or vows, folks. Primer :-) Yes, I took the plunge and started spray painting the basswood parts in the kit. The wood was so nice to look at plain and untouched by my novice hands, but it wasn't getting the model built. Because Don/Scale Rail is mailing me some gel samples, I wanted to have some design questions and issues resolved and out of the way so that I can focus on experimenting with the windows when the gels arrive. So, I took the plunge. It's kinda scary, commitment, is.
I had a little unexpected time that allowed me some time for thinking and a little doing. Unfortunately, I didn't prime all of the parts that I ultimately need to, but it was a good start. The walls, floor, and roof are at the top:
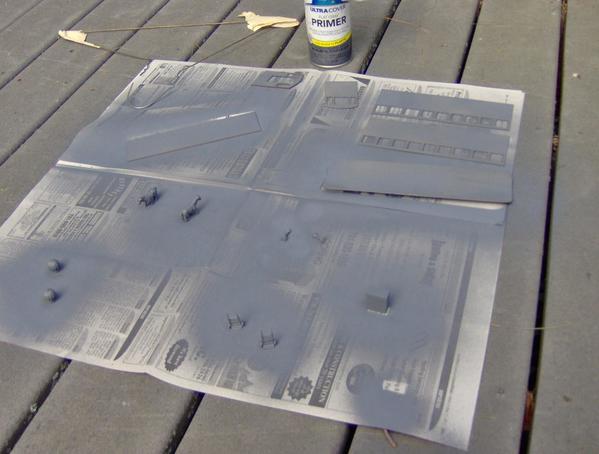
After I primed the food animals shown in a prior post, I spent two hours with nail polish remover getting the paint off of myself. Doh! This time, I used a wire coat hanger to hold aloft the parts with holes (windows) to be hung (swung) from while I spray painted. I also wore plastic gloves. My wire rig was kinda comical as there wasn't much control, but it worked. In fact, having the parts swinging in the breeze off the end of the wire ensured that I got the light coat that I was aiming for. Literally. While drying, it looked like the edge of the long sides warped a bit at the thin tops where the windows are cut out -- and yes, I did flip them over to ensure even drying. But upon further drying overnight per the instructions, they seem OK.
Previously, I manged to file two of the four pewter stools before hand cramp set in. The stools are at the right center in the photo above, and below them are two hand carts that also needed filing before priming. Two sheep, the two roof vents, and the resin diner counter round out the photo. I wasn't happy with the nubs of flashing that still remained on the stool tops and realized that my jeweler's files weren't going to cut it. This encouraged me to pull out my Dremel tool and instructions to see what I had and to learn how to use it to save time with the two remaining stools. To date, I've only used the Dremel tool for removing excess metal that prevented RR track sections from connecting properly. It seemed like organizing my tools before I dive into this model will pay off in the future. So, I did just that -- in a big way:

Fortunately, I have the right accessories to file and polish, and thus improve the look of the tops of the stools. They will have black seats, silver sides, and white bases like the stools in the diner I recently visited. Next my files were a rusted mess from years in the basement, so they got the WD-40 and steel wool treatment (before photo):
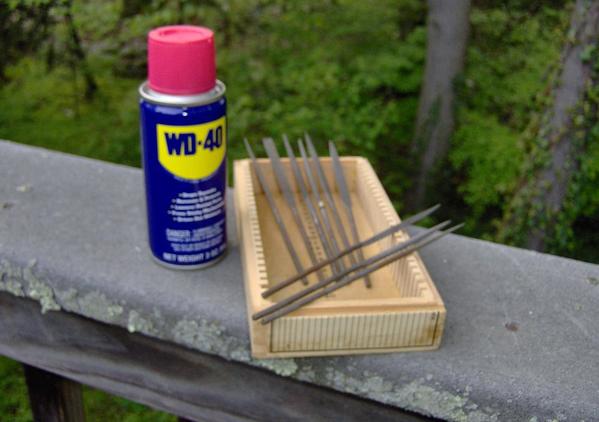
They're still a rusty mess, but less so. I find that for O scale modelling, I most often turn to my size 2 triangular files. Because of their shape, triangular files are very strong and because they're tapered, they can fit almost anywhere. They are also good for rounding off flashing on, say, Bar Mills handcart tires. If you can imagine it, they maneuver well over round surfaces in ways that the other file shapes don't. My next go-to file is a size 3 tapered flat file with a stiff spine on the back. Like the triangular files, it's also great for cleaning up the slats on handcarts. Gone are my college days of making truly awful silver jewelry but I'm glad I kept the tools.
From my Dremel tool and files, I moved on to reviewing the paints that I had on hand. To see whether I was missing any important colors or finishes, I wrote down where in the spectrum the colors I had sat; whether they were tube acrylics or jars of latex; matte or gloss finish; and then I spent some quality time with a color wheel. It looks like I have all that I need for painting this model -- thanks in part to a generous holiday present of artist paints from my company some years' ago. A future step is to create paint swatches on Fudgcicle sticks to have on hand for planning future painting efforts, without having to haul the paints out. I like making color samples on wood and have been doing it for years with stains (on tongue depressors :-). And, in keeping with this project, Fudgcicle sticks are free, food-related, and seem to be in unlimited supply in my house ![]() .
.
Lastly, I have on hand some very fine sable brushes. These will be needed for detailing the resin refrigerator, stove, coffee maker, dishes, and teeny tiny toaster. I hope to paint some of these this weekend for a certain "team track" event. However, I remembered that small brushes were rarely standardized across manufacturers. One company's size "2" would be larger or smaller than another. So, I laid my fine detail brushes out by thickness and bristle length. Then I numbered them with a paper sticker from 1 (longest and thickest) to 7 (shortest and thinnest). This way I won't have to root around in my paint box guessing which No. 2 is actually the right size for the job; I can just look at my sticker number and grab the right one.
Before I actually do the fine detailing on the appliances, I tried using the different brushes on each detail that I will color, but without any paint. I am glad that I did. For example, the brush that looked best suited for a particular space on the bottom of the refrigerator actually split the bristles in a way that would have made a mess of the model had paint been on it. So, using dry brushes, I figured out what numbered brush would work best for each feature and wrote it down for when I do the painting. It seems compulsive but I think it will save future annoyment, disappointment, and reduce the risk of ruining these really nice accessories.
Tomlinson Run Railroad


