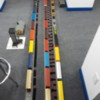
Woops, I hit enter too soon. Now that I have all my pictures attached. The track frame is 1/4 inch angle iron set atop 1/4 inch flat steel formed in the shape of an L lag bolted to the columns. The track sits atop 1/2 inch Styrofoam pads cut from 4x8 sheets. The curves are 1/4 inch steel arcs painstakingly measured and designed by my friend Hunter. Once cut out they were set with clamps, and the mounting pieces, which I showed you in the photos, were measured out and cut, drilled, tapped, and low and behold they worked. Curve 3 got messed up big time so Hunter elongated the holes and solved the problem. Once the curves were on, the Styrofoam went quick, but the booster drops were a pain.
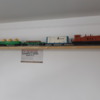
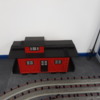
I used Fastrack because I had Fastrack on hand. I promised a picture of the Burger King locomotive, well, there it is. It has a Hershey tanker, a Wheaties box car, a Lobsterville vat car, or as I call it, a mistake buy. Thought it said Red Lobster. A Crayola caboose and my favorite, the Morton Salt hopper.
I added pics of how the wiring was run. Starts at the transformer, feeds the TIU through the Variable 1 in ports, then feeds the track through the variable 1 out ports, by snaking its way down through the floor of the shelf, behind a fake wall at the back of the cabinet, down under the bottom of the last shelf out through the face of the bottom of the cabinet under the porch carpet I used for a floor cover making a noticeable bump, then through the wall of the column, picture shows the outlet cover I used to cover the box. Once there it snakes upward toward another outlet cover and using sticky back Velcro I moved it along the wall, up to the hanger face, and over to the access point I showed you in yet another picture. Once through the Styrofoam, it connects to the 10 inch track piece above it, and then using red and black 18 gauge wire I ran booster drops off this piece to pieces at the beginning and opposite side of each curve.
Once completed, I set the loco on the track, and after some tweeks and a learning curve, it ratcheted around the track forward and backwards with no issues. I kept adding cars one at a time to test its pulling power and settled on the ones mentioned above and shown in the picture.
I added pictures of my DT&I Yardmaster set that I got from Santa in 1971. I also added a picture of my old toy chest, now a storage chest, that my maternal grandfather built for me in 1965. 53 years it finally has a home it can be proud of. A note, if you look at the picture closely, a fishing rod sits to the right of it. This is the rod my paternal grandfather used once before he died. I used it to catch an 8 pound Bass in 1995. Finally I added a picture of 3 of my 5 trains. Just thought you might like to see them. All of you have been so nice to add pictures of your train set ups. I've enjoyed looking at all of them. I hope you enjoyed seeing a small part of mine.
Now I have a question. My SD 70 ACE has suddenly begun to throw sparks from the pickup wheels. None of my other four locomotives do this. I assumed dirty track, dirty wheels, but the other four run the same track, no sparks. They've been dormant for several weeks now since I have been finishing Liam's track. I have a propane heater in the room. Any ideas as to why one would suddenly start sparking and the others don't?
Thanks
John


