3D printed parts are getting better and more detailed. If you are using them, please post some pictures...
Original Post


|
|
3D printed parts are getting better and more detailed. If you are using them, please post some pictures...
Replies sorted oldest to newest
Fantastic. I really like the ditch lights housings!
Antlor
caught your topic and decided to rejoin OGR after about 10 years off of trains.
Nice job, even the lettering looks great
I guess we might be among the few using 3D printing for our railroads.
The buildings and details are what I am interested in right now.
The process is finally at a point where we can get much finer detailing than ever before so decided to create a building in CAD and then 3D print it.
Here are some of the walls, windows and doors etc. (I still had a few windows left over from Grandt but the rest were printed)
Those are really nice looking. 3D printing is getting better all the time. Keep sharing what you got going on..
Thanks Antlor, what else do you have in the works?
This is putting the walls up and some inside details will be adding

I am sorry if I made this confusing, that work is not mine. It is a friend of mine who is doing the 3D work and printing.
Where the silos printed also
yes, all inside details and out
Antlor: Great thread. My son has helped me design some highway overpass molded concrete walls and pillars, he recently purchased his 3rd printer and is getting great results. photos below.
SIDEHACK: Very nice work on the building and especially the detail parts.... I am always looking for unique tanks, cyclones, and detail parts for buildings. Would you be willing to either print me some of tank parts (especially ones with cone shaped bottoms), or share the 3D files so I could have my son print me up some ? I am not asking for free stuff, I'd be willing to pay a fair fee for either the parts, or the master file that we could slice and print. Chris A ( my email is in my profile if you want to reply off line)


Chris
Nice to see your son is into 3D printing, my son got me interested, there is so much that can be done on the layout if you just think about it.
I don't want to sell anything I create but I will email you.
This is a brewery so those are the large tanks I think you are talking about, I first create a computer model of what I want and then print the parts. Each tank is made up of 3 pieces.
Here are cut away views to see the inside of the computer model. This of course is not a real brew process but only what I wanted to have.


That brewery project is really cool. It's great being able to do the "cut away views in a isometric view like that.
I have so many layout building projects in front of me I haven't found the time to really sit down and master drawing in CAD. Just got my 240 foot main line finally connected so that I can run trains continuously, been working for more years than I care to admit to get it this far. Installing more B&O style CPL signals that I purchased is coming this winter.
Look forward to hearing from you when you get a minute to email... Now that I have had 2 snow days, I'll be pretty busy at work for the next week and a half, so no big rush.
Chris
looks really great how much do the 3d printer cost that you all have used?
Alan
this is the printer I built, you can get a kit for $799 or get one assembled at the factory for $250 more.
It is a Prusa MK3S from the Czech Republic
I've run for 460 Hours with no problems just normal maintenance.
The printer and a sample of wall etc. prints for the structure I'm building.
Ray


I have a TEVO bought from amazon it has a 12"w X12"d X 14"h print area and I have printed parts that took over 24hours and have had no trouble with it I believe I paid $350.00. I have been printing constantly with it for about 7 months and it has been very reliable. I have one at work they paid over $4000.00 for it and it is difficult to set up and run but it does print some very high tech material at some very high temps. I also have a very cheap printer paid $130.00 off the bay and after printing some modifications found online it prints surprising well but has a very small build area. Prices are all over the place just depends what you are looking for and what you will settle for, The difficult part is finding or drawing up the parts you want to make. Once you have a printer the only thing limiting what you can make is your imagination.
OLD TOYMAKER
That's a great deal for a printer with a large print area, there have been some good deals out there on Ebay and Amazon.
3D printing has really come of age now and I agree "Once you have a printer the only thing limiting what you can make is your imagination." I've seen people who have printers and do run out of ideas but in this hobby there are always new ideas or a part needed.
I am proving out my idea of designing and building a brewery structure with as much 3D parts as possible. I've been lucky enough to have a long background in computer design so that is what I do first in the computer then send it to the printer.
I wanted a roof top sign and had a label that I went by to design the model, then printed and painted it. Even the sign supports were printed. So yes having some computer modelling skills is an important part of the process.
Ray


With 3d printing you can go from design to finished part in a very short time, with small parts anyway. I have been reverse engineering and machining aircraft parts at work with several cad programs and cnc machines for the last 30+ yrs so designing the parts is not too bad but I have not been able to put in the textures ( like brick and stone) for buildings I am unable to add that feature to my building designs in any of my programs.
Ray
what are you using for a program to design your buildings. I would love to print out that brewery.
My latest project was some catenary poles and wire. The poles took about 45 mins apiece and the wires took between 7 and 9 mins each because I had different lengths. From design to finish instaled on the layout 1 weekend (27 poles and 30 wire sets)


I use Rhino 6. There is an app that details surface textures that can be exported as a .stl file to print on a 3D laser printer (FormLabs 2).
However, I'd use a Laser cutter (Glowforge) for flat shapes like walls and trusses with a 3D engrave function to detail textures.
Catenary: You may find that over time that long thin parts don't retain their shape they bend.
For my catenary I printed the top piece and base with connectors then used a metal rod to connect them.
Atheists would not be in a foxhole in the first place.
Nice job on the catenary poles and wires, what width and thickness did you use for the wires?
Your experience is very similar to mine, did forging and die design also CNC programming, started with computers in 1987 with a Computervision main frame. Retired after 39 years. Now I have Autodesk Power Shape software on a Dell 5820.
I have designed the brick as well as cement and stone walls. I could send you some sample stl files if that would help. Did a lot of testing to see how different textures would come out and was for the most part pleased. Here is a sample.
Also made jigs as went along to keep everything square


The horizontal portion is .04 X.08w except for the ends which are .04" square. I made them so that I could mount the poles in place using a printed jig and just slip the wires into the poles. the vertical sections are .07" X.04"thick printed at 60mms .2mm layer height with a .6mm nozzle.
I started out with autocad almost 30 yrs ago then started using mastercam and for the last 20yrs have been programming with featurecam now they just gave us solid works because the engineers decided we should get into 3d printing but there doing a lot with metal printed parts. I have been trying to figure out solidworks and there texture feature and I can get a solidworks key with a military discount.
A sample part would be great maybe I can figure it out.
If you like I could send you the stl files for the poles and wires
Gary
Gary
on their way
I'm not (yet) into 3-D printing - so I have a couple of elementary questions. First, I gather that most 3-D printers are driven by .stl files (or the computer hooked up to them)? I use Sketchup a lot for my woodworking projects and I think it has the ability to create those output files.
At the top of this thread, there are pictures of 3-D printed snowplows that have 3-D surfaces on all/both sides (as opposed to some of the building walls that presumably have a 'flat' inside surface. The picture shows the plows sitting on a 'forest' of sprues - I assume to support the 'back' surface as it hardens. How do you know how 'dense' that forest should be -- is it just experience or do you run the .stl file through some sort of processor that knows (based on the plastic?) what sort of support structure is needed??
You folks are really creating some great, detailed models
You have to run your .stl file through what is called a slicer program. Cura is one program and is free there are other programs also that can be used, In the program there are settings that you can change to add more or less support or none at all to the model. you can rotate the part on your build table so that you can use very little support but some models will need a lot. The plastic will bridge some distance without support. I have successfully bridged across openings as wide as 3/4 of an inch without support with very little noticeable sag in the part. Its all in the settings ie speed, heat, flow. Its really not difficult to figure out once you have done a few parts and there are lots of good information at U of YT ( University of Youtube).
Sometimes rather than use supports you can divide and conquer. Wanted a barrel load for truck but instead of doing it all at once laying down I split it in two then was able to stand both sides up and added holes in them for pins to get a perfect alignment when gluing.


Thanks for the info and the additional pictures. What makes your modeling work is the level of detail in the 3-D printing. What's the smallest object the printer is capable of printing (not free standing, but as a 'surface feature' -- 0.5 mm? larger/smaller?
.stl or .obj files. The software exports to those formats. All 3D printers print 2D slices over many many micron high vertical layers.
I dont like the horizontal lines in the 3D Fused Deposition Modeling (FDM) printers the Stereolithography (SLA) laser printers print objects that are isotropic no lines.
Rich
The nozzle on mine is .4MM (.0157 in) so that would be the thinnest line you could make. All you can do is see how small your machine will actually print something. Tried making beer bottles AHAHAHa no way maybe G scale.
Alan
I stayed away from 3D printing for my layout for just that reason didn't like the noticeable horizontal lines it produced. But this machine is capable of a layer height of .05MM which is .002 inch so the line problem is going away. But it takes a lot more time in the machine to produce the highest quality. Even lines can be smoothed out when painted and or if rubbed with the right solutions.
the Sherman was one of the first train projects I did on a $140.00 anet the first printer that I bought with the standard .4mm nozzle and I believe the layer height was .15mm. they were printed in three separate parts, the body, the tracks ,and the turret then painted. I wanted a flatcar load so I did tree tanks. My camera dose not take very good close ups sorry.


Nice job and they look great on the flatcars
Looking for files for 3D printing O Gauge accessories & buildings. I found a few on-line (eBay) but most are HO? Any recommendations where to find files for 3D printing? My brother does my printing for me. Since I'm not a printer myself, links to files would be appreciated!
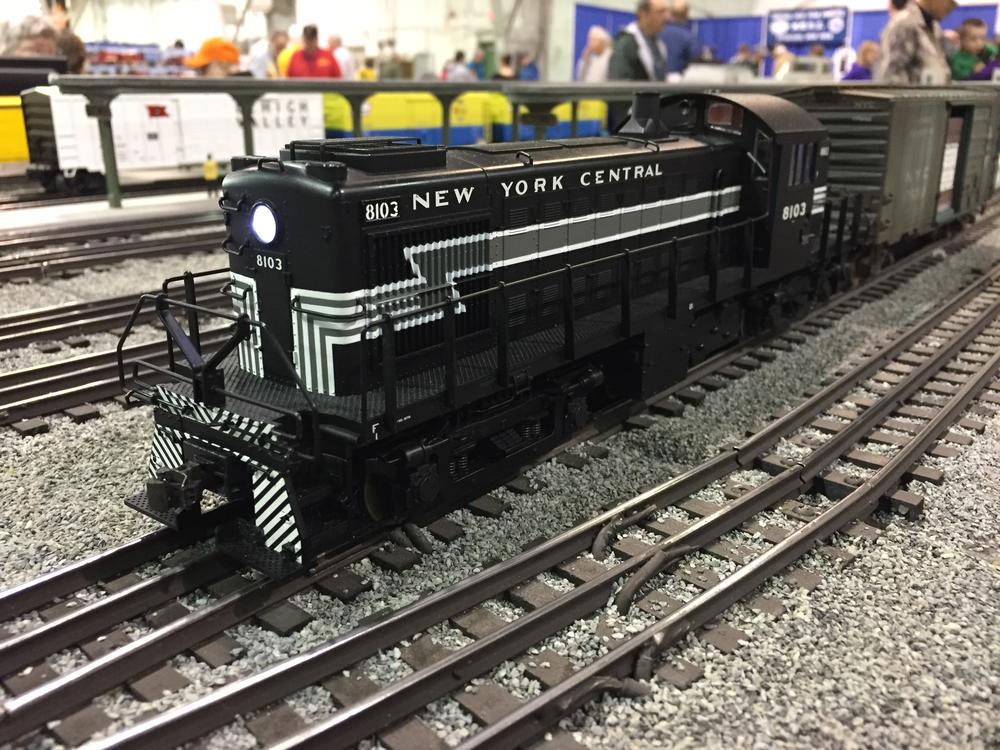
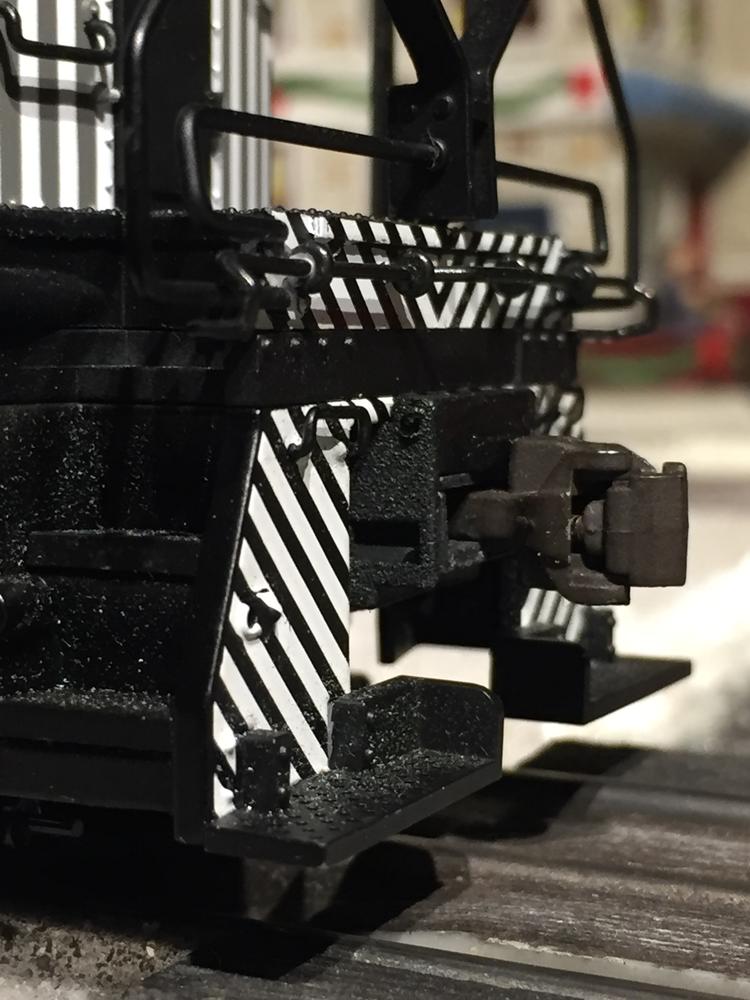
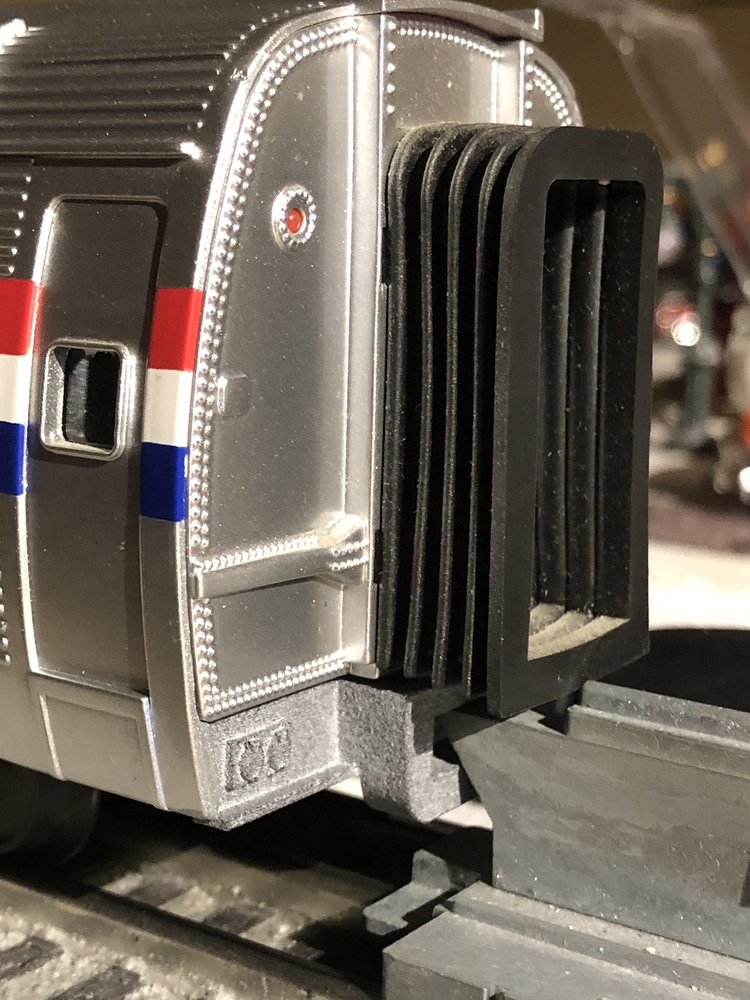
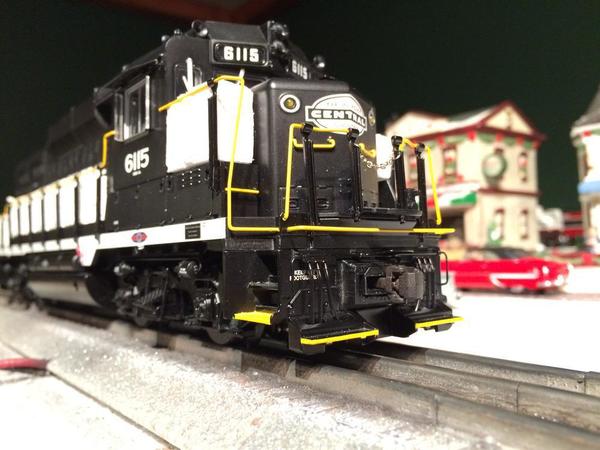
Here's some of the parts I've designed, mostly for mounting Kadee couplers to our locomotives.


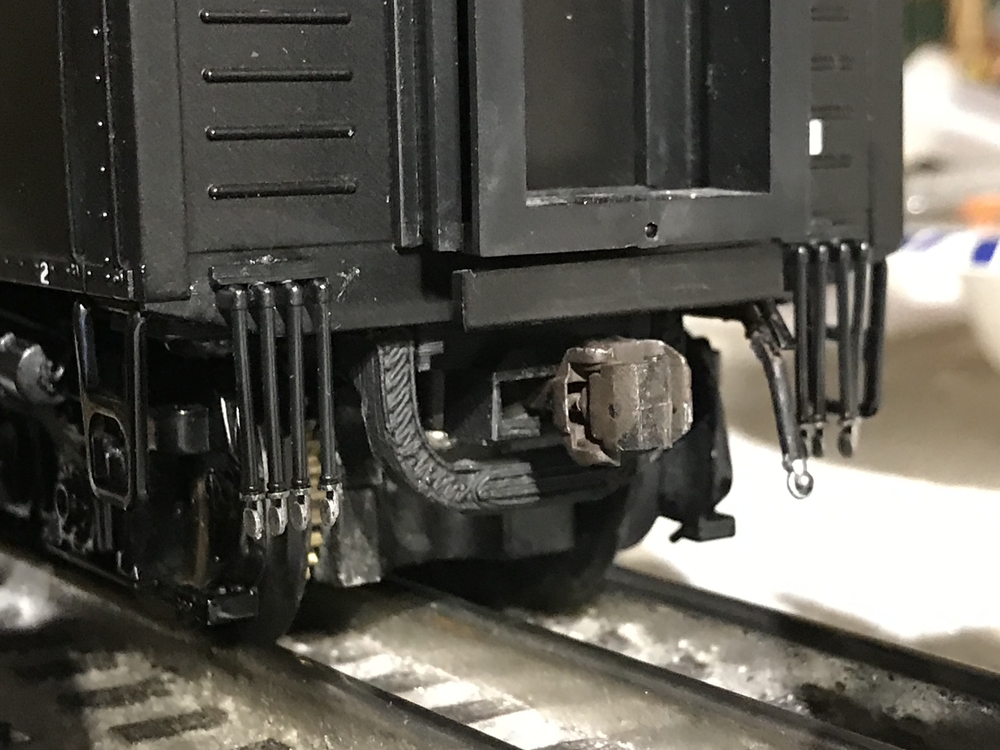
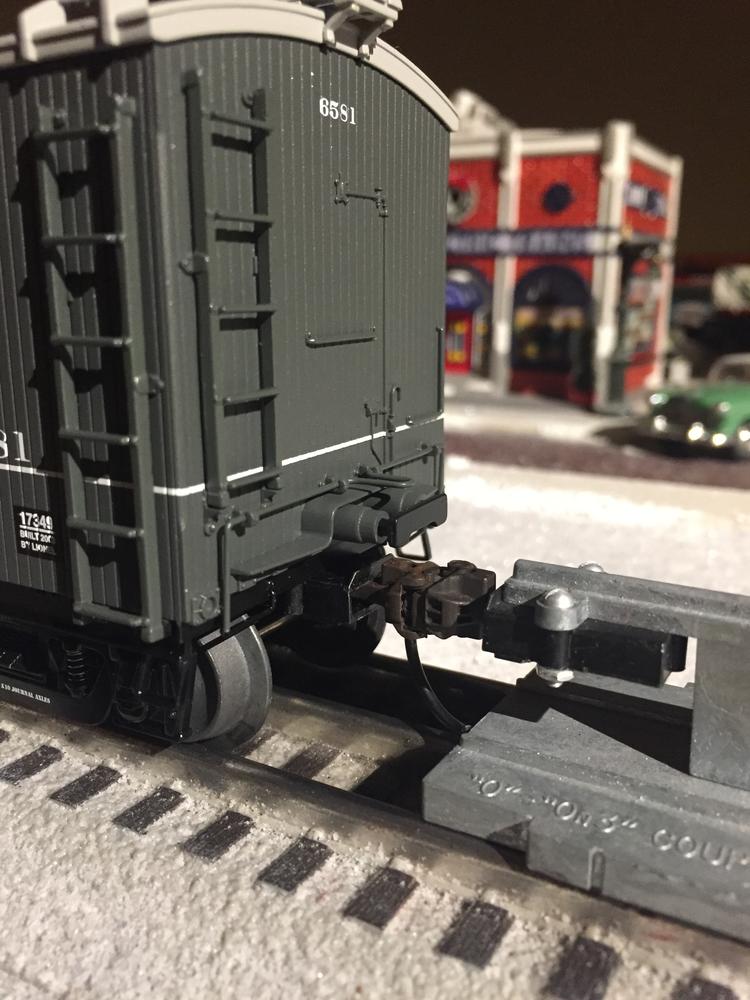

Thanks!
- Mario
@epoch13 posted:Looking for files for 3D printing O Gauge accessories & buildings. I found a few on-line (eBay) but most are HO? Any recommendations where to find files for 3D printing? My brother does my printing for me. Since I'm not a printer myself, links to files would be appreciated!
Clink this forum link: OGR forum/3d-printing If you have something in mind special or not in the repository, create a thread with the request for help. Someone here will be able to guide you.
Access to this requires an OGR Forum Supporting Membership


