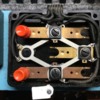
When I built my last layout, I cut the 6-wire controller-to-terminal-strip harness so I could run the wires below the last layout. As I was tearing down that last layout, I forgot to label the each of the 6 wires. I took a guess at how to re-connect them but struck out and wasn't about to go through all 720 wire-to-to combinations.

My instructions don't have a wiring diagram nor does my copy Toy Train Repair Made Easy. I couldn't find much online.

If anyone has a guide for "this wire from the controller goes to this wire on the terminal strip" I'd greatly appreciate it.  Otherwise, it's off to the LHS.

Original Post

Replies sorted oldest to newest

At the risk of revealing my inability to read a wiring schematic, here's how I wired the controller. Results aren't good.

  • Left goes right, right goes left but no cab light on either
  • Up goes right, down goes left WITH cab light on

I'm confident that I have the wires 1 thru 6 properly identified coming off the terminal.

I tried a couple other combinations but with 720 combinations total, I figure I ought to ask for help first.  Can you help @ADCX Rob?

cranecontrollerwiring

Attachments

Images (1)
  • cranecontrollerwiring

the easiest way to rewire one is if you know somebody that has one just compare wire for wire while your rewiring yours compared the the one that works  a picture is worth a 1000 words and would make it much easier for you if you not good at wiring diagrams, and the Lionel ones aren't exactly the easiest to use!

ok

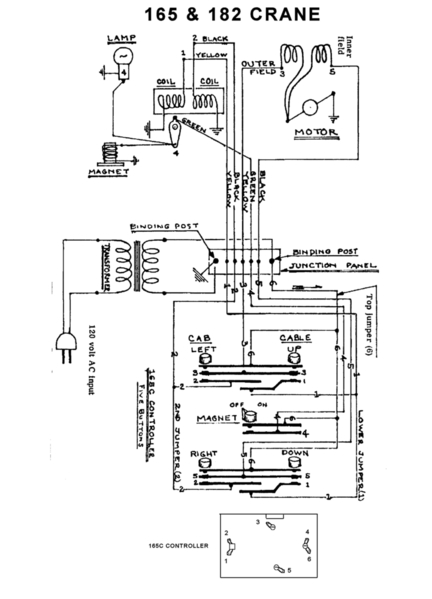
To turn on the cab light and magnet 4 has to be connect to power, which is 6.  This is done on the switch in the middle of the controller. In your photo 4 is probably on the opposite side from where it should be as it going to the upper and lowers switches, which control motor direction and the clutches. 

In the photo there is no way for me to see how the buss bars are connected to the switch blades, so it is hard to tell how it should be wired from the picture.  I would suggest you look at how it operates and figure out where the errors are. 

To make something happen the motor has to run and one clutch has to be energized. The motor is a double wound field arrangement so to make the motor run one way power one field, to go the other way power the other field lead.  The motor field leads are 3 and 5.  At the same time either hoist or rotate has to be selected by energizing one clutch coil or the other. The clutch coils are 1 and 2.

Power to everything is 6.  The magnet and light are 4.  So exclusive of the the 4, the push buttons should make up four combinations, 1-3, 2-3, 1-5 or 2-5, each connected to 6.

Just a guess is that 1 and 4 are reversed from where they should be. Just be sure that 3 and 5 do not get energized at the same time.  That could burn out the motor. 

I think it would be easier to help you if you would show all the wires connected to the accessory and to the controller then we can set you straight just from one picture you might not be understanding what were telling you with all the wires connected and you send us pictures from you hook up we'll be able to help you ok!

show us picture exactly where the other 6 wires are  connected  to the crane ok with wire numbers that  correspond to your numbers you have hooked up to your controller. ok!

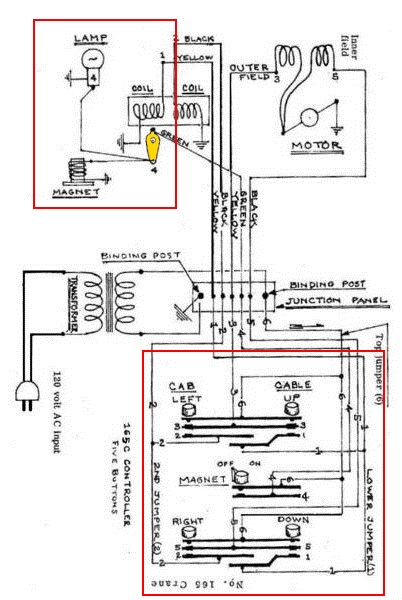
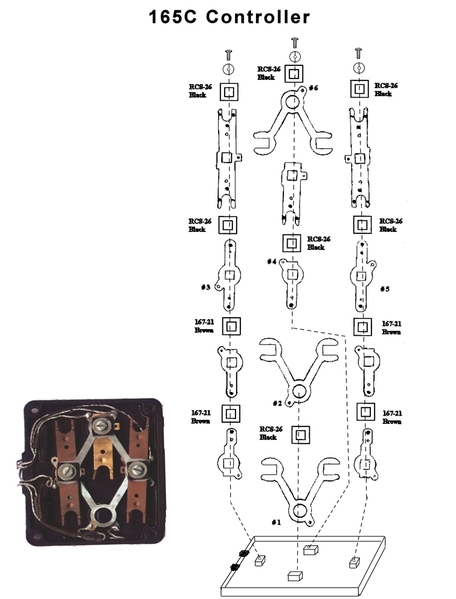
I rotated the schematic supplied by @ADCX Rob to make is easier to picture the contact layers in the controller. As I read the schematic, I agree with @David Johnston that the lamp only comes on when the magnet is turned on by the know in the middle of the controller - which seems to be missing in your picture of the controller - though you can see on of the contact bars for the magnet switch knob.

Anyways, I would assume that the contact layers shown in the schematic physically match how the controller is built. Thus, under the Cab Left button, there should be three contact bars ==> Top Contact bar to wire 6, Middle Contact bar to wire 3, and Lower Contact bar to wire 2. You proceed to each button, then the knob, making sure the proper wires get to the proper contact bars. This is one of those cases that if I could sit with you, use a Volt-Ohm-Meter to and soldering iron, we could figure this out in under an hour. Hope this is of some help.

165 Diagram.bmp.rotate

Attachments

Images (1)
  • 165 Diagram.bmp.rotate

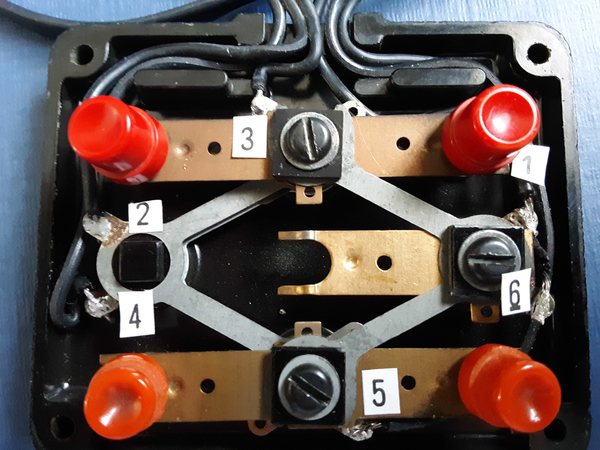
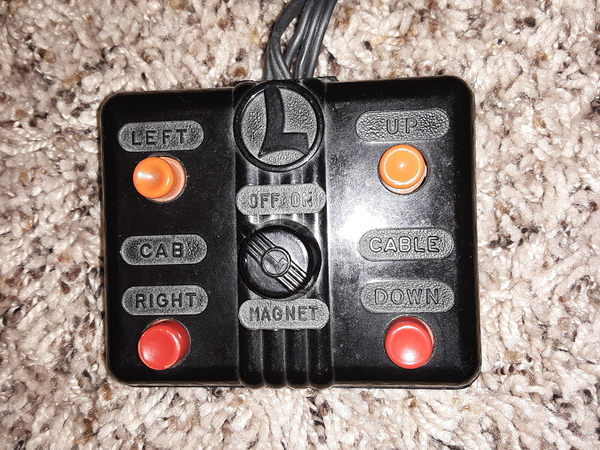
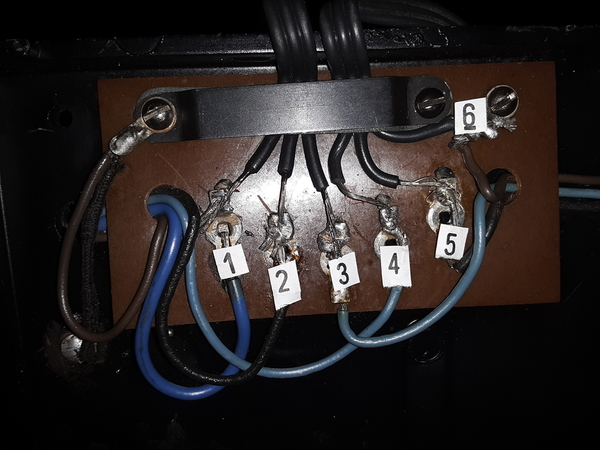
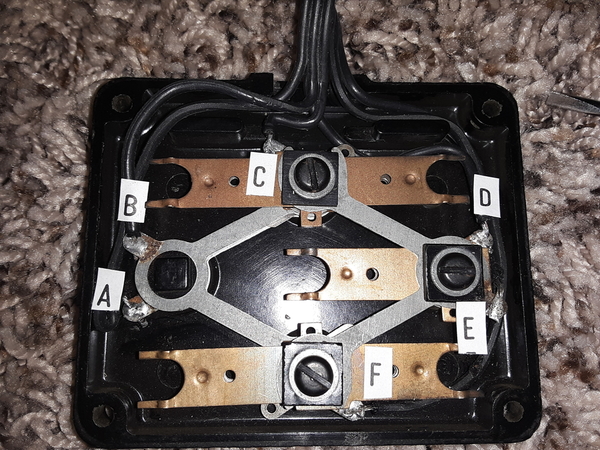
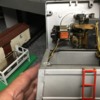
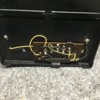
20190113_201543Thanks for all the feedback. I think these 3 pics may help. The wires going to the accessory (crane) have not been touched and original. I split them so I could run them below my last layout. I used a simple pin connector to reconnect them. When tearing down, I separated with keeping a map from the controller to the terminal.

In one pic, I've marked each wire and terminus according to the schematic. I'm 95% confident these are right. 6 for sure goes to the binding post on the crane. But, I don't know where o connect that wire on the controller.

The 6 wires came into the controller and are soldered at points marked A-F.

Trying to figure out a mapping key. Does 1 go to A, B, ..., F? Same for each of the other 5.20190113_19564320190113_19571620190113_200128

Attachments

Images (4)
  • 20190113_195643
  • 20190113_195716
  • 20190113_200128
  • 20190113_201543
Last edited by raising4daughters

Wanted to say thanks for posting the diagram above. Got the crane working for the most part, though the up and down motions are struggling. Got me far enough to know it needs some TLC from my LHS.  I might be able to figure it out, but my time is better on getting the rest of the near-complete layout done. It's better off there and in the capable hands of a fellow forum member  

Raising4--  Can you verify that your wiring changes, taking the two three-wire cables entering the pix of the wiring of the push-button switch as being left to right connected from the numbered points 1 thru 6 on the crane's terminal board, are as follows, clockwise from A on that pix:  A, B, C, D, F, E.  That is, 1-4 in clockwise order, then 6, finally 5 (using the existing solder as a guide)?

I'm referring to your crane after you got it to work.  That information would be very useful to forum members who find themselves with the same problem.  BTW, good work!  --Frank

The biggest issue I've had with this accessory  are the clutches.  I've tweeked it as much as I can, replaced the solenoids, springs etc but it can still be a bit touchy. Two things  have observed.

1. Sometimes the clutches stick. So if you want to go left and nothing happens I hit right for a sec and then left and it works.  Same for up / down.

2. It seems to like higher voltages somewhere around 18v. If you have it connected to a variable voltage feed then you can find your "sweet spot".


@Alan Mancus posted:

I think it would be easier to help you if you would show all the wires connected to the accessory and to the controller then we can set you straight just from one picture you might not be understanding what were telling you with all the wires connected and you send us pictures from you hook up we'll be able to help you ok!

show us picture exactly where the other 6 wires are  connected  to the crane ok with wire numbers that  correspond to your numbers you have hooked up to your controller. ok!

Please someone post a photo of the Controller wired to the Crane Base, and separate the wires in the Controller, so they are clearly visible, and we can see which wire goes where.

Last edited by Bencar

Add Reply

Post

OGR Publishing, Inc., 1310 Eastside Centre Ct, Suite 6, Mountain Home, AR 72653
800-980-OGRR (6477)
www.ogaugerr.com

×
×
×
×
Link copied to your clipboard.
×
×